The House of Hope, named for its imprisoned master, is actually the primary residence of Raphael, the devil who has been trying to offer you deals since Act 1. After managing the ritual at the Devil’s Fee, you may end up here in search of the Orphic Hammer or your Soul-Bound Contract (depending on if you’ve made a deal with the devil). In either case, this guide will help you navigate the House of Hope, steal the precious items within, save Hope, and defeat Raphael. Is it getting hot in here?
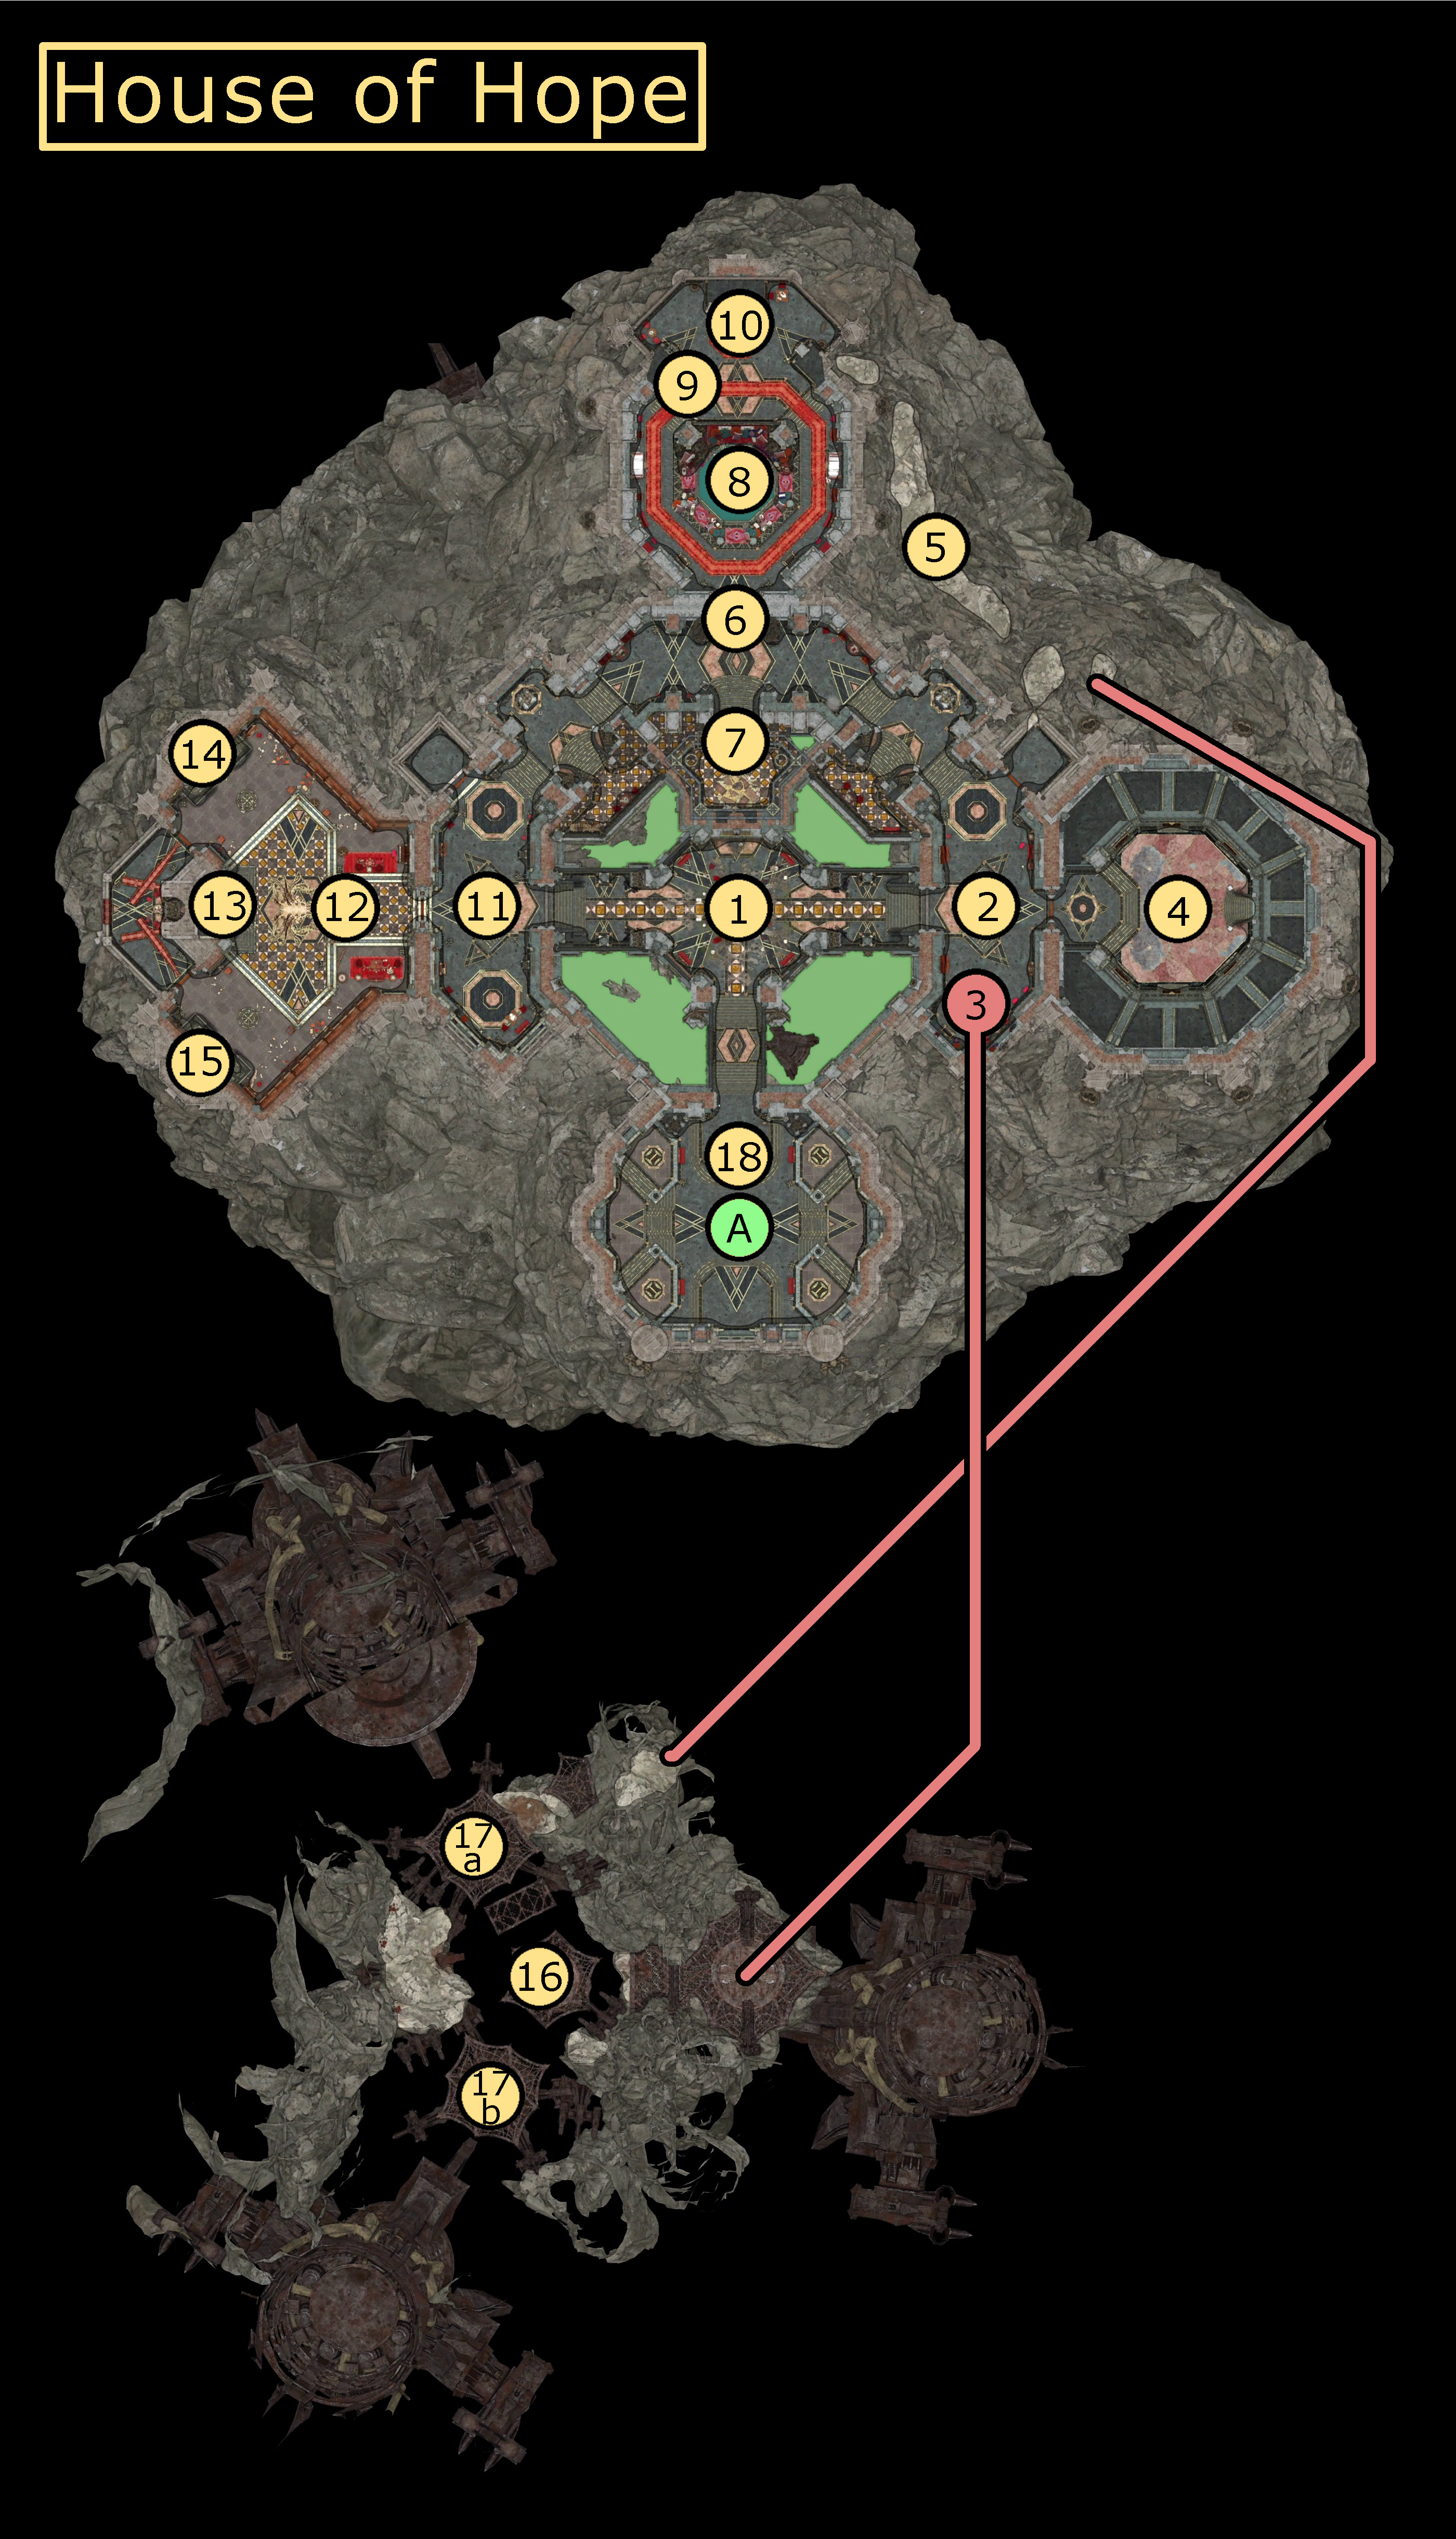
Map
Entering the House of Hope
In order to reach the House of Hope, you’ll need to head to the Devil’s Fee in the Lower City. You’ll need various ingredients, all of which you can find on a pouch on Helsik, the shopkeep. However you get it, you can then head inside Helsik’s room upstairs, where you’ll find a ritual circle, with smaller circles around its edge. Following the archaically worded directions in the Grimoire, you can open a portal. Simply place the following items in the following places:
- On the western circle, place the Skull.
- On the northeastern circle (closer to opposite the skull), place the Diamond.
- On the southeastern circle (next to the diamond), place the Incense.
- On the northwestern circle, place the Coin of Mammon.
- In the center of the ritual circle, place the Infernal Marble.
Once all of these have been placed, a portal to the House of Hope will open. Despite the warning, the portal out will not close itself until you have the Orphic Hammer (#13) in hand.
Points of Interest
NOTE: The first thing that you’ll do upon entering is speak to a projection of Hope. She will tell you that Raphael has her imprisoned in the basement, and that only the Orphic Hammer (#13) can free her. So long as you agree to help her, she will unlock the door next to her and give your party the Indebted Disguise, which will allow you to traverse the House of Hope undisturbed by the Debtors. It should be noted that there are ways to enter the House of Hope with 5 characters in your party, but that Hope will only be able to disguise 4 of them, so be wary.
Alternatively, if you are mean to her and dismiss her, then you will need to lockpick a DC-20  Sleight of Hand locked door next to her (though she will remain around to speak to). In this case, you will not have the Indebted Disguise, and so any Debtors that see you will sound the alarm, turning the denizens of the House hostile.
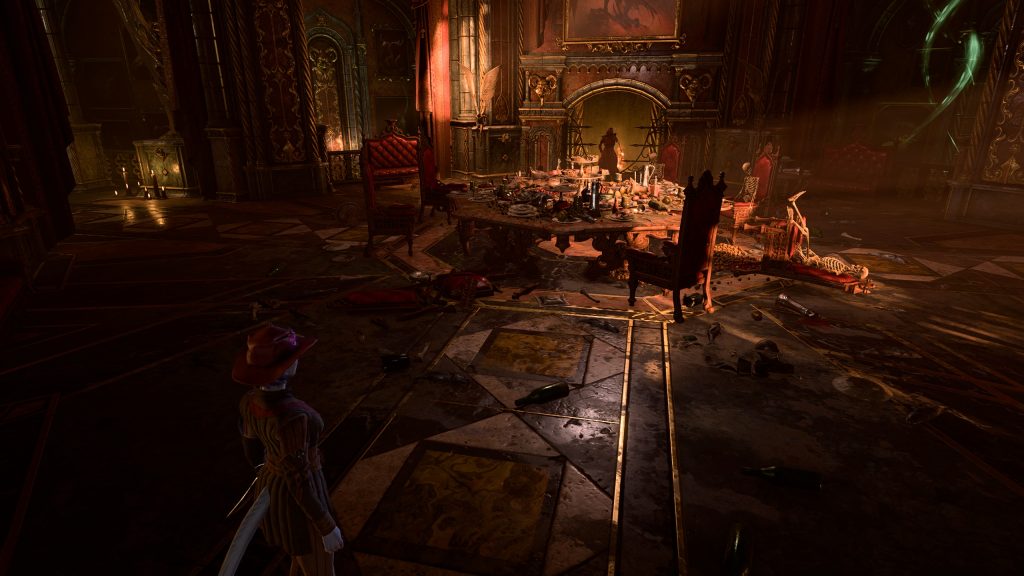
1 – Feast Hall
When you first enter the Feast Hall, you will be met with the Infernal Mason. Speaking to him can reveal that he is actually the architect of Moonrise Tower. He made a deal with Raphael to defeat Ketheric’s army, but the deal did not defeat Ketheric himself. However, you can tell him that you have killed Ketheric, finally, which brings him some peace.
If you return to the Feast Hall after the Debtors (#2, #6, #11) have been made hostile (either by spotting the party outside of an Indebted Disguise or by stealing the Orphic Hammer or any of the items in the Archive), then there will be 6 Eternal Debtors that will gather in the Feast Hall to stop you. They are pulled from elsewhere in the House, so which Debtors will be here (and what creatures they turn into) will vary depending on which you can see when combat begins. As usual, these Eternal Debtors, when killed, will explode into fire and then transform into a Vengeful version of either an Imp, a Merregon, or a Boar.
2 – Eternal Debtors
In the hallway surrounding the Feast Hall in a semicircle, you can find a number of Eternal Debtors wandering the halls. Should any of these Eternal Debtors see you while you aren’t wearing an Indebted Disguise (such as if you attack them), then they will sound the alarm, turning the House of Hope hostile.
There are usually about 6 Eternal Debtors on either side of the House of Hope. Killing them immediately causes them to burst into flames (damaging anyone nearby) and then become either a Vengeful Imp, Vengeful Merregon, or Vengeful Boar. As well, if the House of Hope is hostile to you, a Hell Sphere will spawn on this side of the hallway. Because it is deadlier than the Debtors or anything they turn into, it should be dealt with first.
3 – Hatch to Prison
There is a Hatch leading to the prison beneath the House of Hope, where Hope herself remains. In order to pry open the Hatch, you will need to succeed on a DC-10  Strength check. Upon doing so, you can enter the Prison and speak to Hope (#16). Without the Orphic Hammer (#13), though, you will be unable to free her, so it is best to heed your party’s warnings and make sure to only enter when you have the Orphic Hammer (#13).
4 – Outer Portals
This room is filled with Portals to other places in Faerûn. While each of these portals (and their keeper Nubaldin) each have an interesting line of dialogue upon interacting with them, there is actually not much to do in this room. Tragically, you cannot go see Menzoberranzan.
5 – Stoney Pathway
Along the east half of the hallway, you can go out a door to your right to go onto a balcony. From here, you can actually jump along the cliff near the balcony in order to easily access the Boudoir (#6), coming into the Boudoir right next to Haarlep (#10). This, effectively, lets you bypass the need to request an invitation from the Archivist (#12) to enter the Boudoir.
There is also a secondary entrance to Hope (#16) along this Stoney Pathway, giving you a better angle to approach the fight at, though you will still only want to go through it once you’ve acquired the Orphic Hammer (#13).
6 – Boudoir Entrance
The Boudoir Entrance is sealed shut by a “Mystic Force Curtain”. In order to get past this Mystic Force Curtain, you will either need to obtain a Boudoir Invitation from the Archivist (#12), or cause the House of Hope to go hostile (which will cause Haarlep (#10) to exit the Boudoir to fight you, opening the Curtain). You can also bypass the Boudoir Entrance entirely via the Stoney Pathway (#5), routing directly to Haarlep, still in bed (#10).
7 – Gem-Protected Door
Across from the Mystic Force Curtain blocking the Boudoir Entrance (#6), you can find an arcane Gem. Passing a passive  Perception check, you can interact with it. From here, you will need to succeed on a DC-10
  Wisdom check, followed by a DC-20
  Arcana check. Failing the latter will fling anyone nearby back, but deal no damage, and you can reattempt it.
Once you succeed, a secret room will open, containing 666 gold, the Heldusk Helmet, the Staff of Spellpower, and Mol’s Contract (so long as Mol survived Acts 1 and 2). With the Contract, you can give it to Mol in the City Sewers in order to free her of her bond. She will also agree to fight with you if you do this, so long as you either don’t kill Raphael (#18) at the end of the House of Hope or don’t tell her that you have.
8 – Boudoir Bath
Once you’ve found your way into the Boudoir, either through the Entrance (#6) or the Stoney Pathway (#5), you will have access to the Boudoir Bath. The Bath has 2 “Restorarion Faucets”, and interacting with either of these will fully heal the party and restore their spell slots, as though they had taken a Long Rest. Because you cannot Long Rest while within the House of Hope, this is your best method of healing within it, especially before you fight Raphael (#18).
9 – Secret, Trapped Safe
The portrait of Raphael titled “Raphael Bears Flame” to the west of the Boudoir is actually a hidden safe. Unless you have slept with Haarlep (#10) and acquired his key, the portrait is trapped, which you can notice with a passive Perception check and disarm with a DC-20 Sleight of Hand check. The trap will go off if you press the hidden button beneath the portrait before it is disabled. If it goes off, you will be hit by an explosion for a small amount of damage, summon 6 hostile Vengeful Imps, and Haarlep will become hostile if he is still alive. If you have slept with Haarlep, then the trap will already be disabled.
A passive Perception check or sleeping with Haarlep (#10) will reveal a button beneath the portrait. If you haven’t disarmed the trap or slept with Haarlep, then the trap will activate, but the portrait will slide up, revealing a hidden safe. This DC-25 Sleight of Hand-locked safe can be unlocked with the key on Haarlep (#10), which you can pickpocket or receive from him for free after you sleep with him. Inside, there are 5 Soul Coins and a note revealing the password to unlock the Orphic Hammer and Soul-Sworn Contract (#13).
10 – Haarlep
So long as the House of Hope isn’t hostile, Haarlep will be waiting for you in the Boudoir, lying on a bed. Upon noticing you, he will engage you. However, he is not hostile to you, and quickly offers to sleep with you. The only way to avoid combat with Haarlep is to agree, though he will take whatever form you prefer.
Should you accept and sleep with the devil, then you need to be careful: you will be offered DC-18 Wisdom and  Performance checks that have no effect, and then Haarlep will ask you a series of questions. In order to complete the encounter without turning Haarlep hostile, you will need to agree to let him take your body, but not your soul. If he takes your soul, you will receive an instant game over, and if you refuse to let him take your body, then he will become hostile. If he takes your body, however, the only impact will be that he will gain the ability to transform into your form, but there is no mechanical drawbacks. As well, should you agree to this, then he will happily give you the key to the Secret, Trapped Safe (#9), giving you access to the Orphic Hammer (#13).
If you end up fighting Haarlep (most likely here, but possibly at the Boudoir Entrance (#6)), then he can be a bit annoying. Whenever he takes any damage, he will use a reaction to use “Ethereal Escape”, vanishing to a different plane where he can’t be damaged (though he will return on his next turn). This means you are limited on the damage you can deal to him on any given turn, unless you leave his melee range and make him spend his reaction on an Attack of Opportunity first, which will let you pummel him without him using his Ethereal Escape.
11 – Eternal Debtors
In the hallway surrounding the Feast Hall in a semicircle, you can find a number of Eternal Debtors wandering the halls. Should any of these Eternal Debtors see you while you aren’t wearing an Indebted Disguise (such as if you attack them), then they will sound the alarm, turning the House of Hope hostile.
There are usually about 6 Eternal Debtors on either side of the House of Hope, though they do wander some. Killing them immediately causes them to burst into flames (damaging anyone nearby) and then become either a Vengeful Imp, Vengeful Merregon, or Vengeful Boar. As well, if the House of Hope is hostile to you, a Hell Sphere will spawn on this side of the hallway. Because it is deadlier than the Debtors or anything they turn into, it should be dealt with first.
The door to this side of the hallway from the Feast Hall (#1) is normally locked with a DC-25 Sleight of Hand lock. However, from the hallway, there is a lever to unlock the door.
Also in this hallway, you can find another of Hope’s Projections, leading into the Archives (#12). If you talk to Hope’s projection and pass a DC-15  Intelligence,
  Charisma, or Wisdomcheck, and then a DC-18
  Persuasion check, she will tell you about the Archivist’s greatest fear, which you can use against him later (#12).
12 – The Archivist
The Archivist is the master of the House of Hope’s Archives, where the Orphic Hammer (#13) (or your Soul-Bound Contract), Gauntlets of Hill Giant Strength (#14), and Amulet of Greater Health (#15) are. As such, he will follow you throughout the room, to try and keep you from stealing anything.
Speaking the Archivist without being hostile to the House of Hope, you will be able to convince him to give you the chance to convince Haarlep (#10) to let you use the Orphic Hammer. If you were able to convince Hope to tell you about his greatest fear in the hallway outside the Archives (#11), or if you use  Detect Thoughts and pass a DC-10 Intelligence check, then you can leverage this information against him. From there, you can attempt a DC-15
  Deception check. Otherwise, you will need to pass a DC-25 Deception,
  Intimidation, or Persuasion check. If you succeed at any of these, then the Archivist will give you a Boudoir Invitation, letting you pass through the Boudoir Entrance (#6) curtain, where you can engage Haarlep (#10) in order to get access to the password in the Secret, Trapped Safe (#9).
13 – Orphic Hammer / Soul-Sworn Contract
Encased in a magical barrier is either the Orphic Hammer, or your Soul-Sworn Contract, depending on if you took Raphael’s deal for the Hammer at Sharess’ Caress in Wyrm’s Crossing. It is inaccessible unless you have the password, which you can only get from a note in the Secret, Trapped Safe (#9) in the Boudoir, which you can access with the key that Haarlep (#10) has.
Once you’ve disabled the barrier, then you will get a warning: once you steal the Hammer or Contract, then the House of Hope will become hostile, with all of the Eternal Debtors (#1, #2, #11) ready to fight you. The Debtors and Archivist will not be hostile, however. With the Hammer, you can free Hope (#16) from her Binding Crystals (#17), making it worth it to now enter the Prison (#3).
14 – Gauntlets of Hill Giant Strength
The Gauntlets of Hill Giant Strength rest on a pressure plate, which you can notice with a passive Perception check. If you notice the pressure pad, you can disable it with a DC-15 Sleight of Hand check, letting you steal the Gauntlets of Hill Giant Strength without causing the House of Hope to become hostile. However, after stealing them, if the Archivist is still alive, he will know that they were stolen, and will accuse you of it if he can find you, which could still turn the house hostile if you don’t talk your way out.
The Gauntlets themselves instantly set the Strength score of whoever wears them to 23, making them one of the most powerful items in the game.
The Gauntlets are what Helsik in the Devil’s Fee in the Lower City will ask you to steal, if she agreed to help you get into the House of Hope. When you return, she will demand them, but you can either pass a DC-15 Deception check, or DC-10 Intimidation check to get her to back off and keep the Gauntlets for yourself.
15 – Amulet of Greater Health
The Amulet of Greater Health rests on a pressure plate, which you can notice with a passive Perception check. If you notice the pressure pad, you can disable it with a DC-15 Sleight of Hand check, letting you steal the Amulet without causing the House of Hope to become hostile. However, after stealing them, if the Archivist is still alive, he will know that they were stolen, and will accuse you of it if he can find you, which could still turn the house hostile if you don’t talk your way out.
The Amulet of Greater Health instantly sets the  Constitution score of whoever wears them to 23, making it one of the best amulets in the game.
16 – Hope
It is best not to approach Hope until you have acquired the Orphic Hammer (#13). If you enter the House of Hope with the Hammer (having accepted Raphael’s deal at Sharess’ Caress in Wyrm’s Crossing), then you can free her immediately, but doing so will make the House of Hope hostile, so it is still best to wait to do so until you have the Soul-Sworn Contract (#13) that is in its place.
Hope will be happy to see you if you come to rescue her, but you’ll need to get through some foes first. Notably, there are 2 Spectators and 5 Vengeful Imps. It should be noted that pushing the enemies off the platforms is not ideal, as they will simply respawn where you pushed them off.
In addition, in order to rescue her, you will need to destroy the 2 Binding Crystals (#17) by attacking them using the Orphic Hammer (#13).
If you rescue Hope, she will be happy to assist you in the final battle of the game.
17 – Binding Crystals
These Binding Crystals surround Hope (#16), binding her. In order to free her, you will need to destroy them, and they can only be destroyed by attacking them with the Orphic Hammer (#13) equipped. Once Hope has been freed, she will join you as a temporary party member until you leave the House of Hope, and her powerful clerical magic is extremely useful when fighting Raphael (#18).
18 – Raphael
Raphael will appear whenever you attempt to leave the House of Hope after the Debtors become hostile, having been alerted to your presence. He will arrive whenever you interact with the Portal at the end. Also worth noting is that Hope will slam the door leading to Raphael/the Portal if you haven’t saved her (#16), requiring a DC-20 Sleight of Hand check to open. Given how helpful she is in the Raphael fight, that’s probably a good thing to do anyway.
For Raphael himself, he will appear with Yurgir if you killed Yurgir in the Gauntlet of Shar, then he will also be present, ready to fight with Raphael unless you persuade him otherwise with a DC-30 Persuasion check, in which case he will join your side (and, if he survives the ensuing battle, will also fight with you in the final battle).
In any case, after dialogue, Raphael will attack. He will have 666 health and some incredibly powerful AoE fire spells. In addition, he will be joined by Korrilla (Hope’s sister), 6 Vengeful Cambions, and Yurgir if you didn’t convince him. There are also 4 Soul Pillars with 100 health each that enable some of Raphael’s most deadly spells and improving the damage of his attacks with Fire damage. Among these, it is important to note that dealing non-lethal damage to Korrilla will result in unique dialogue with Hope after the battle.
For the fight, it is usually best to take out the Soul Pillars and Cambions before dealing with Raphael, and to spread out to avoid the AoE attacks. Once the Soul Pillars are destroyed, you can then target a weakened Raphael. Once you’ve destroyed all of the pillars, however, Raphael will transform into his full Ascended form, giving him access to his most powerful attack, a gigantic AoE that can deal massive damage.
If the party rescued Hope (#16), then making extensive use of her special abilities, such as Divine Intervention to damage Raphael, Revoke Guest Status to deal with the Cambions, and her healing spells to keep you and your party alive.
After defeating Raphael and watching the cutscenes after, you can grab the Helldusk Armor off of his body. Once you leave out the portal, you will not be able to return, so make sure you’ve grabbed all the valuables you want from the House of Hope first.
Exits
The portal to the Lower City can be accessed at any time while the House of Hope is not hostile to you, allowing you to go back and forth at your leisure. However, once the Debtors in the House are hostile to you, then attempting to use the portal will instead summon Raphael (#18), inevitably leading to a fight with him. After defeating Raphael, then the next time you use the portal, you will be unable to return to the House of Hope.