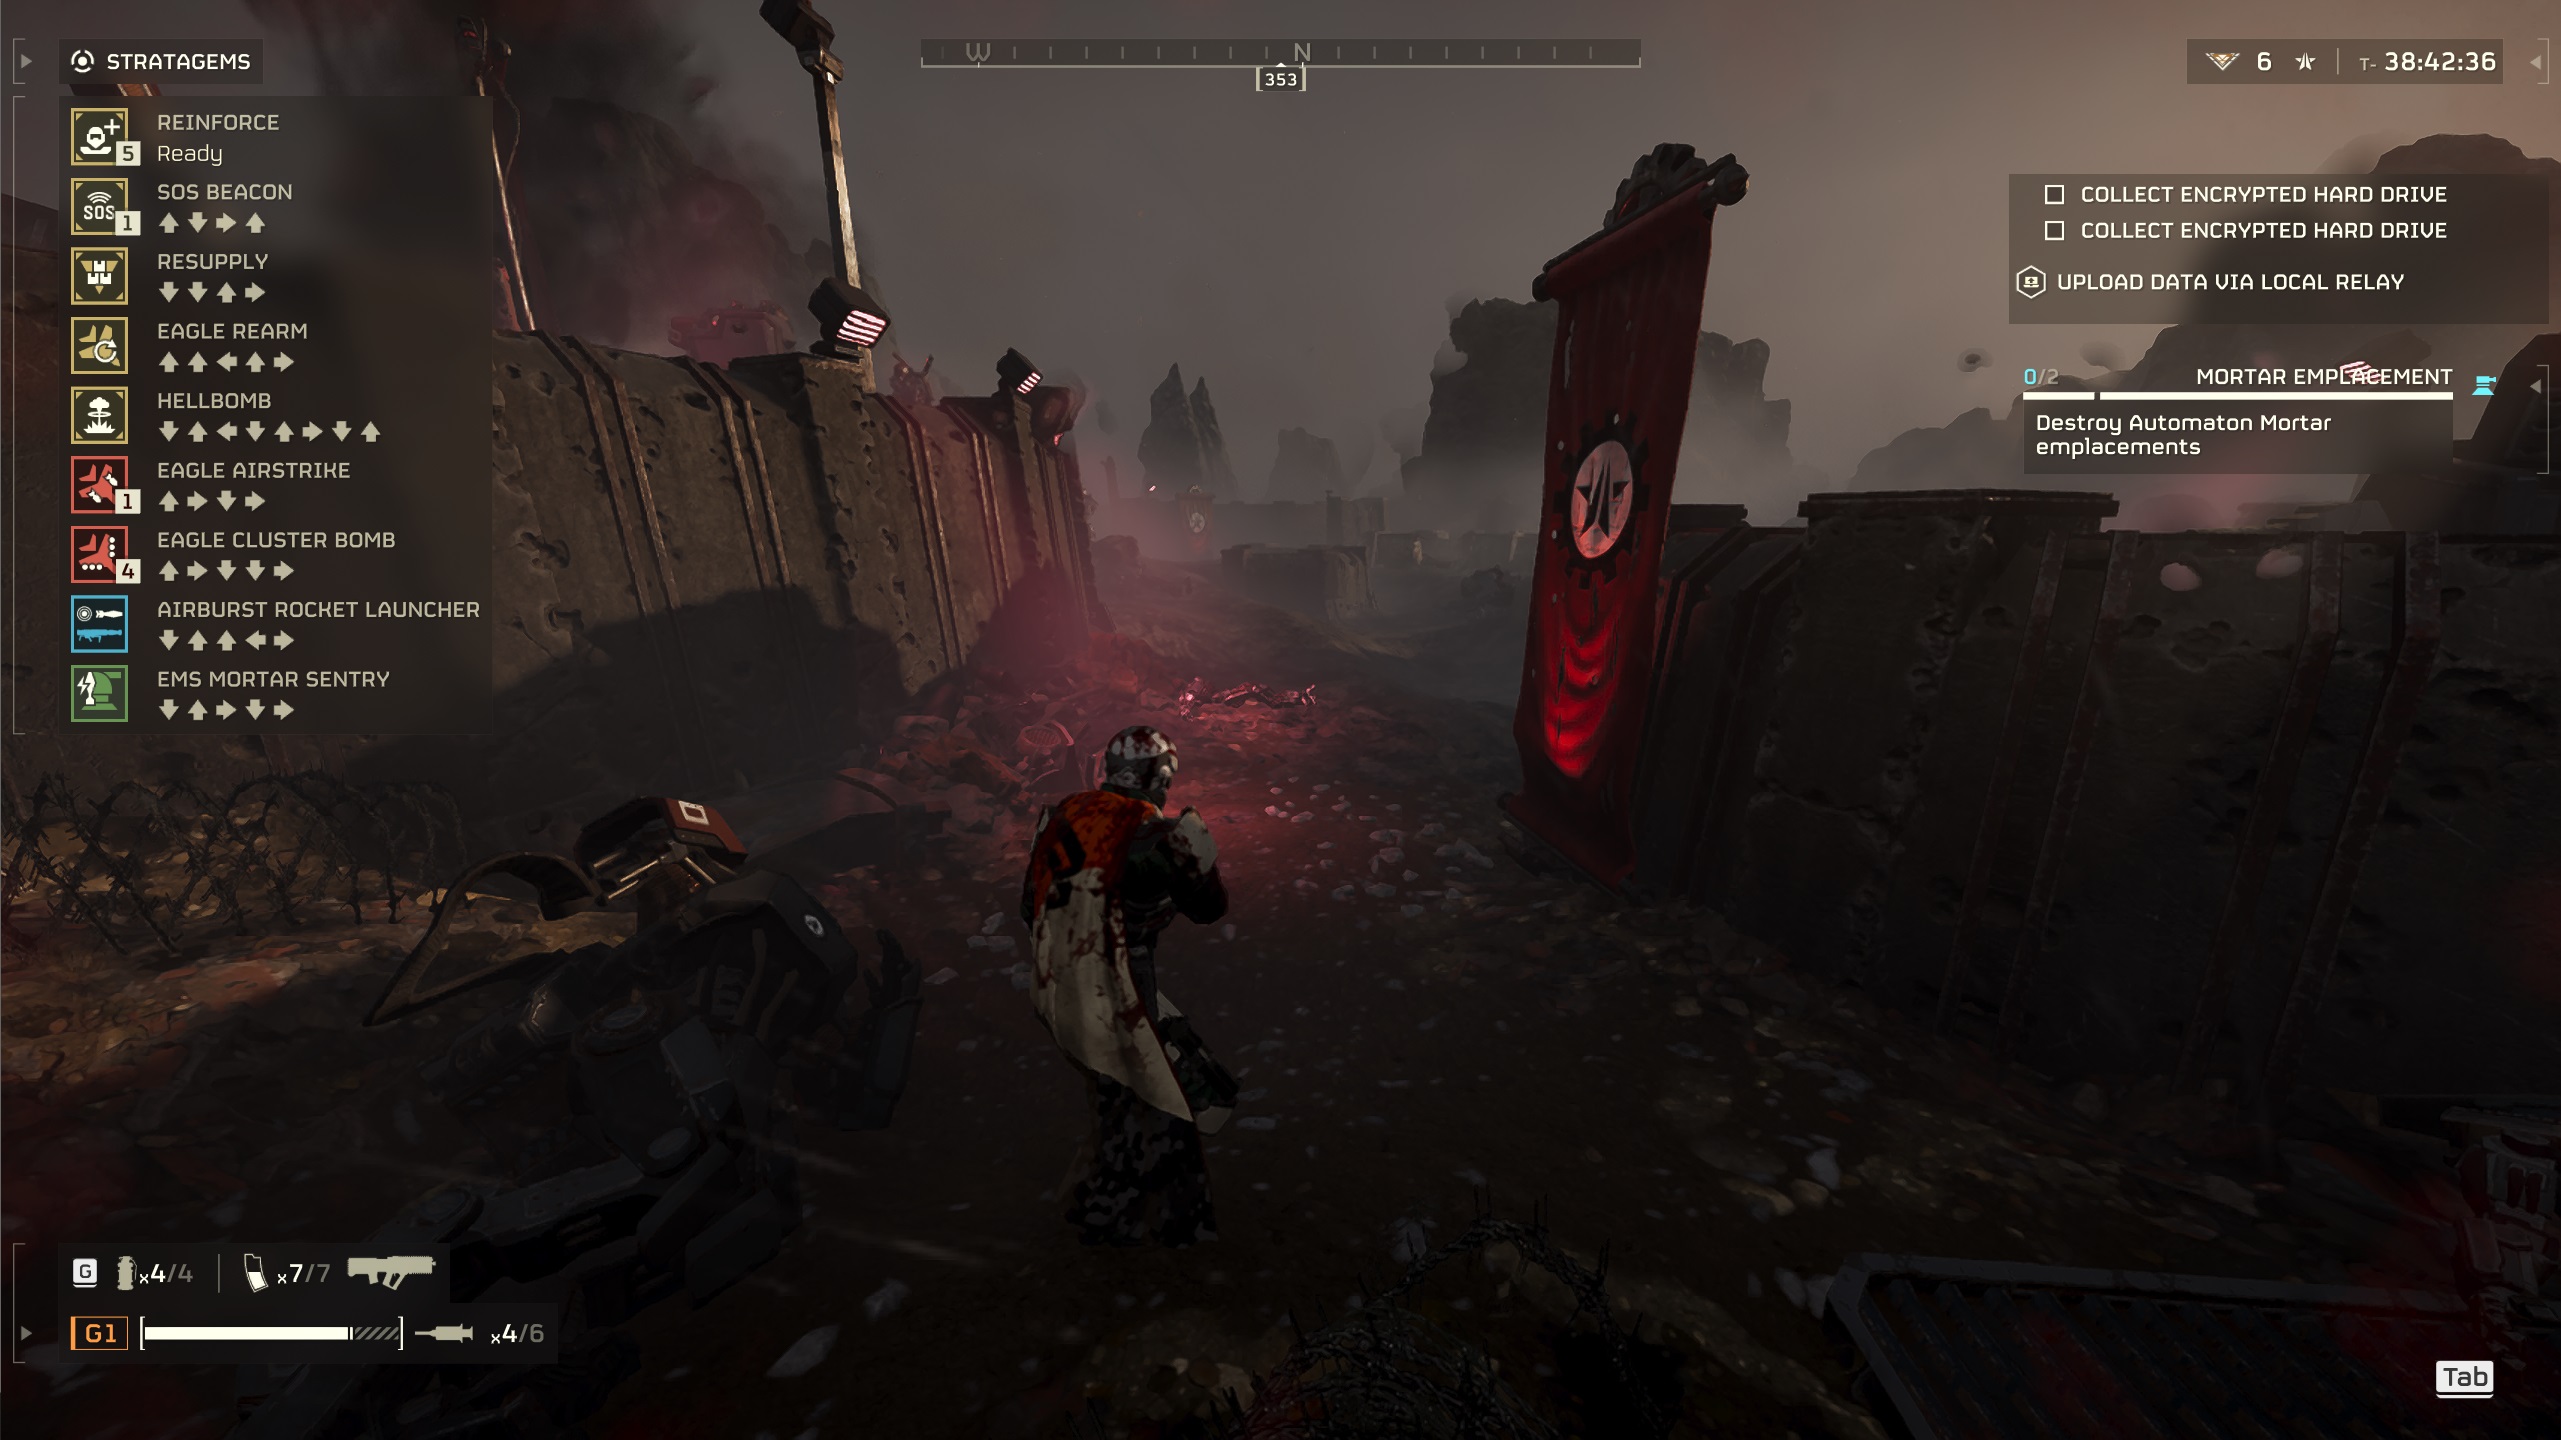
Stratagems in Helldivers 2 are your bread and butter. Even more than your trusty Liberator Assault rifle or the armor you’re wearing, Stratagems are what make or break most missions. And, as a Helldivers, you have access to quite a lot of them, and it can be hard to gauge which are the best, how to use them in the most efficient ways, and how to build around them. Well, we’ve got you covered: we’ve rated each stratagem in the game and explained the best way to play with every single one, as well as how to start making builds around each.
What Are Stratagems
Stratagems in Helldivers 2 are game-changing pieces of ordinance that can be called down in game in order to even the odds. Taking the form of airstrikes, heavy weapons, sentries, and various other pieces of support equipment, Stratagems are one of the most important parts of a Helldiver’s equipment.
To activate a Stratagem that has been selected for a mission, you simply need to open the Stratagem List (/), and then key in the Stratagem’s code using WASD or the D-Pad to represent ⬆️⬅️⬇️➡️, respectively (by default). This will create a throwable marker that you can toss wherever you want your stratagem to land.
These support packages are dropped or sent directly from your ships in orbit and onto a marker that you can call in (after a brief delay). After being called in, nearly all Stratagems have a cooldown before they can be called in again. Some of these cooldowns can be brief (most notably the Eagle strikes while you still have uses remaining, and Expendable Anti-Tank rockets), while many of them are several minutes long, which should be kept in mind while selecting them.
Mission-based stratagems, such as SEAF artillery shells, Hellbombs, or Prospecting Drills, and the Reinforce and Resupply stratagems are always available. Because these are situational, we will not be focusing on them, instead focusing on the Stratagems you can unlock and select at the start of each mission.
How to Make a Stratagem Loadout
Before we list all the Stratagems, let’s go over how to make a Stratagem loadout. This will be how to best select what 4 (or sometimes 3) Stratagems you should take with you in order to maximize your efficiency (even on the highest difficulties) while still having plenty of room to play around with different items.
In the lists below, we’ve given each Stratagem 1 or 2 “types”, in addition to their overall categories. These types are as follows:
Anti-Heavy: Reliably kills Heavy Enemies quickly.
Anti-Horde: Kills hordes of Small and Medium Enemies quickly.
General: Kills Small and Medium Enemies, damages and sometimes kills Heavy Enemies.
Siege: Destroys buildings and infrastructure.
Support: Doesn’t deal direct damage, but provides advantage.
With that in mind, any given build you make on higher difficulties should include the following:
At Least 2 Anti-Heavy Stratagems, or 1 Anti-Heavy Stratagem and a General Stratagem .
This is because the meta of Helldivers 2 currently favors “tank-busting,” and often the only way to kill the heaviest enemies reliably is using Anti-Heavy items.
At least 1 Low Cooldown or Reusable Siege Stratagem, or 2 High Cooldown Stratagems Items (except on Defense).
Most missions see you destroying infrastructure as a primary or secondary mission objective. For these, you will need a lot of ordinance. So, you will either want a Weapon or airstrike that is capable of destroying multiple buildings, or 2 airstrikes on longer cooldowns able to destroy buildings.
If you are on a Defense mission that doesn’t require you to destroy any buildings, you don’t need any Siege items.
Up to 1 Anti-Horde Stratagem, or up to 1 General Stratagem that you plan to use primarily for Hordes.
Especially if your primary weapon fires slowly, you will want something to deal with light and medium enemies, and so bringing an anti-horde weapon like one of the machine guns, or certain Airstrikes or Sentries, is a safe choice.
Up to 1 Support Stratagem .
Support Items can be incredibly useful for mobility and survivability, and can be essential on higher difficulties, especially Solo.
Example of a good loadout. An Anti-Horde Airstrike, a General Airstrike, A Support Pack, and an Anti-Heavy Weapon.
In addition to the above, you also will want to make sure your Stratagem types are divided amongst the following:
At least 1 Weapon
At least 2 Airstrikes
The last slot can either be another Airstrike, a Backpack, or a Defense, according to the following:
Airstrike for mobile operations where you want to destroy most enemy bases
Backpack for survivability and speed, especially Blitz missions or full-map-clears. This should only be used if you are not bringing a Weapon requiring a backpack, obviously.
Defense for Defense Missions (duh).
Very rarely, taking Expendable Anti-Tank as a second weapon can be useful, if you are designating a single Helldiver as dedicated anti tank.
Stratagems Full List
Here is the full list of Stratagems, listed alongside their Type (see above), Cooldown time, and Code to activate them. These are presented in no particular order.
Weapons
Weapons are equipable stratagems that can be acquired and used as an additional piece of weaponry beyond your primary and secondary weapons. Certain weapons also have ammo packs that take up your backpack slot.
In general, you should always have no more than one Weapon stratagem, with a minor exception of the Expendable Anti-Tank stratagem, which can be dropped often and used before picking up your other Weapon again.
Air Strikes are, usually, the most useful kind of stratagem. Once called in, they will drop their payloads onto their target within a few seconds, and provide the most effective support against all manner of enemy. It should be noted that the Eagle stratagems have a certain number of uses that, once expended, will not be regenerated until Eagle rearms, requiring 150 seconds where no Eagle strikes can be called in.
Icon
Name
Type
Cooldown
Code
Orbital Gatling Barrage
Anti-Horde Strike
80 sec
➡️⬇️⬅️⬆️⬆️
Orbital Airburst Strike
Anti-Horde Strike
120 sec
➡️➡️➡️
Orbital 120mm HE Barrage
General Strike Siege Strike
240 sec
➡️➡️⬇️⬅️➡️⬇️
Orbital 380mm HE Barrage
General Strike Siege Strike
240 sec
➡️⬇️⬆️⬆️⬅️⬇️⬇️
Orbital Walking Barrage
General Strike Siege Strike
240 sec
➡️⬇️➡️⬇️➡️⬇️
Orbital Laser
Anti-Heavy Strike Siege Strike
300 sec
➡️⬇️⬆️➡️⬇️
Orbital Railcannon Strike
Anti-Heavy Strike
210 sec
➡️⬆️⬇️⬇️➡️
Orbital Precision Strike
Anti-Heavy Strike Siege Strike
100 sec
➡️➡️⬆️
Orbital Gas Strike
Anti-Horde Strike
75 sec
➡️➡️⬇️➡️
Orbital EMS Strike
Support Strike
75 sec
➡️➡️⬅️⬇️
Orbital Smoke Strike
Support Strike
100 sec
➡️➡️⬇️⬆️
Eagle Strafing Run
Anti-Horde Strike
8 sec/150 sec
⬆️➡️➡️
Eagle Airstrike
General Strike Siege Strike
8 sec/150 sec
⬆️➡️⬇️➡️
Eagle Cluster Bomb
Anti-Horde Strike
8 sec/150 sec
⬆️➡️⬇️⬇️➡️
Eagle Napalm Airstrike
General Strike
8 sec/150 sec
⬆️➡️⬇️⬆️
Eagle Smoke Strike
Support Strike
8 sec/150 sec
⬆️➡️⬆️⬇️
Eagle 110mm Rocket Pods
Anti-Heavy Strike
8 sec/150 sec
⬆️➡️⬆️⬅️
Eagle 500kg Bomb
Anti-Heavy Strike Siege Strike
8 sec/150 sec
⬆️➡️⬇️⬇️⬇️
Emplacements and Armor
Emplacements and Armor are mostly stationary positions, generally used for point defense. These can be incredibly effective when placed on an objective or during certain defense missions, racking up scores of kills against pressing enemies, though their lack of mobility can be an issue.
The Exosuits are mobile, but their slow movement speed and vulnerability to close range attacks mean that they should be used defensively, primarily, acting in most ways as a manned, mobile platform for their weapons.
Icon
Name
Type
Cooldown
Code
HMG Replacement
General Defense
180 sec
⬇️⬆️⬅️➡️➡️⬅️
Shield Generator Relay
Support Defense
90 sec
⬇️⬇️⬅️➡️⬅️➡️
Tesla Tower
General Defense
150 sec
⬇️⬆️➡️⬆️⬅️➡️
Anti-Personnel Minefield
General Defense
180 sec
⬇️⬅️⬆️➡️
Incendiary Mines
General Defense
180 sec
⬇️⬅️⬅️⬇️
Machine Gun Sentry
Anti-Horde Defense
180 sec
⬇️⬆️➡️➡️⬆️
Gatling Sentry
Anti-Horde Defense
180 sec
⬇️⬆️➡️⬅️
Mortar Sentry
Anti-Heavy Defense
180 sec
⬇️⬆️➡️➡️⬇️
Autocannon Sentry
Anti-Heavy Defense
180 sec
⬇️⬆️➡️⬆️⬅️⬆️
Rocket Sentry
Anti-Heavy Defense
180 sec
⬇️⬆️➡️➡️⬅️
EMS Mortar Sentry
Support Defense
180 sec
⬇️⬆️➡️⬇️➡️
Patriot Exosuit
General Defense Siege Defense
600 sec
⬅️⬇️➡️⬆️⬅️⬇️⬇️
Emancipator Exosuit
General Defense Siege Defense
600 sec
⬅️⬇️➡️⬆️⬅️⬇️⬆️
Backpack
Backpacks are equipped onto your backpack slot on your Helldiver, and almost universally provide either survivanbility or mobility options. These will generally keep you alive longer, and should be used frequently on missions requiring you to go longer, or on Solo missions where survival is critical.
Icon
Name
Type
Cooldown
Code
Jump Pack
Support Backpack
480 sec
⬇️⬆️⬆️⬇️⬆️
Supply Pack
Support Backpack
480 sec
⬇️⬅️⬇️⬆️⬆️⬇️
“Guard Dog” Rover
Anti-Horde Backpack
480 sec
⬇️⬆️⬅️⬆️➡️➡️
“Guard Dog”
Anti-Horde Backpack
300 sec
⬇️⬅️⬇️⬇️⬆️⬅️
Ballistic Shield Backpack
Support Backpack
300 sec
⬇️⬆️⬅️➡️⬅️➡️
Shield Generator Pack
Support Backpack
480 sec
⬇️⬆️⬅️⬆️➡️⬇️
And that is all there is to know generally about Stratagems in Helldivers 2. With this all in mind, you should be able to make the best Stratagem loadouts in the game. Let us know your favorite builds below, and keep an eye out for some of ours to come!
Share this guide:
Graves
Graves is an avid writer, web designer, and gamer, with more ideas than he could hope to achieve in a lifetime. But, armed with a mug of coffee and an overactive imagination, he'll try. When he isn't working on a creative project, he is painting miniatures, reading cheesy sci-fi novels, or making music.


 /
/ ), and then key in the Stratagem’s code using WASD or the D-Pad to represent ⬆️⬅️⬇️➡️, respectively (by default). This will create a throwable marker that you can toss wherever you want your stratagem to land.