After completing Short Sighted, Vladimir will want to talk to you again. He’ll tell you he has intel on an artifact that has been picked up by a collector, and the collector isn’t interested in selling it for any price. That means you’ll have to steal it.
When you’re ready to get started on the mission, tell him “I’m ready. We’ll head out now” (Image 1). Note that Sarah Morgan will be locked in as your companion for the duration of the mission, so you’ll be unable to swap her out until it’s complete.
Image 1
Travel to the Scow
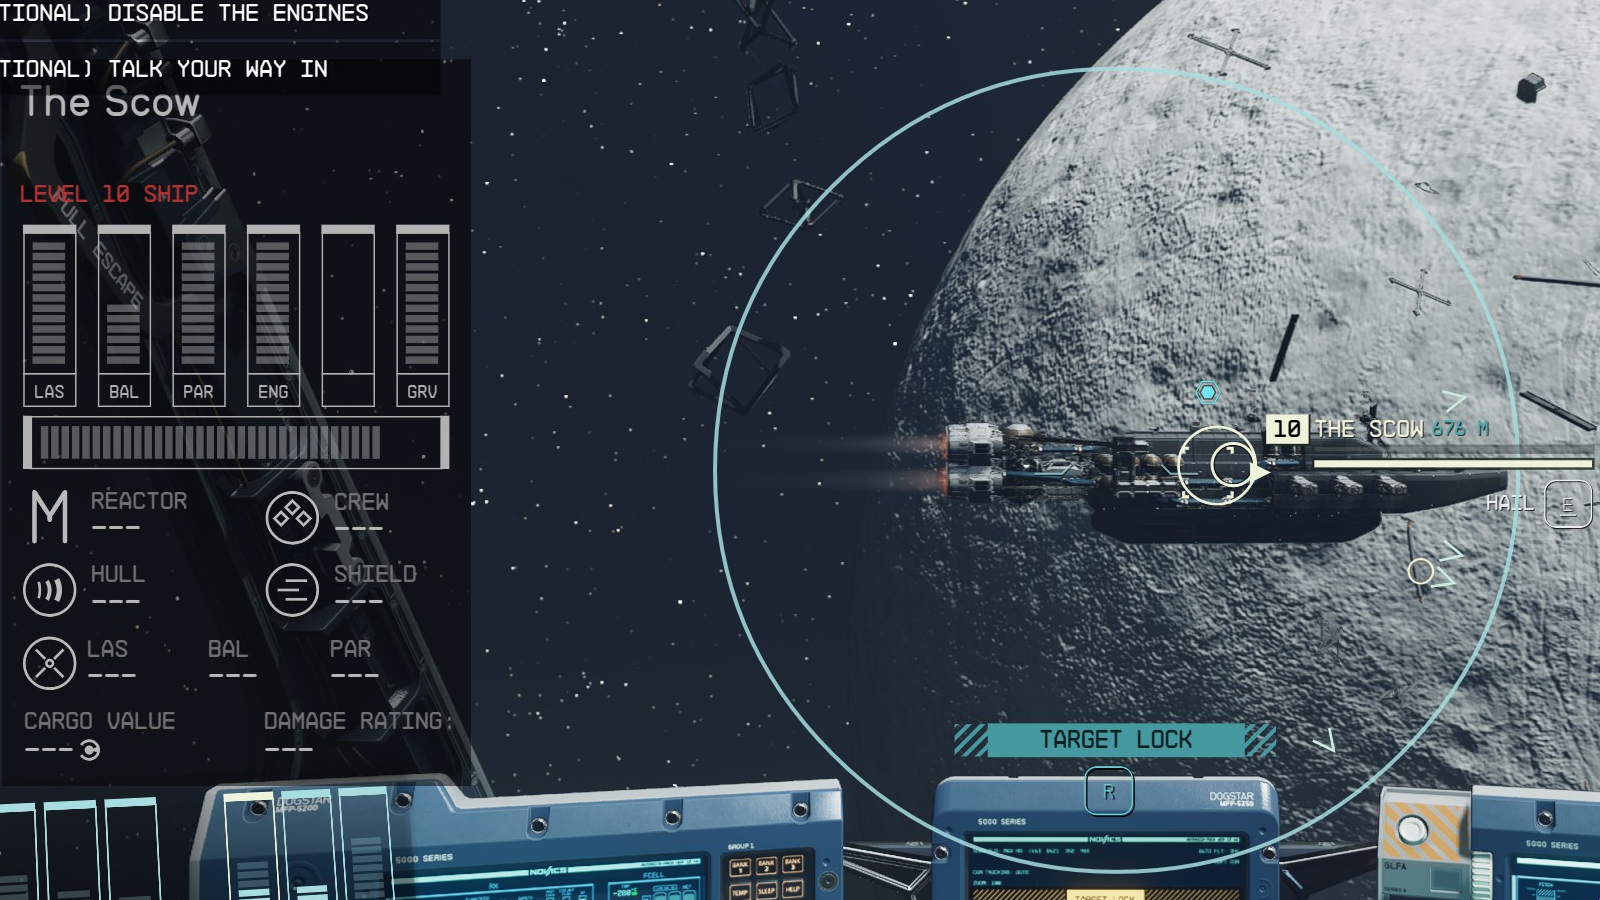
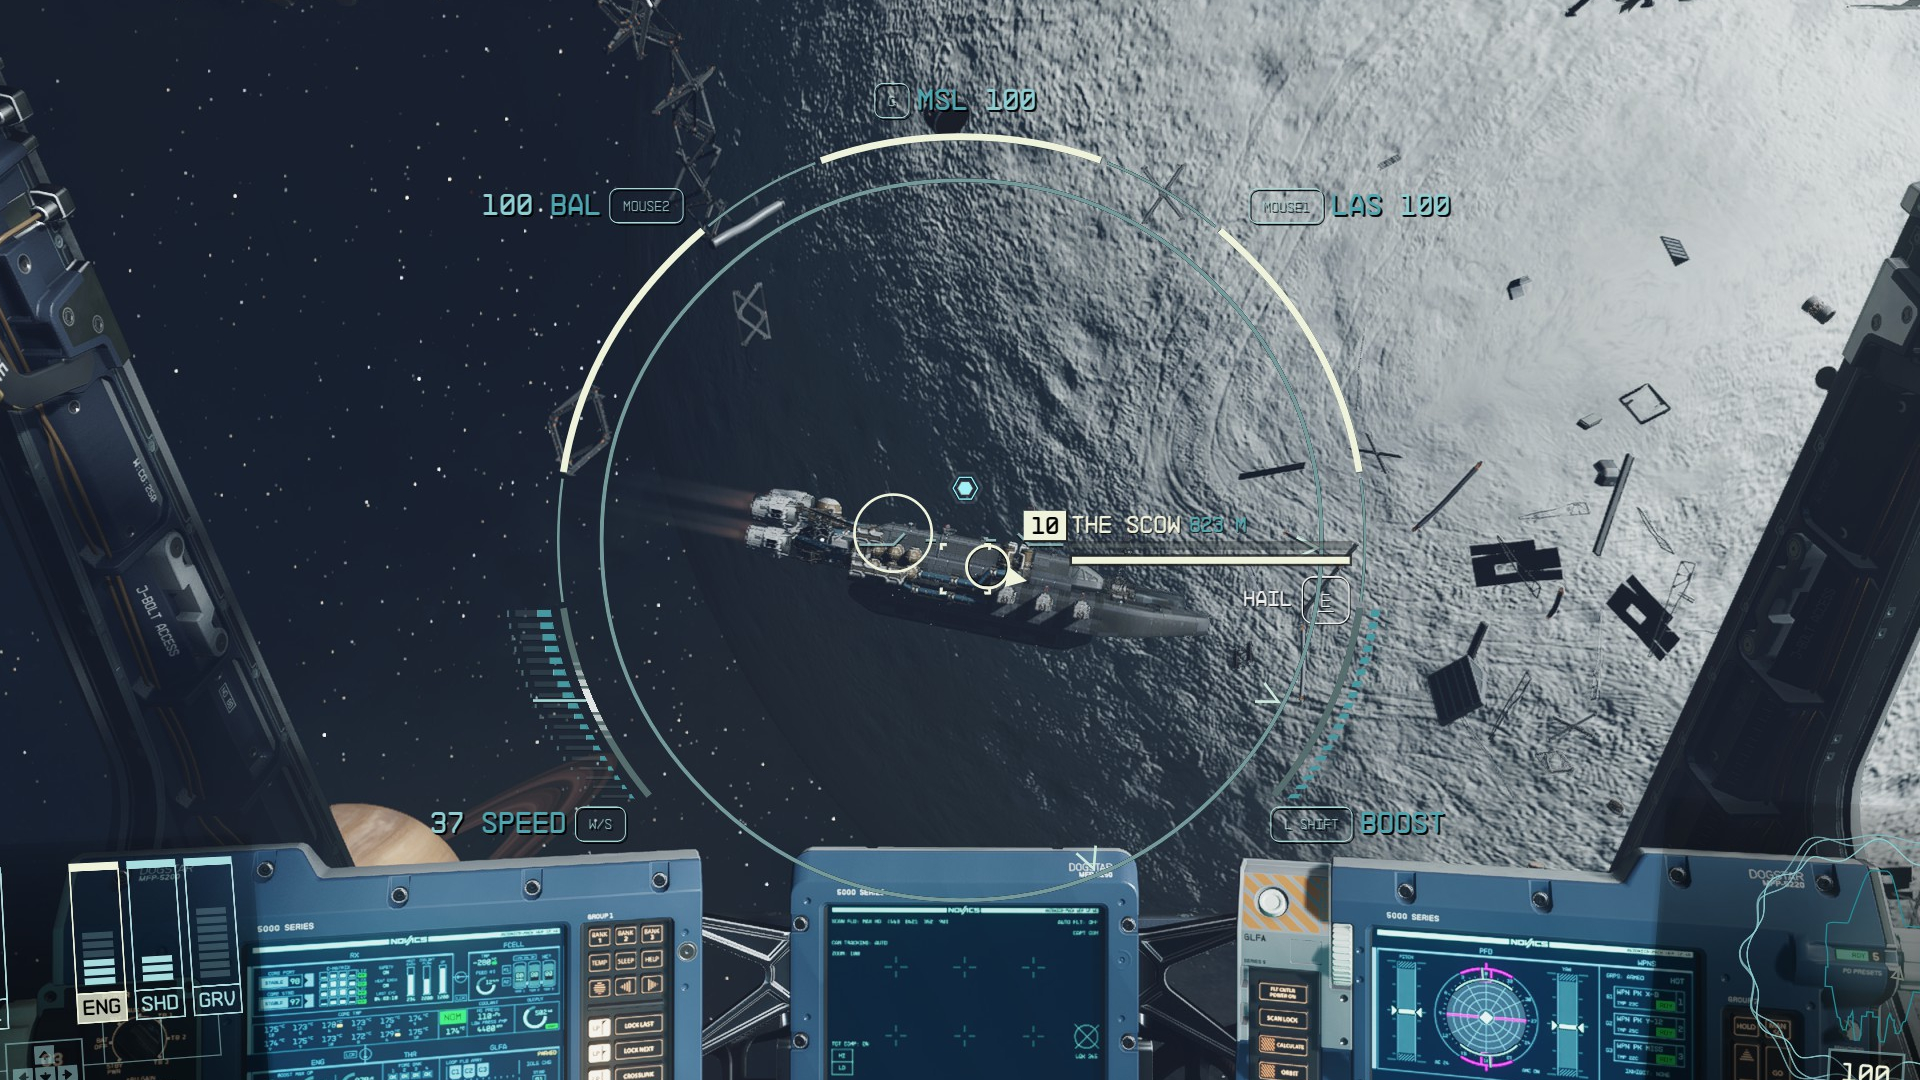
Your target is a salvage ship called the Scow (Image 2). Set course through your mission log, and you’ll arrive in orbit around Procyon V-B, a moon in the Procyon A system. You’ll have three new objectives, two of which are optional:
(Optional) Talk Your Way In
(Optional) Disable the Engines
Board the Scow
You must complete one of the two optional objectives in order to board the ship. Click on the tab below for the option you chose.
It’s worth noting that there is no way to finish this mission without acquiring a bounty. You can avoid bloodshed with the right options, but you have to steal the artifact no matter what, and since you boarded their ship, they know exactly who stole it. (This is likely intentional to give the UC Vanguard a reason to arrest you to start the SysDef/Crimson Fleet missions.)
To talk your way onto the Scow, you’ll need to hail the ship. Aim toward it and press / / to target it, then hold down the same key/button to hail them.
Choose the [Persuade] option to start a persuasion minigame. It should be fairly easy to persuade them to let you on board, despite their initial reluctance. This will remove (Optional) Disable the Engines from your objectives.
Image 3
Board the Scow
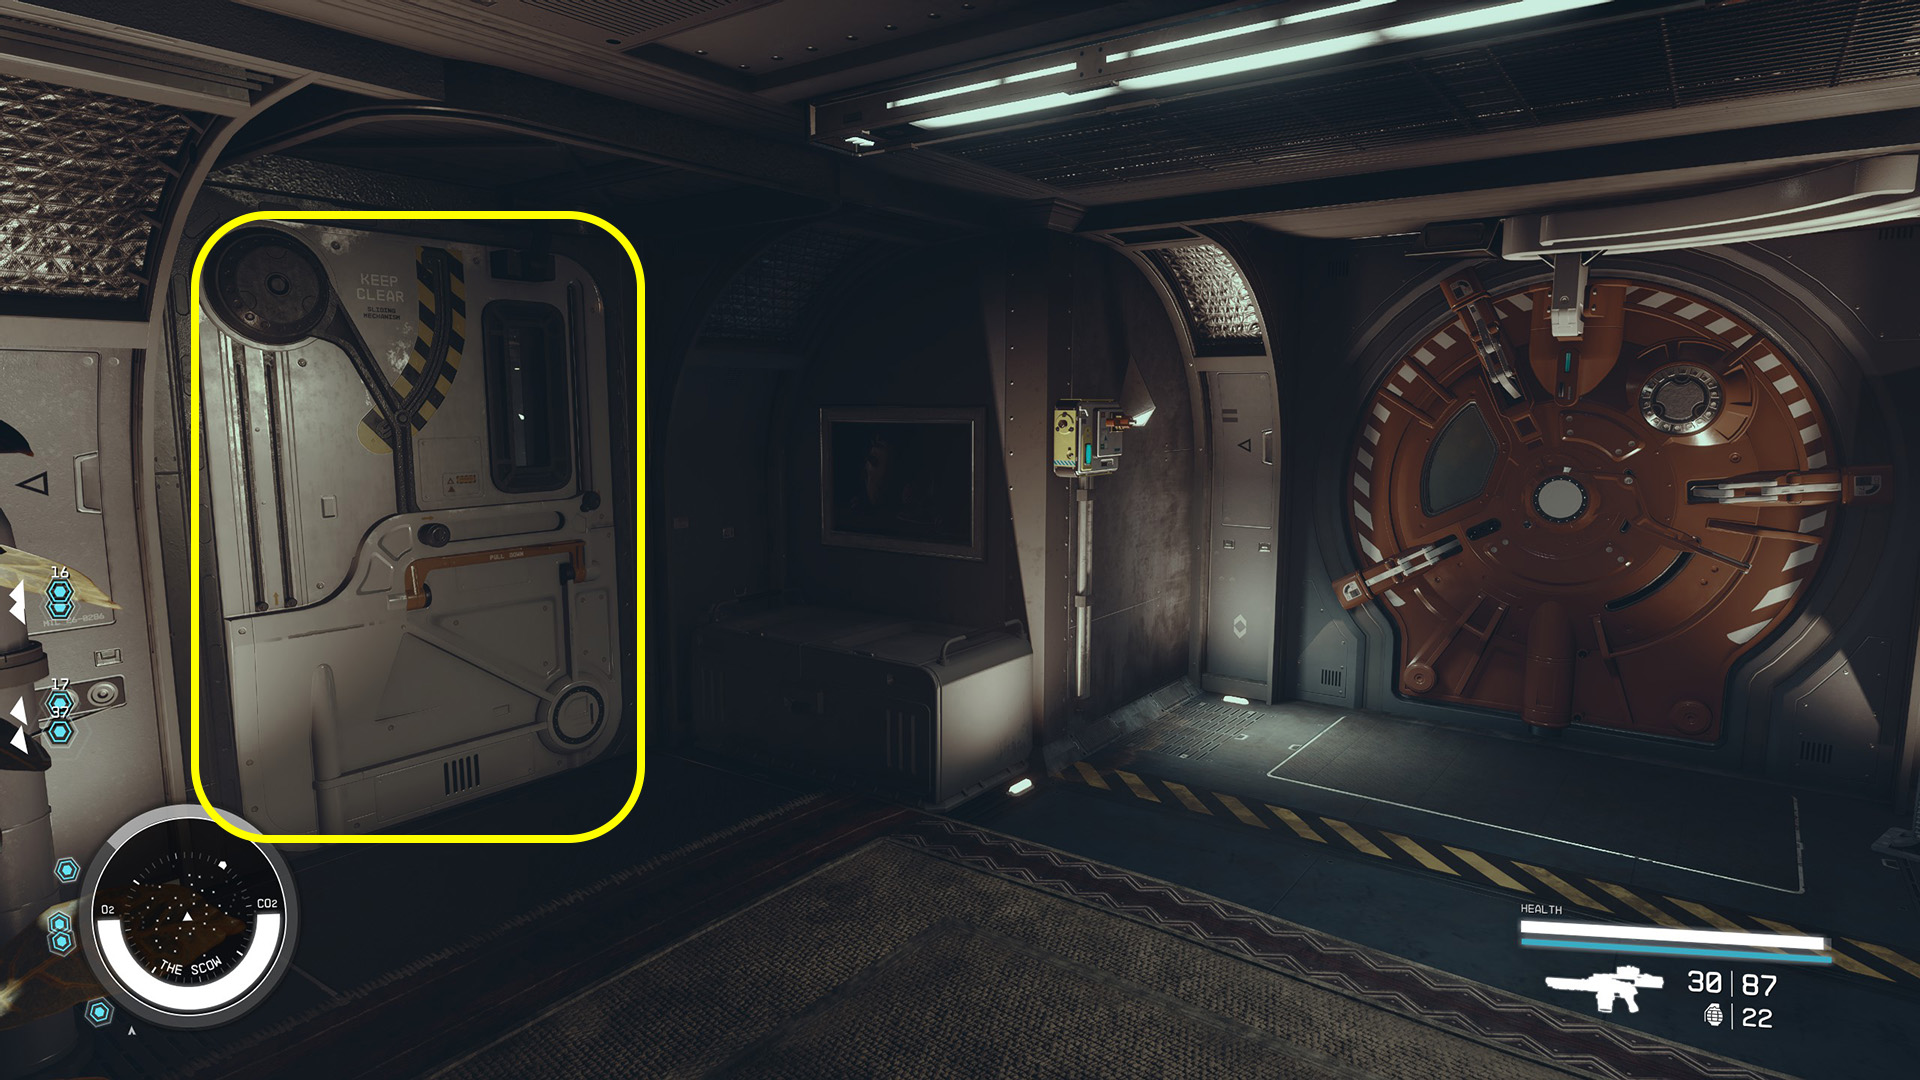
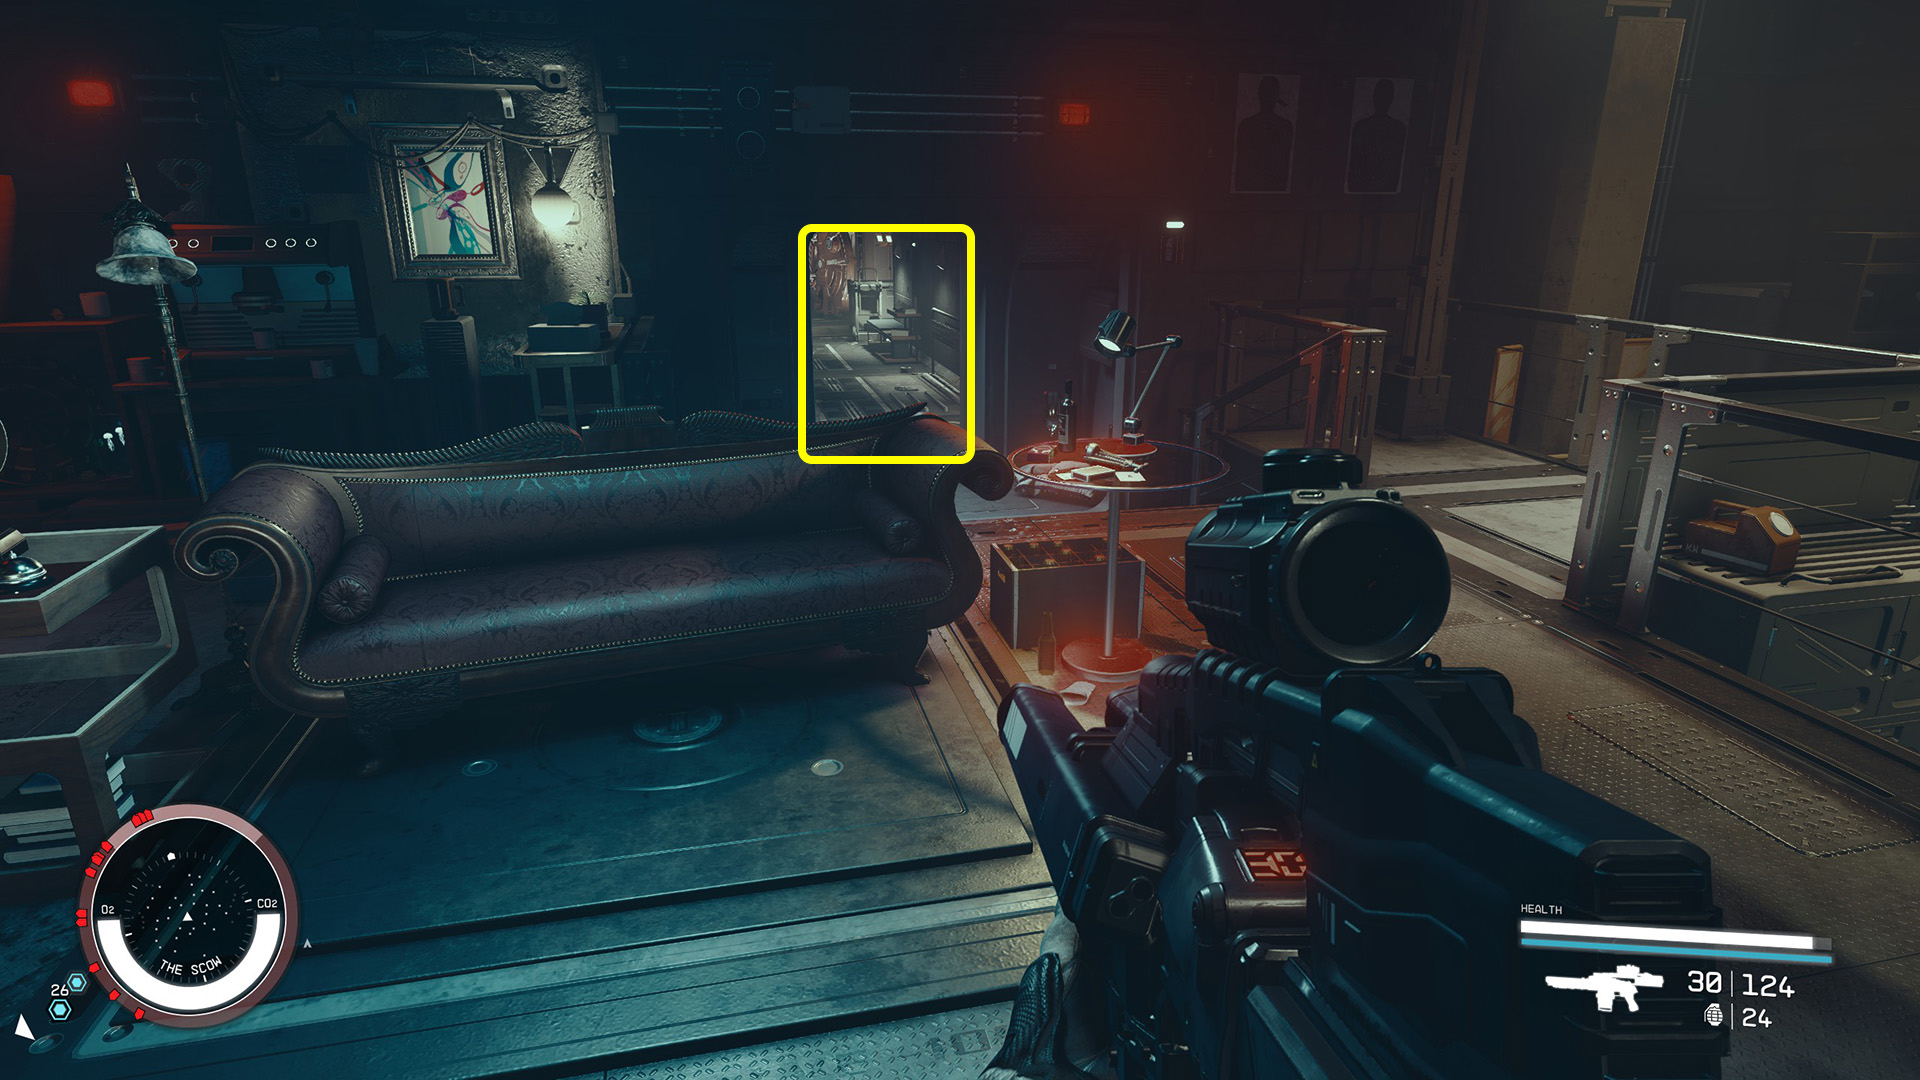
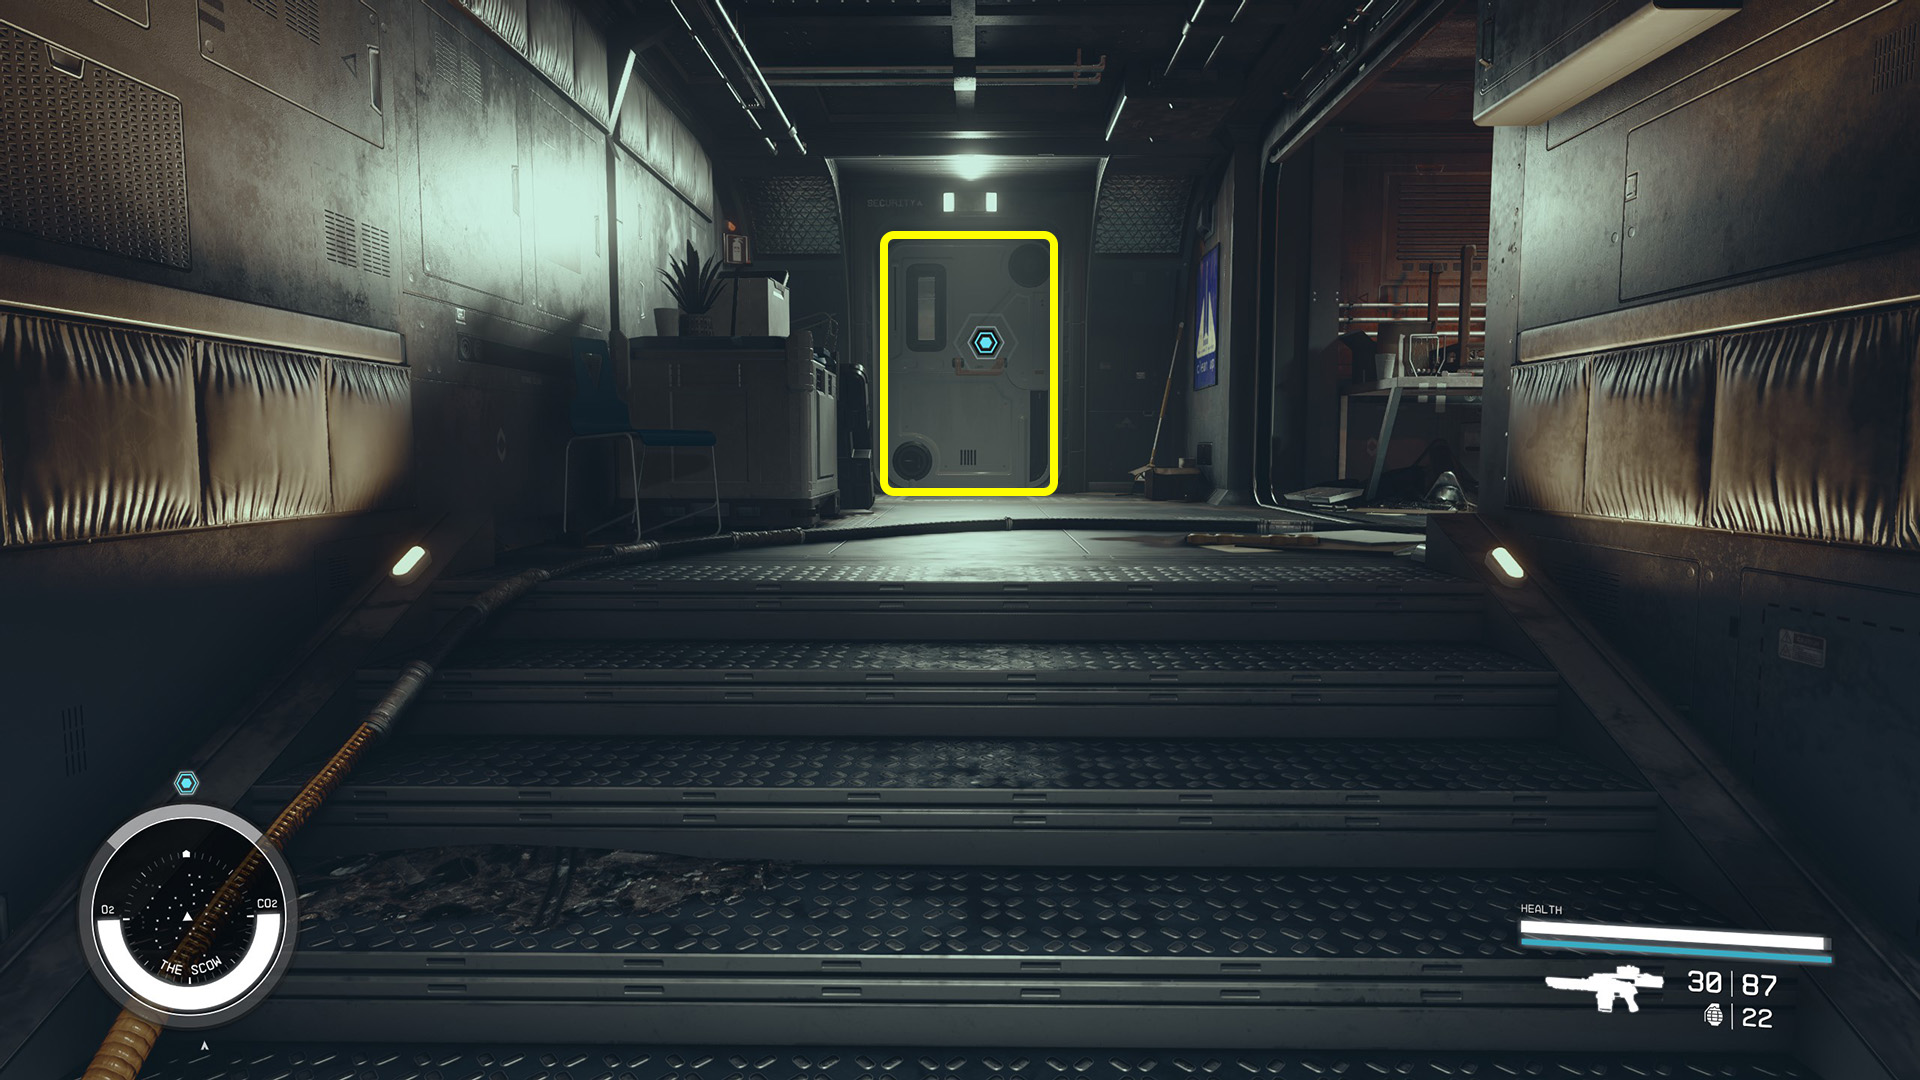
To board the ship, get close and target it with / / , then press / / to dock. Once on board, walk forward and use the Switch on the wall to open the door (Image 4). Don’t bother looting anything right now. You’ll be able to freely take anything on the ship later on.
Image 4
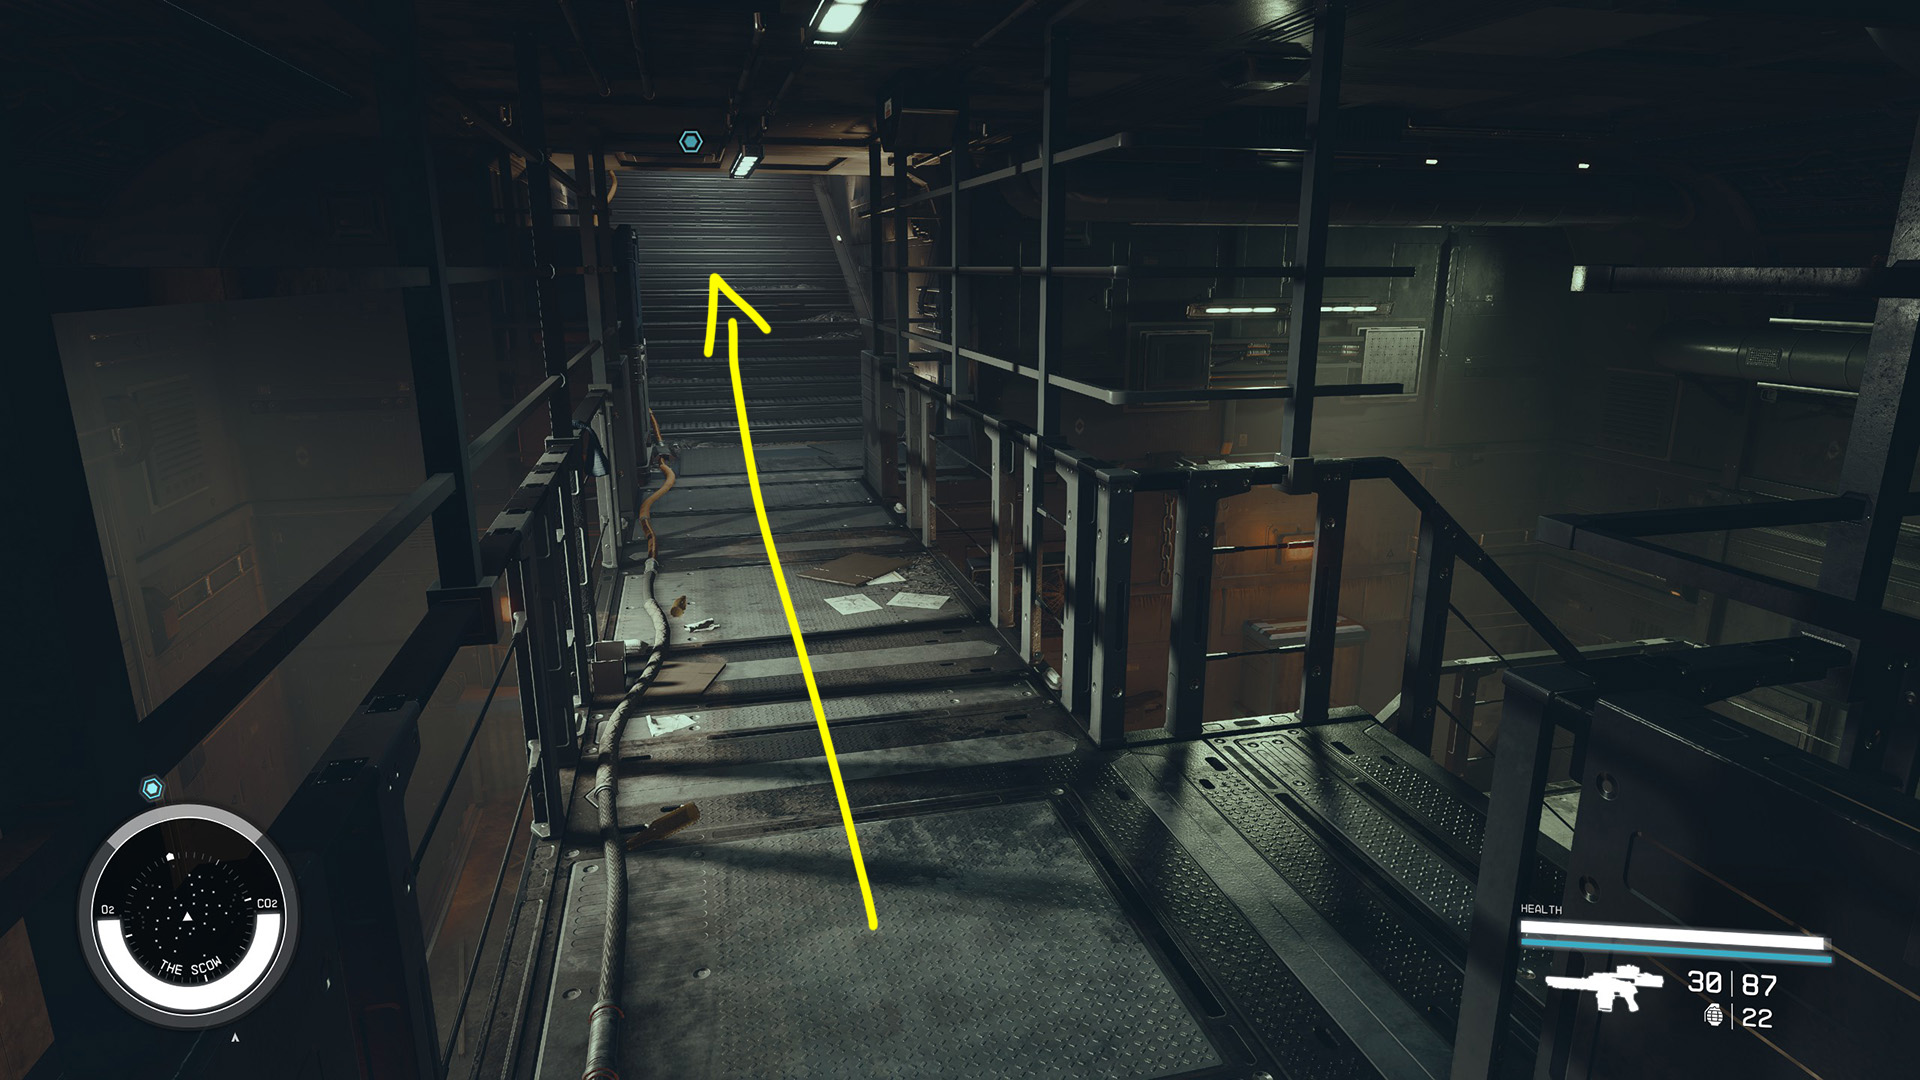
Go up the stairs and a scavenger named Tao Xun will talk to you. Ask about the mosquito reference if you want, then select either of the first two options – Sarah Morgan will like either one. Ask any questions you want, and then back out of the conversation.
Find Captain Petrov
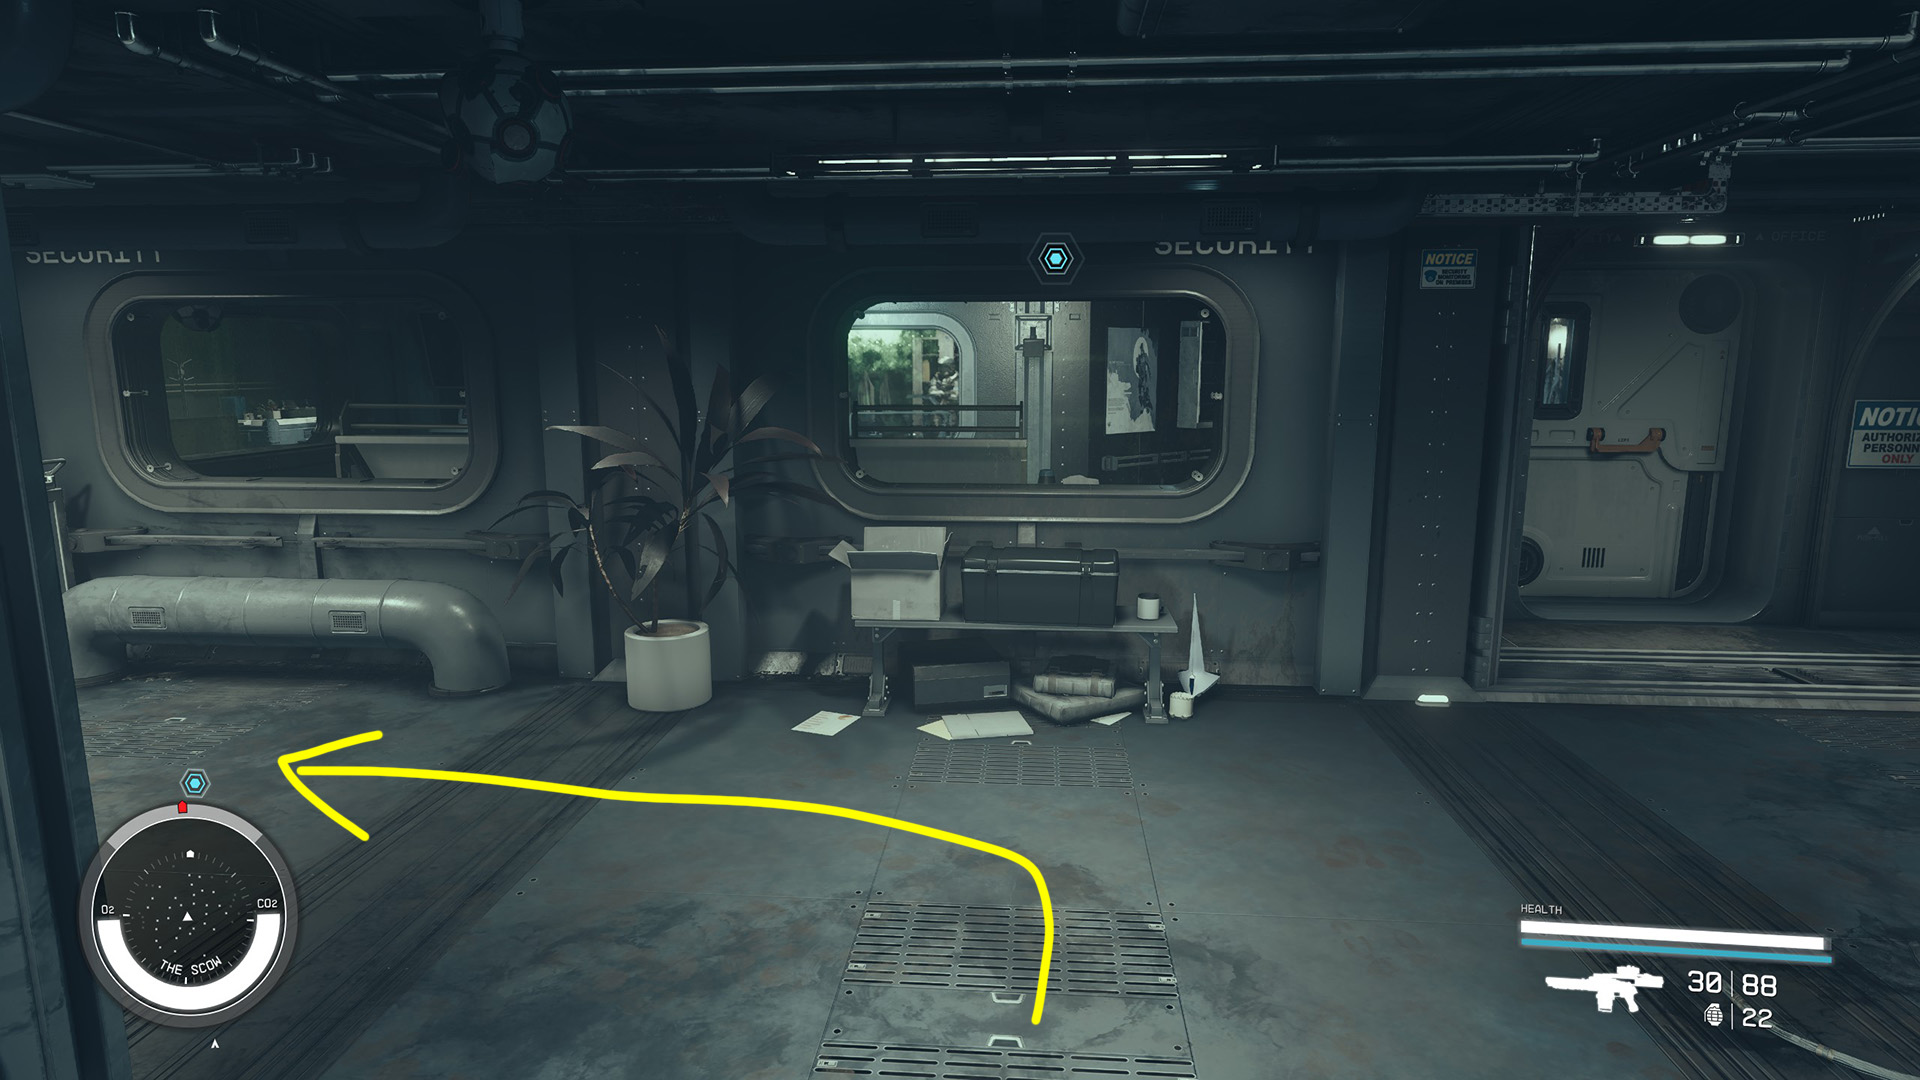
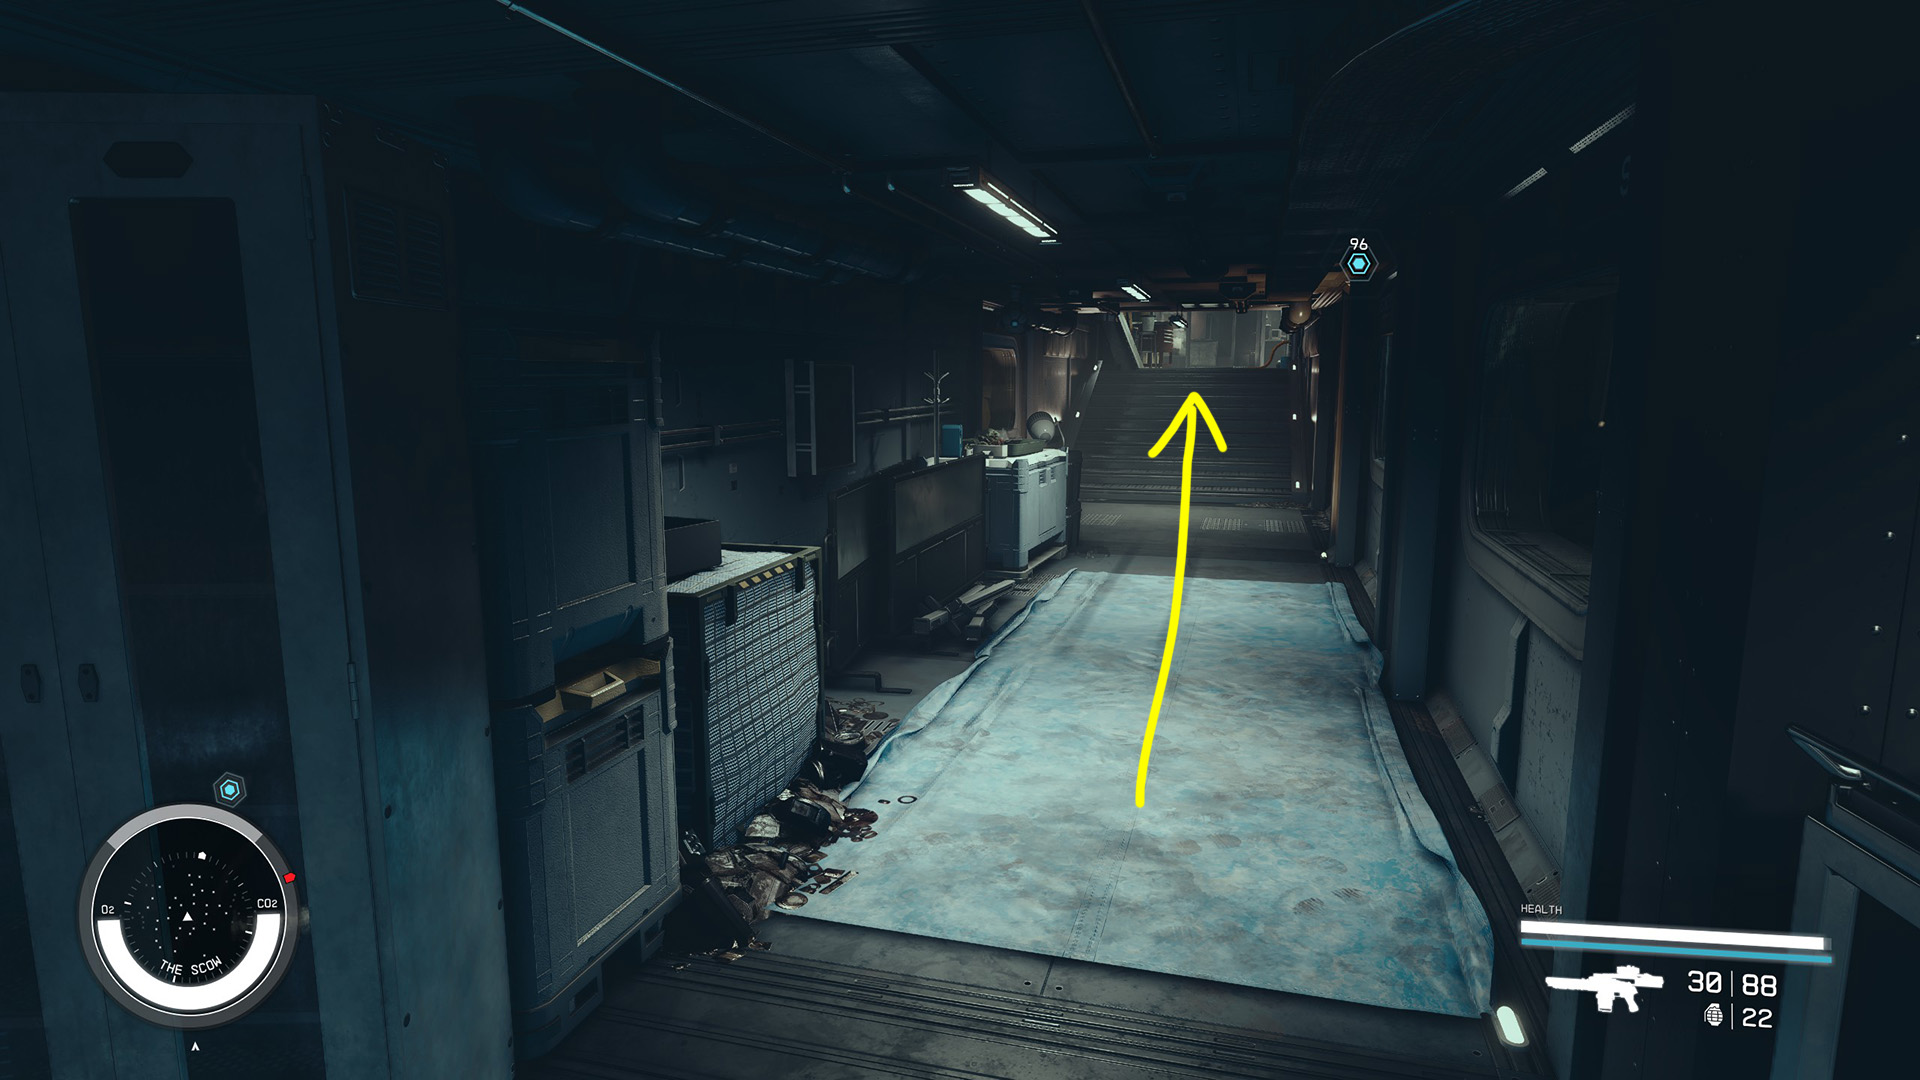
Head through the door at the other end of the room, then up another flight of stairs to go further into the ship (Image 5). Go through the door (Image 6), take a left (Image 7), and then turn the corner to go up more stairs (Image 8).
Image 5Image 6Image 7Image 8
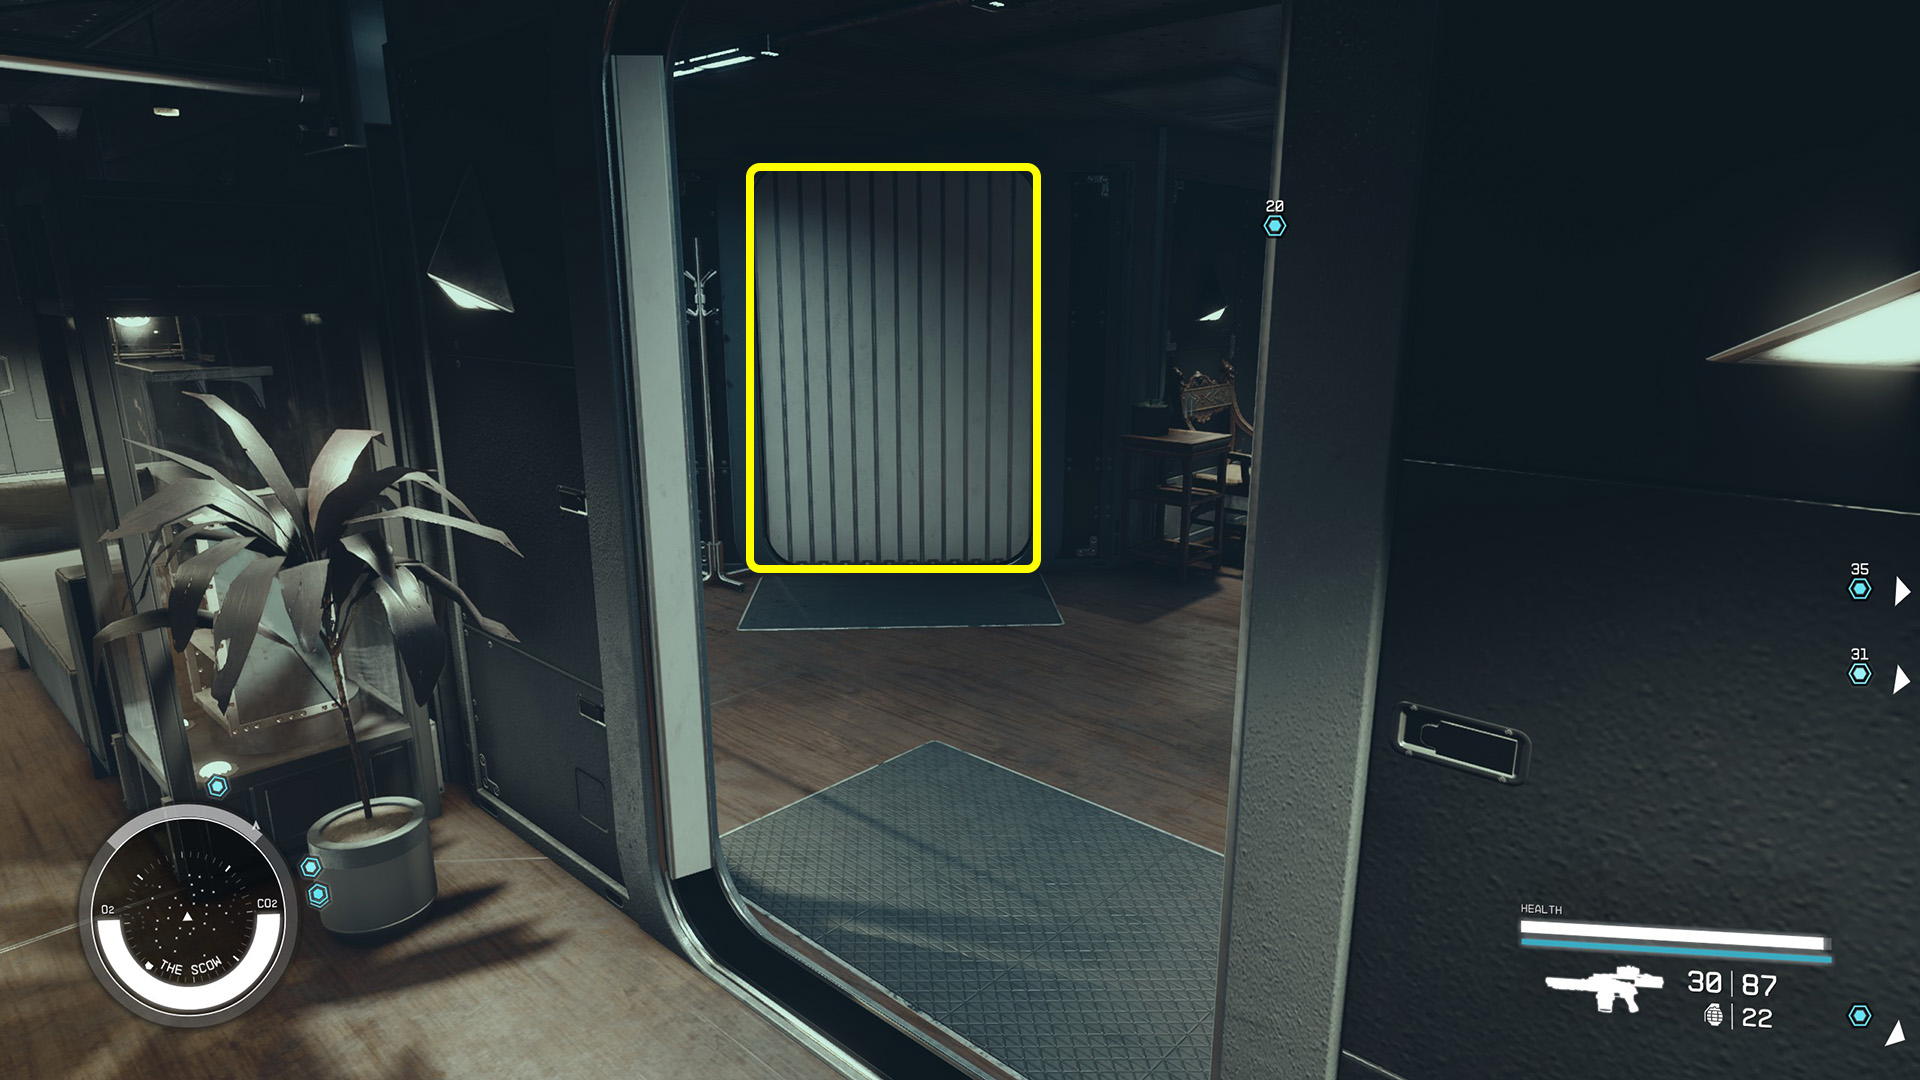
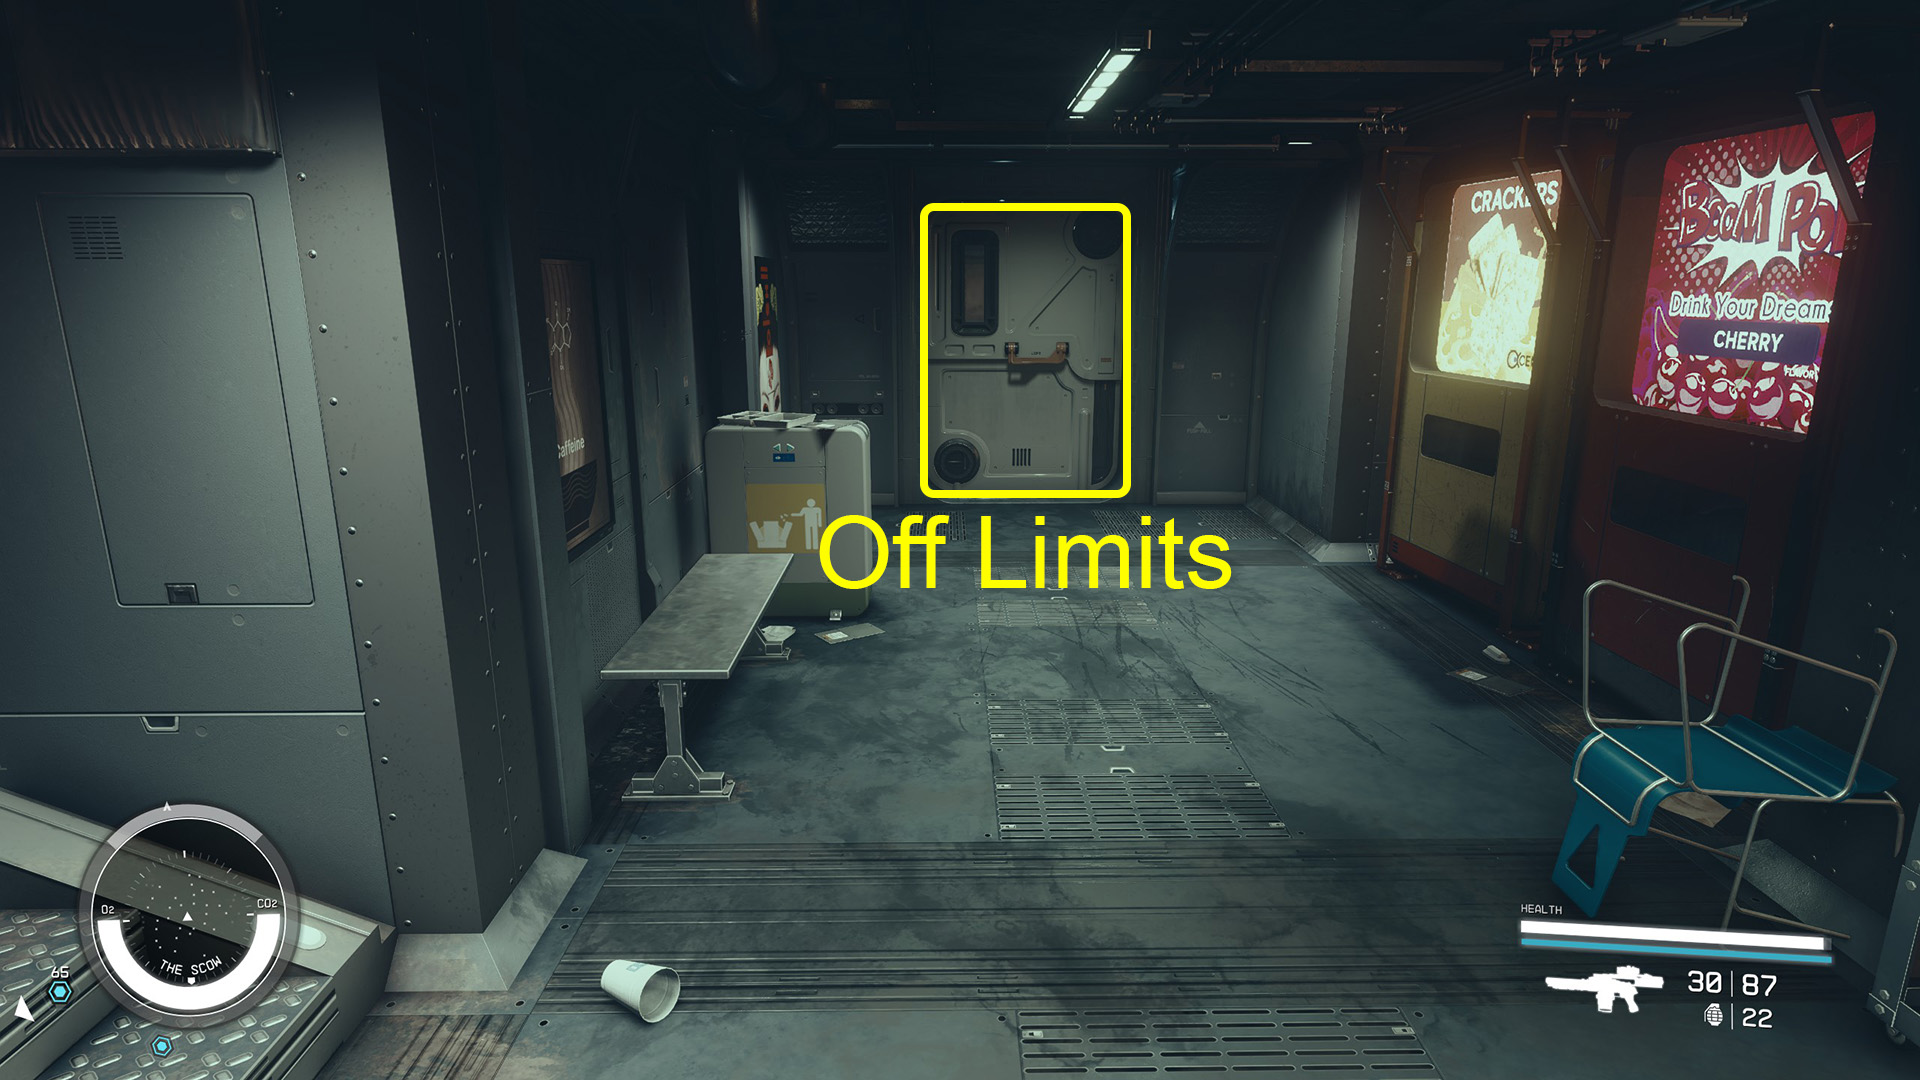
If you explore in this area, avoid going through the closed door near the vending machines (Image 9). Going into this room will make all of the guards hostile.
Image 9
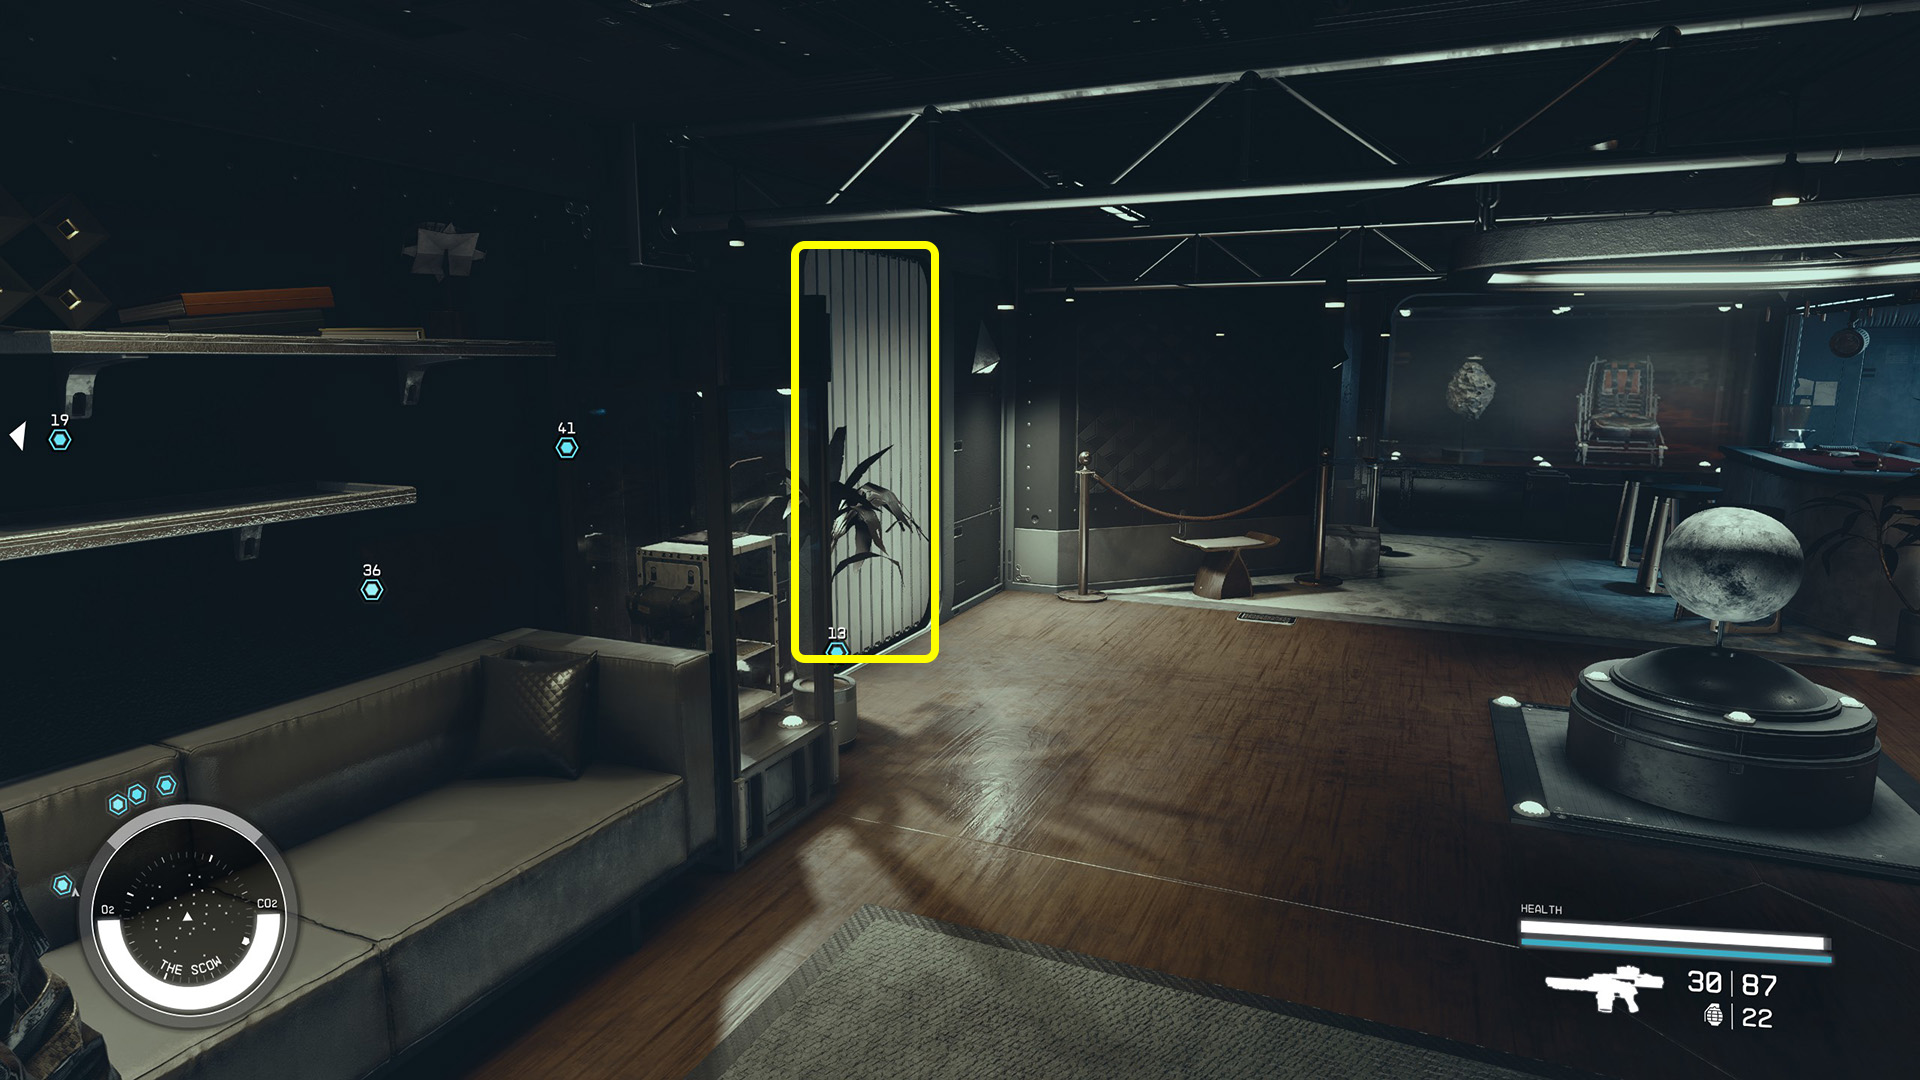
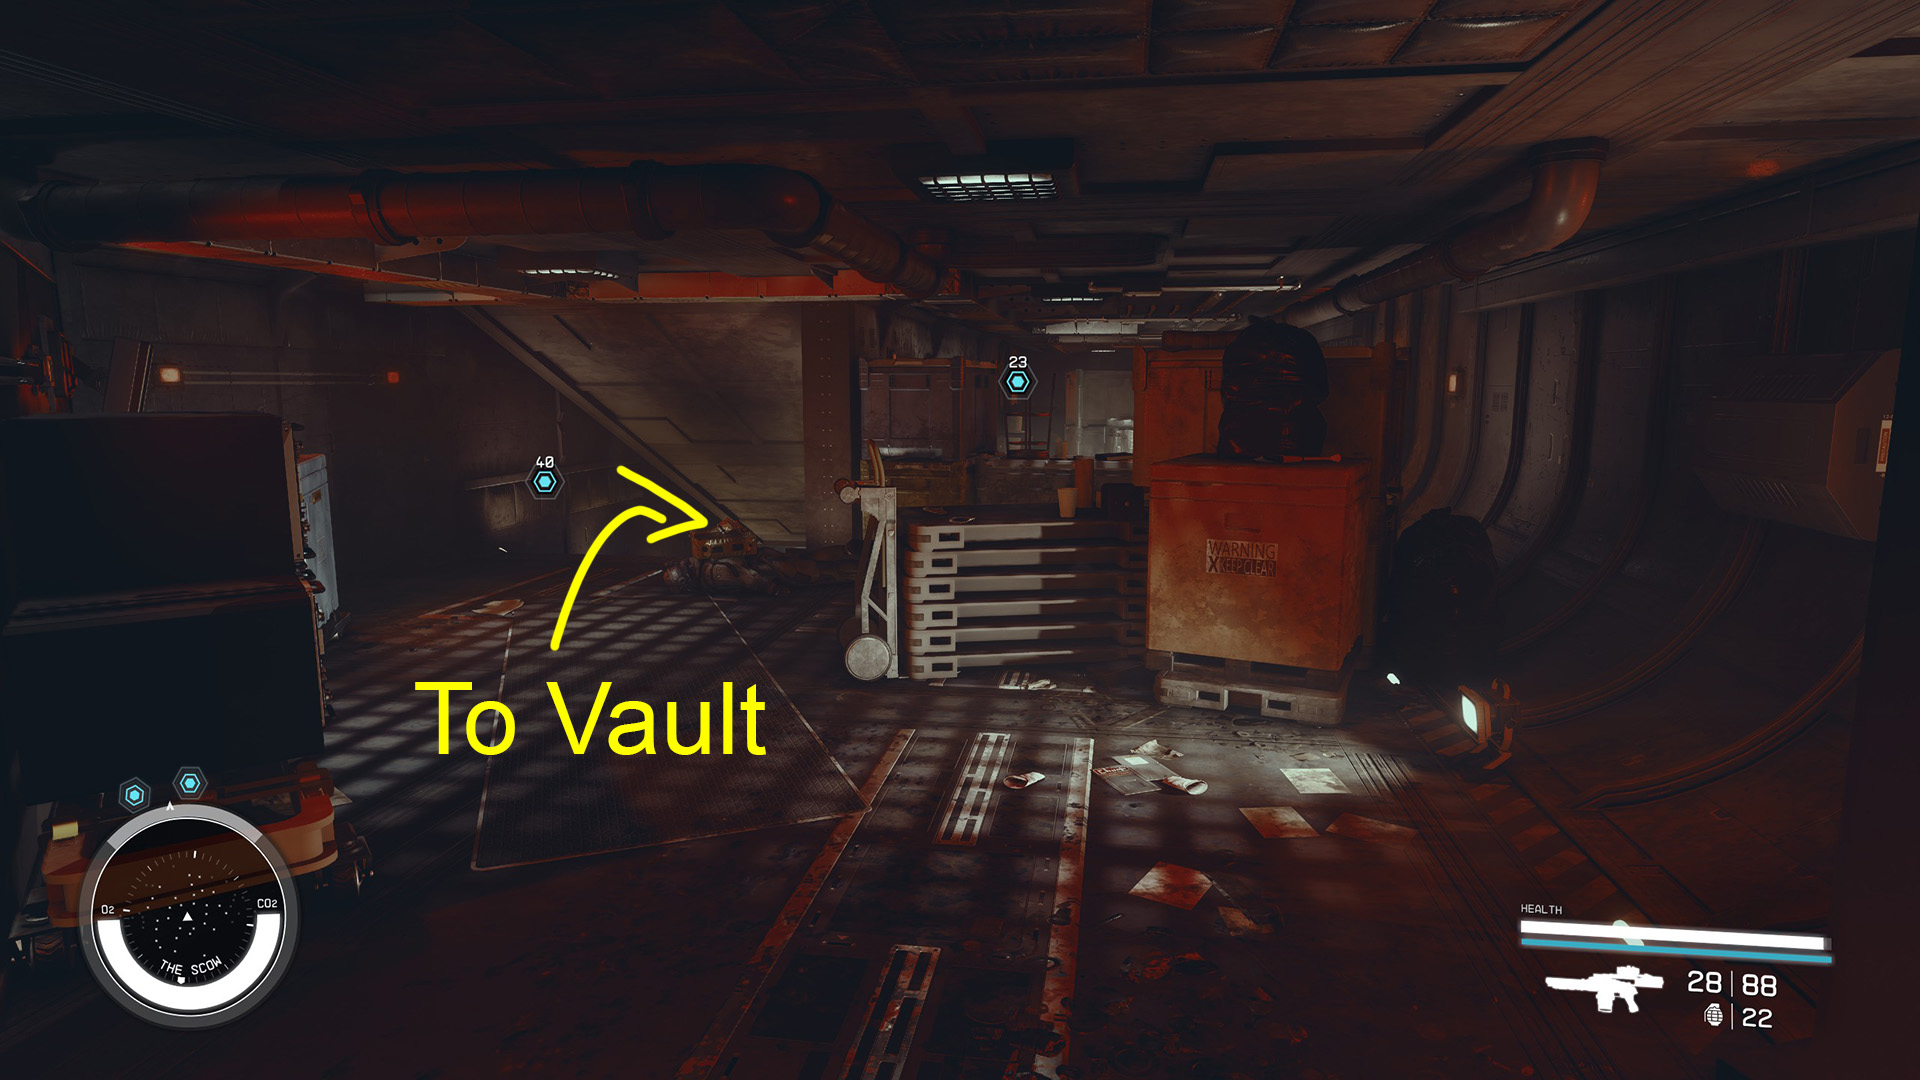
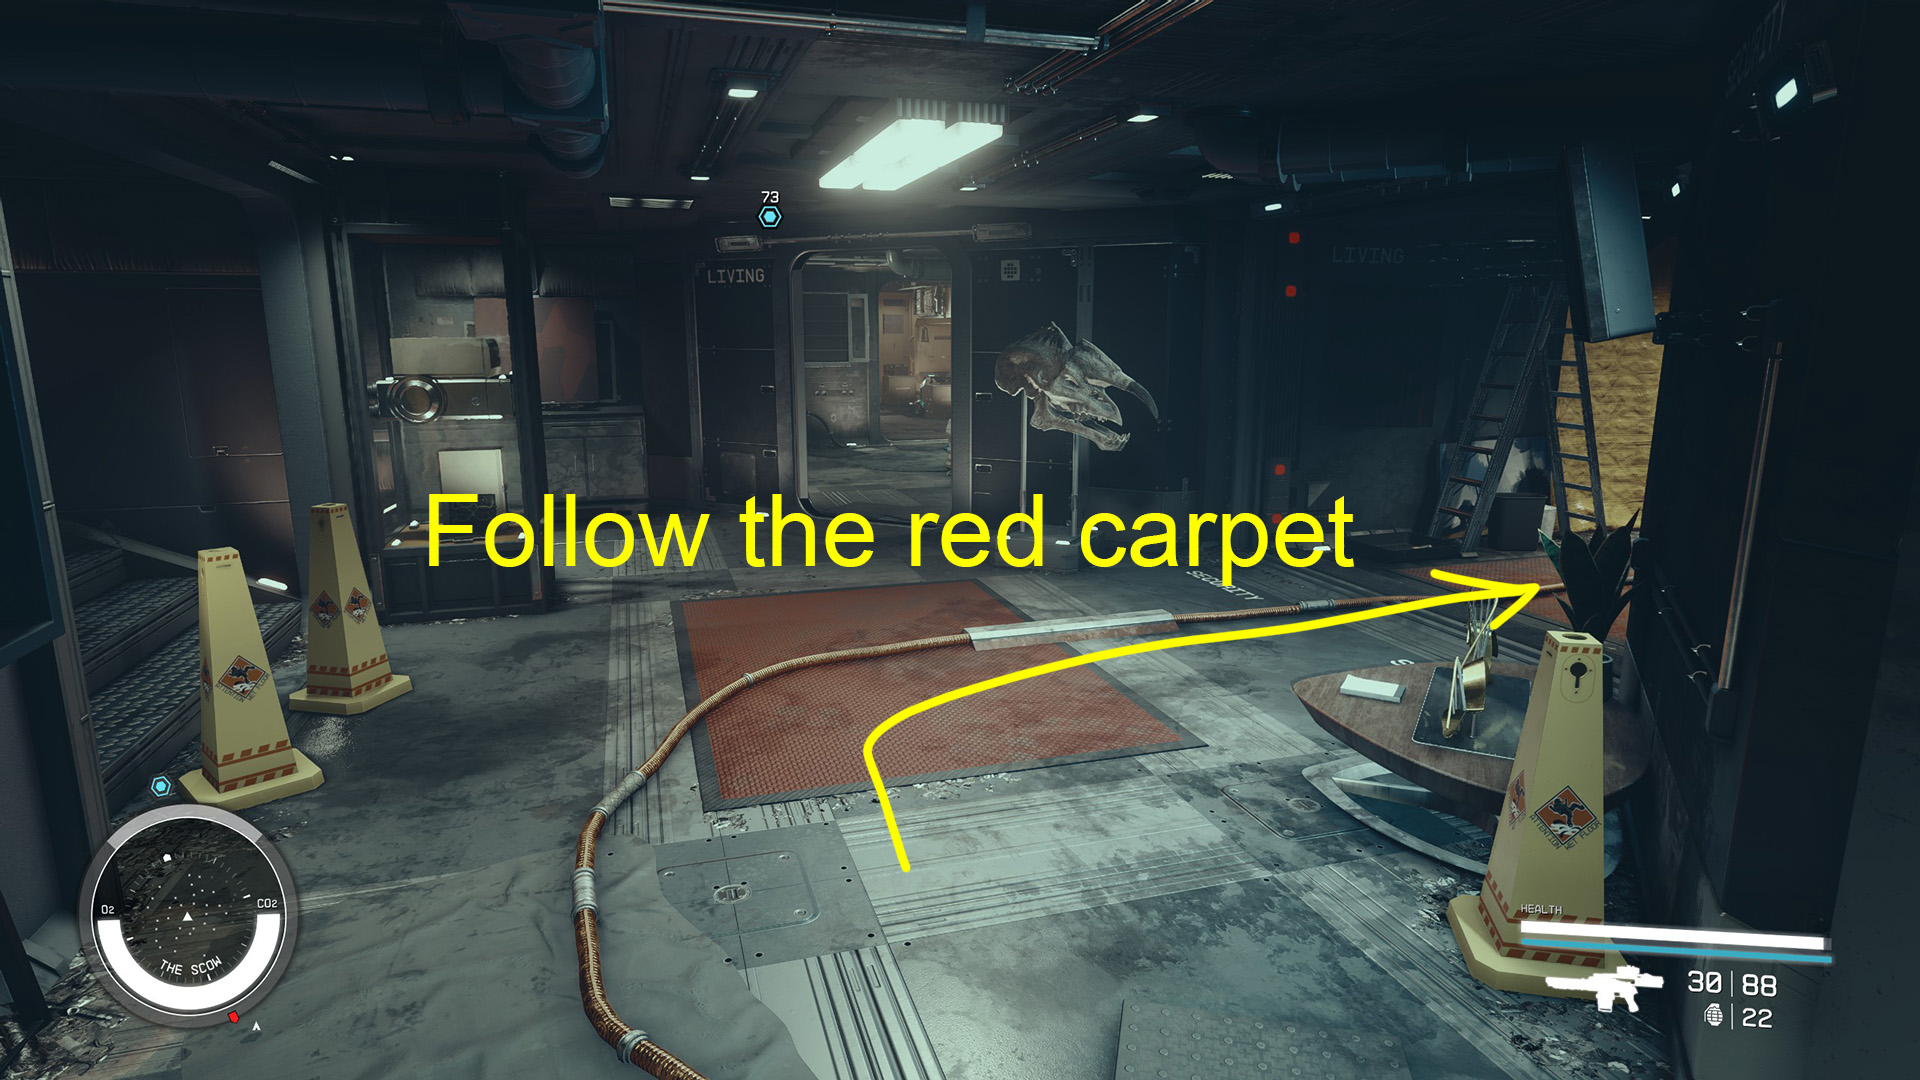
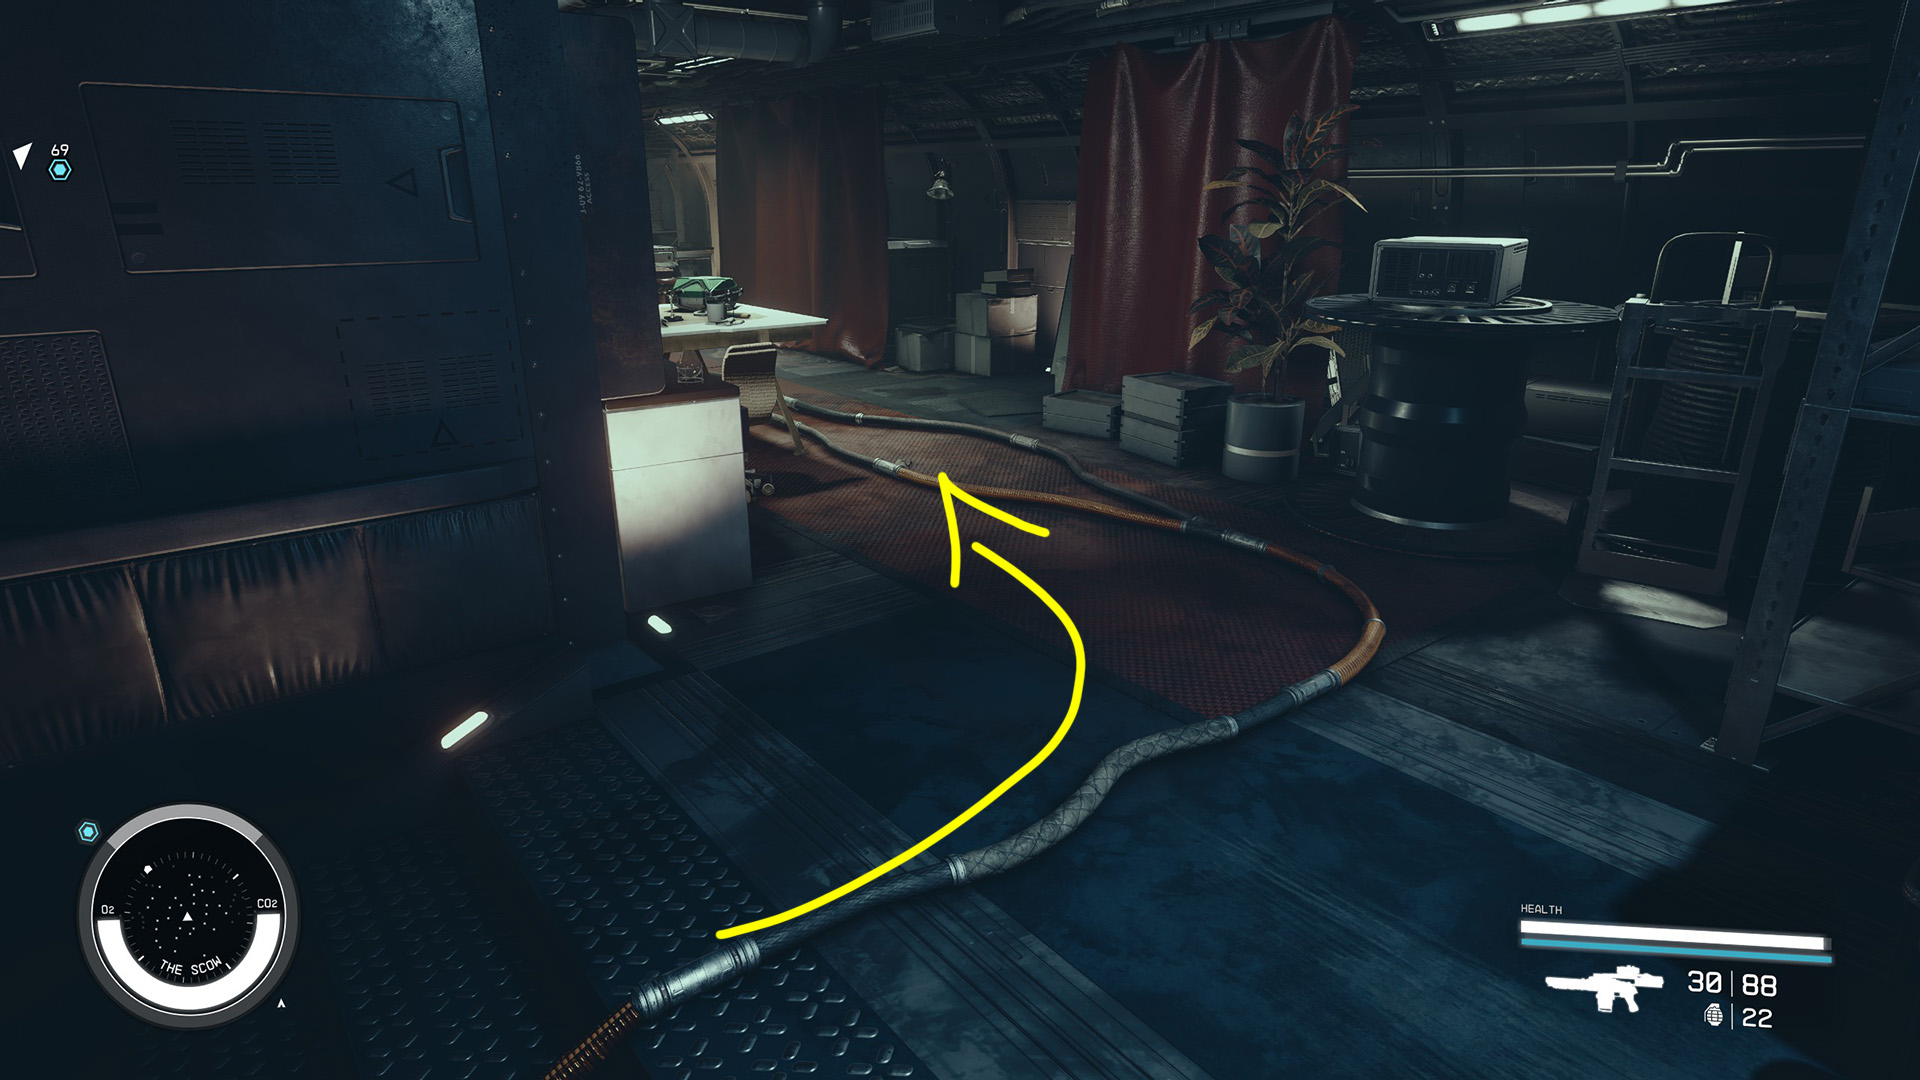
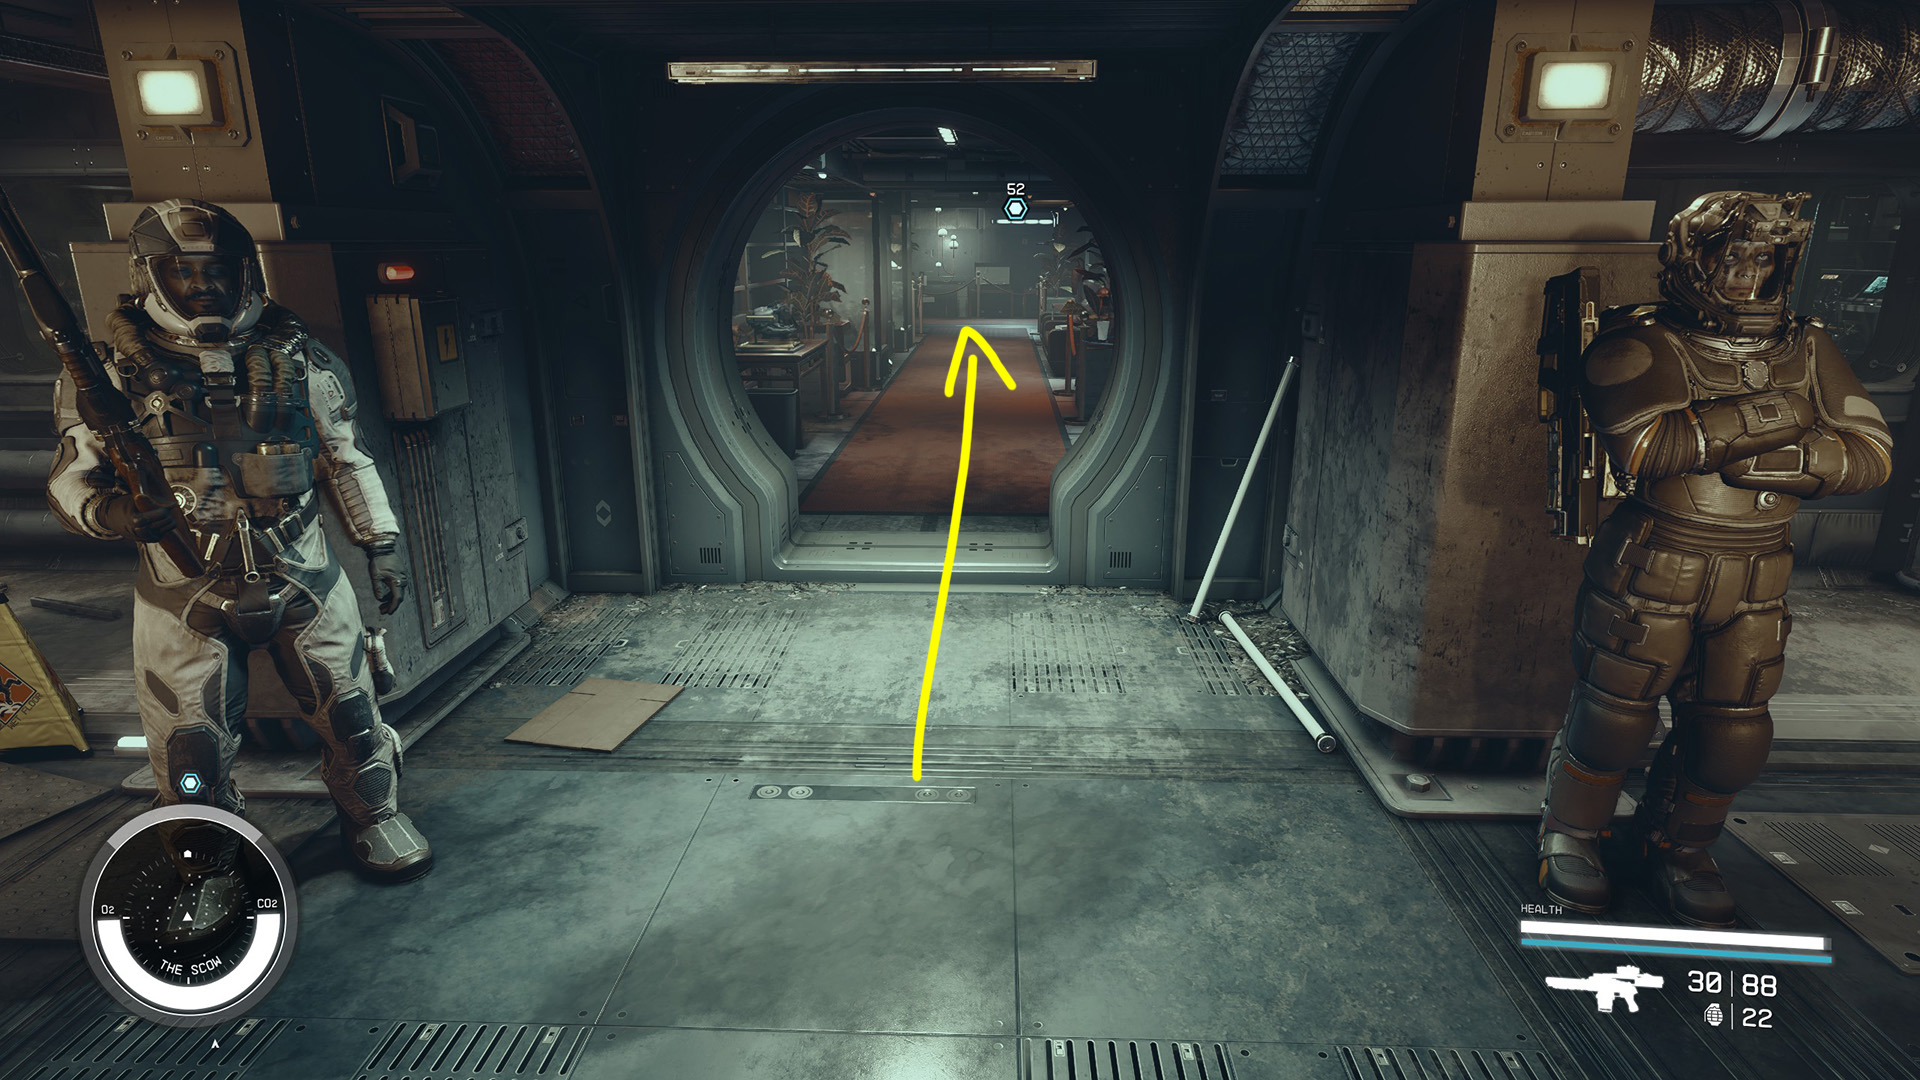
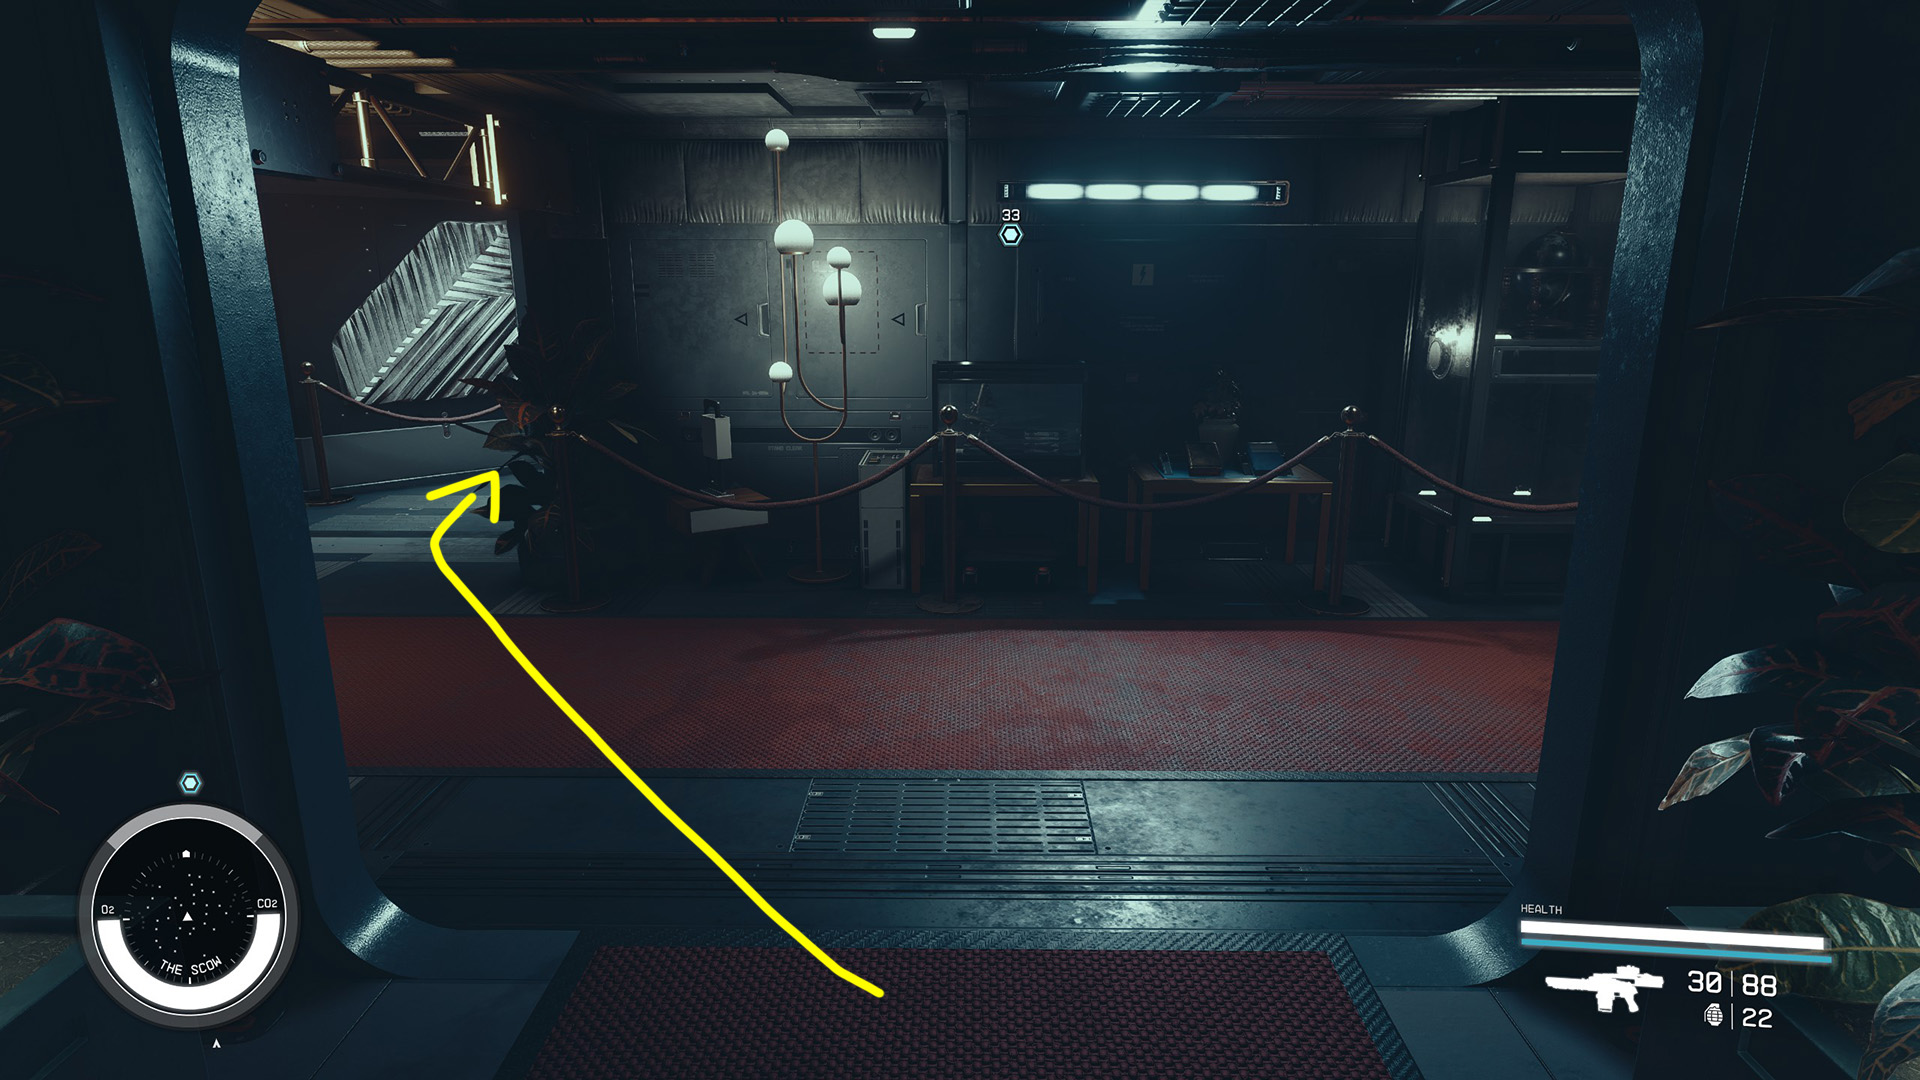
Follow the red carpet down the hall and up the stairs, then another hall and another set of stairs (Images 10 & 11). You’ll arrive at a door with two guards posted outside (Image 12). Go through it and follow the red carpet again, going through the doorway to the right or left (Image 13) and entering a large room with four golden statues.
Image 10Image 11Image 12Image 13
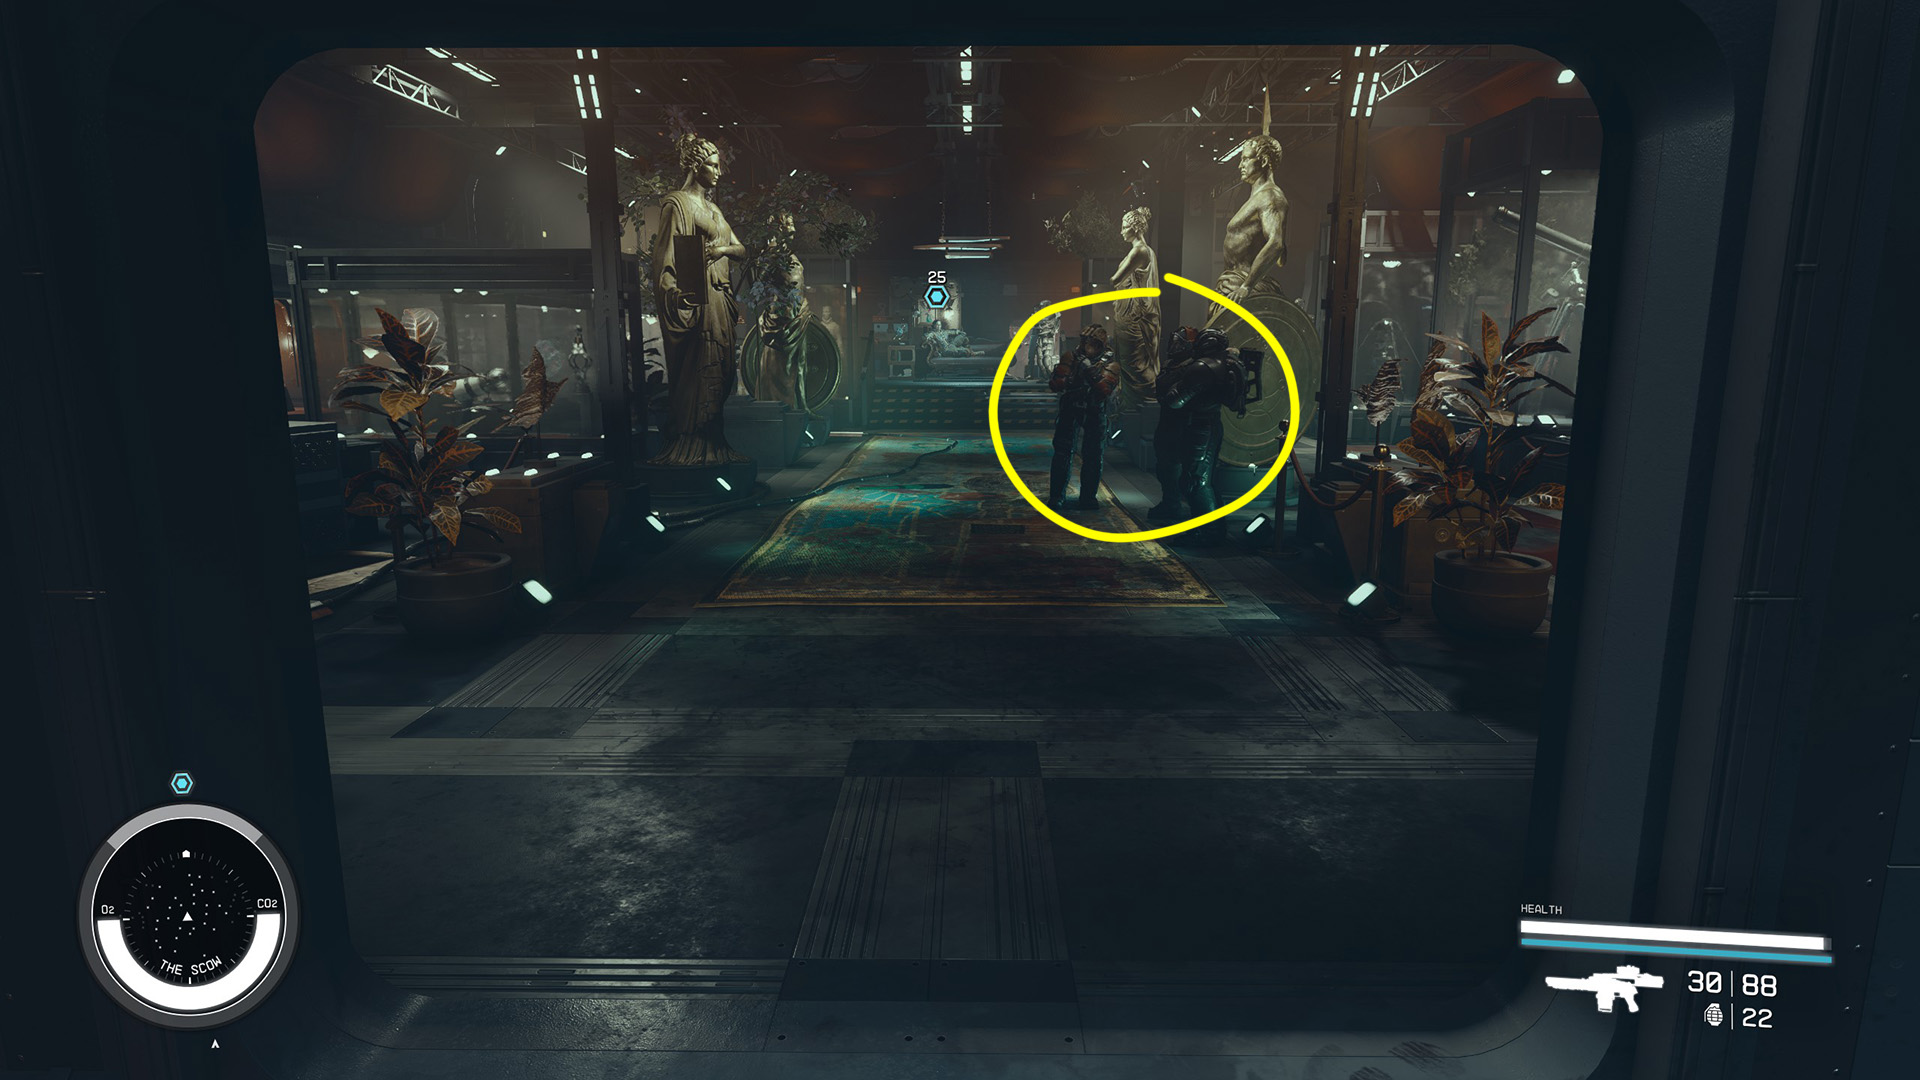
You’ll find three people gathered just inside the room: Erin September, Raptor, and Bull (Image 14). If you speak to one of them, they’ll place bets on what you might be here for. If you say you’re with the sanitation department, you’ll get an amusing response. You can ask them a few questions, and if you pay them 1000 credits, they’ll give you a tip about the ship’s vault which will add an optional objective, “Find the Thin Walls.” For another 1000, they’ll give you the Scow Zoo Password, which will add another optional objective, “Release the Zoo Aliens.” For 2500 credits more, they’ll be willing to side with you if a fight breaks out.
Image 14
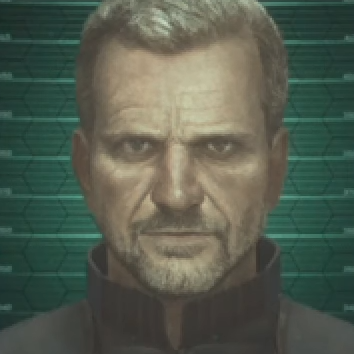
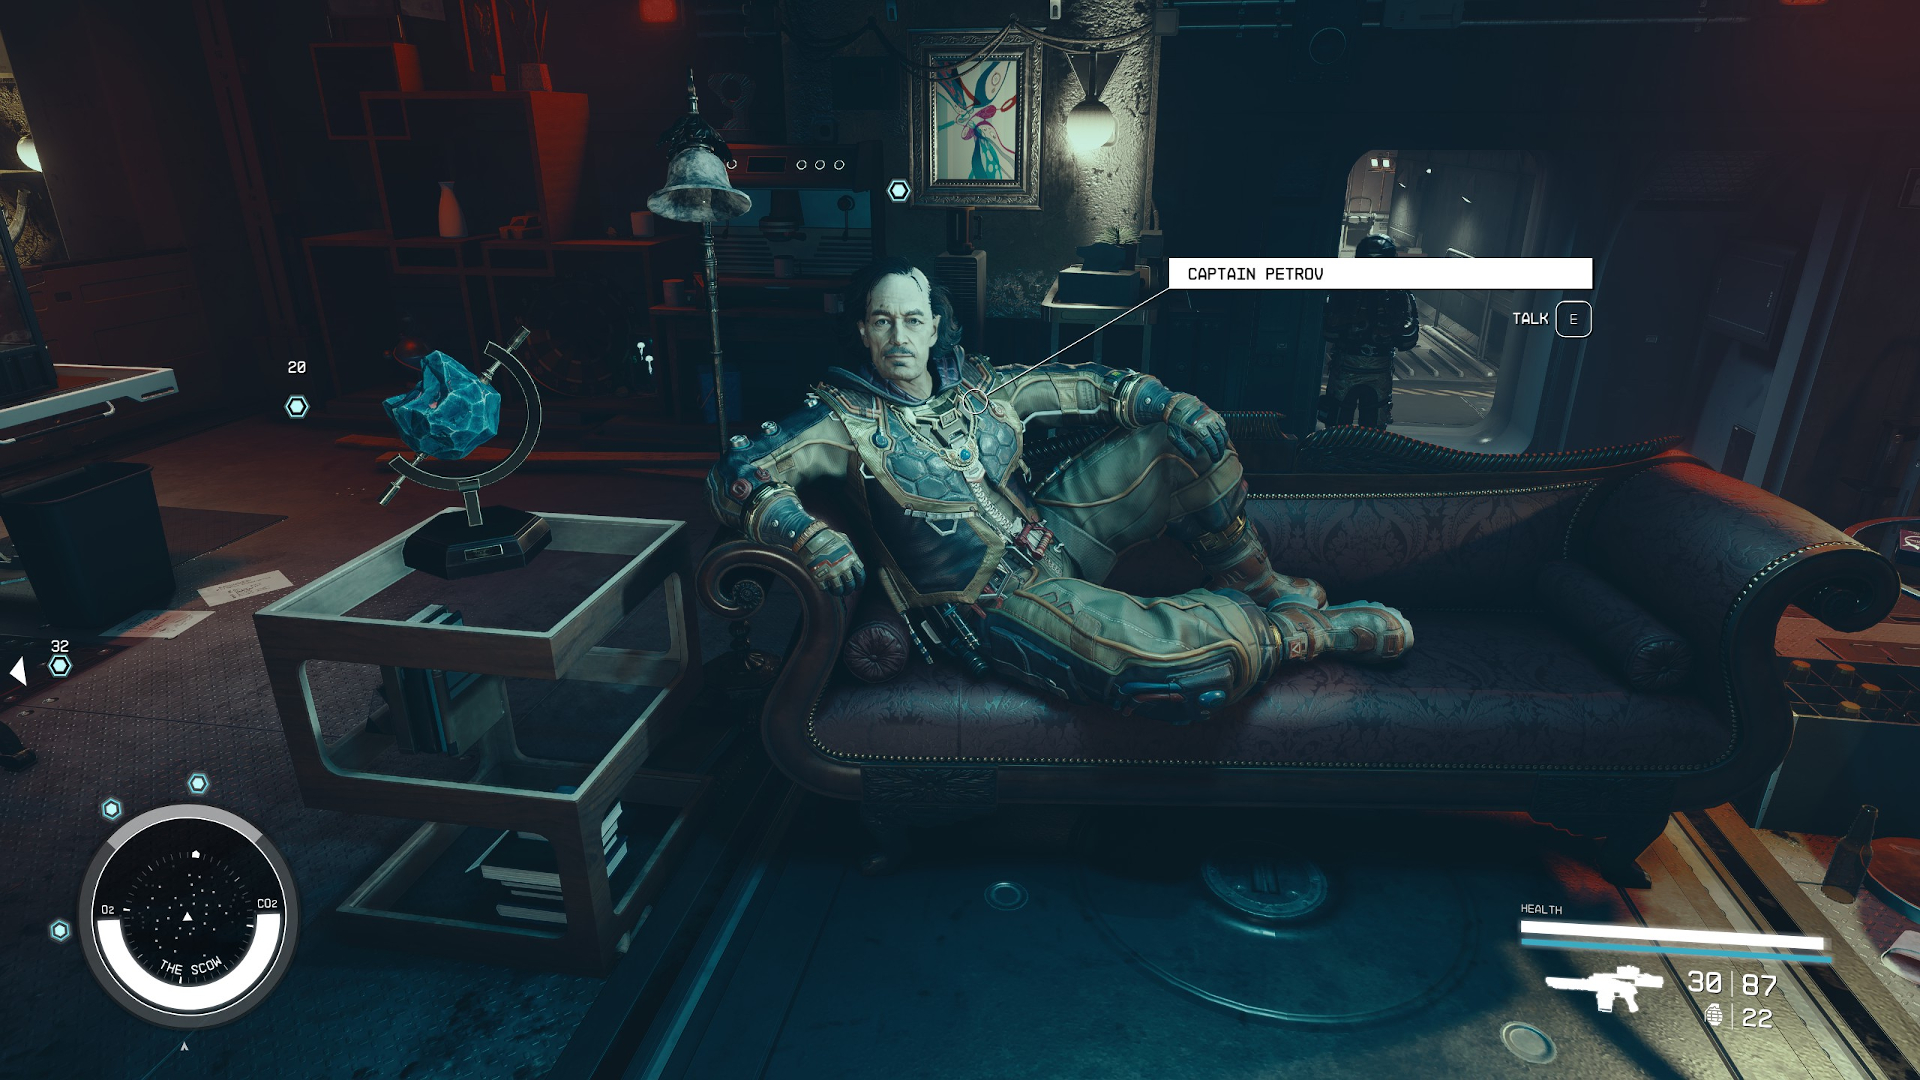
Head up to the dais in the middle of the room and speak with Captain Petrov (Image 15). You’ll have 3 options for dealing with him:
If you choose the [Persuade] option, you can convince Petrov to take you to the artifact. This will be tougher than it was to persuade your way onto the ship, but it’s doable. Skip ahead to the “Option A: Follow Petrov” section below if you succeed.
If you choose the [Attack] option, Petrov and all of his lackeys will become hostile. However, Petrov will surrender the minute you do any damage to him, so you don’t have to kill anyone if you handle it right. Skip ahead to the “Option B: Fight Petrov” section below if you choose this option.
If you say “Maybe I’ll just take a look around your ship. Enjoy your hospitality,” you will add three more optional objectives to the mission: “Fight Petrov,” “Pick the Vault Door Lock,” and “Pickpocket the Key to the Vault.” You can still choose one of the other two options by talking to Petrov again, or you can proceed to those sections below.
Image 15
Access Petrov’s Vault
To complete this mission, you’ll have to find some way to get inside the vault and take the artifact. We’ll cover each of the optional objectives in their own section below. You will only need to do one or two of these to get into the vault, but you can do all of them if you want to. Completing an objective that gets you access to the vault will remove some of the others from your mission log, but they can still be done.
Option A: Follow Petrov
If you successfully [Persuade] Captain Petrov, you can follow him back through the ship to his vault. Note that as soon as he agrees to show you the artifact, you will be able to access the vault area without the guards becoming hostile. So if you want to you can run ahead of him and use any of the other methods to enter the vault, earning some extra XP in the process. However, keep in mind that as soon as you grab the artifact, Petrov and all of his guards will become hostile.
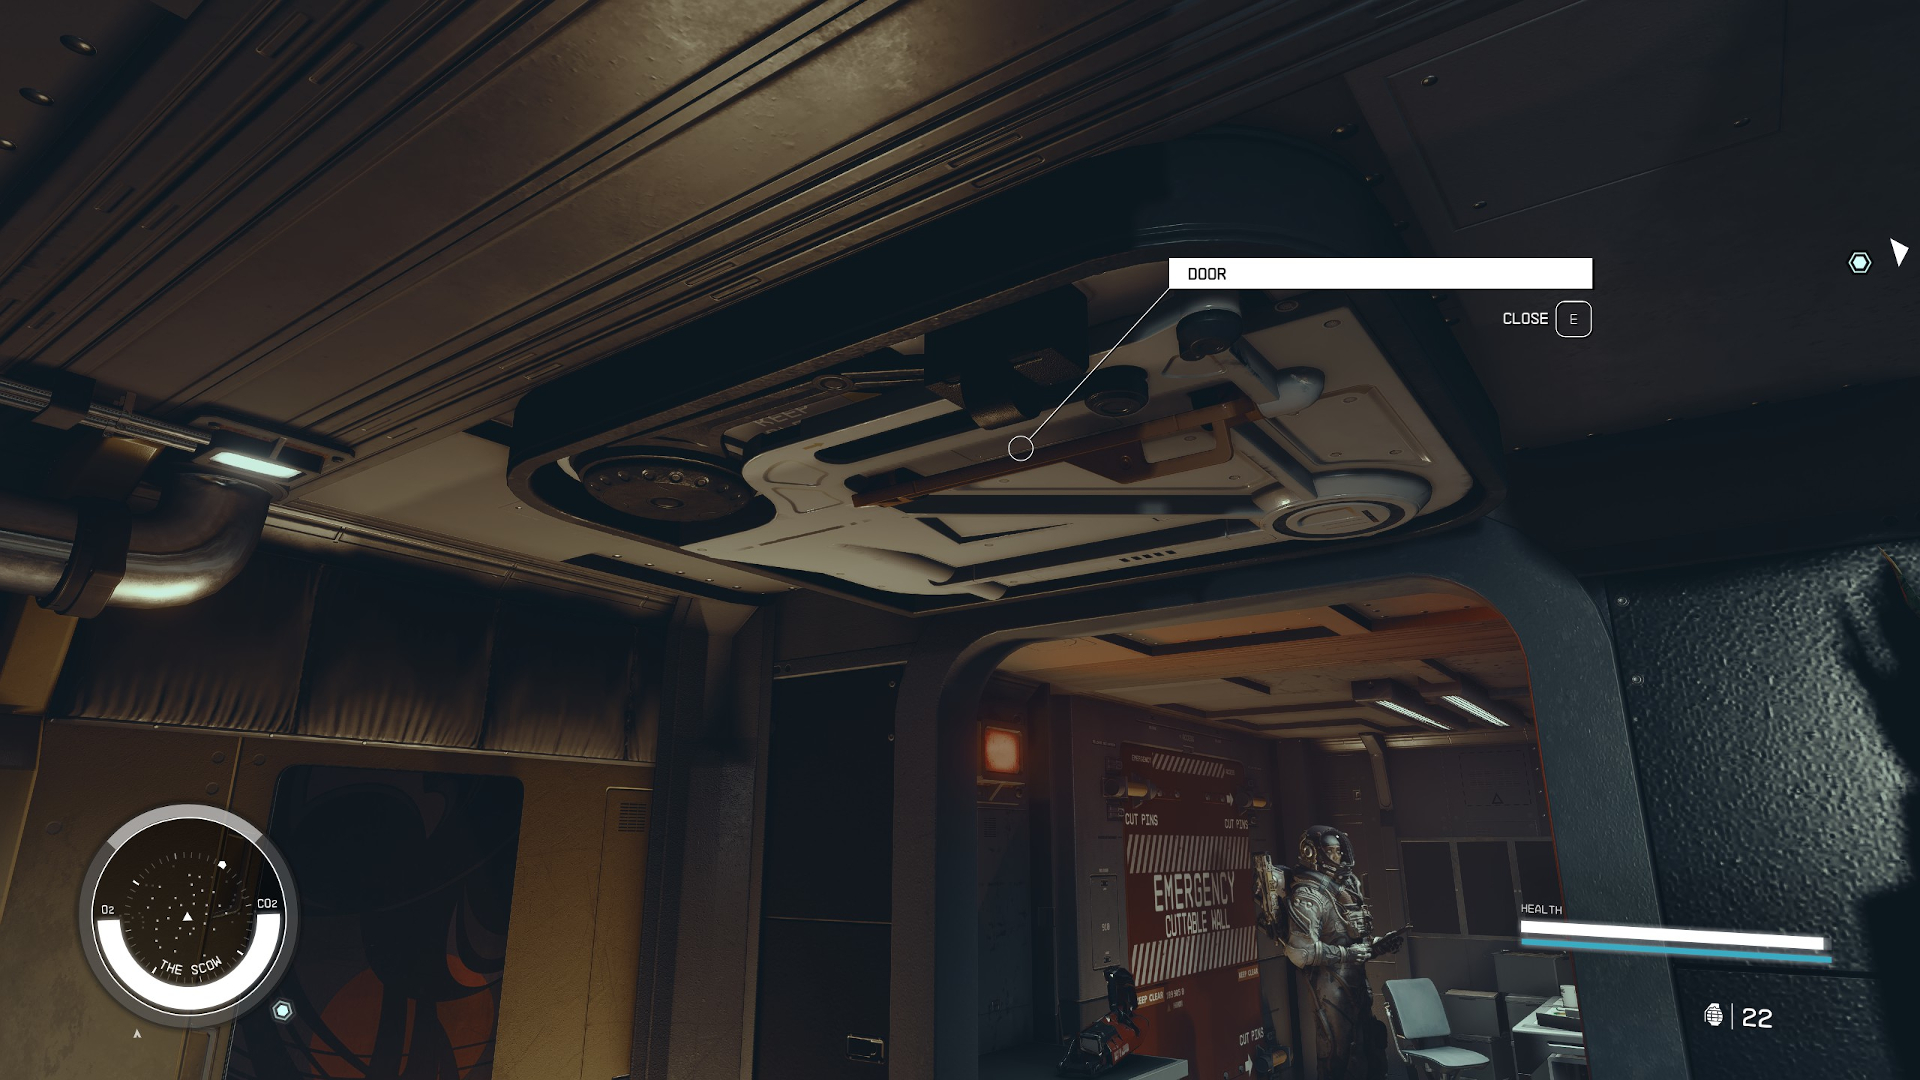
If you do follow him, he’ll open the vault for you and show you the artifact. Before you talk to him, turn around and close the door behind you. You’ll have to look up at the ceiling above the door frame to activate it (Image 16). This will reduce the likelihood of collateral damage when you take the artifact.
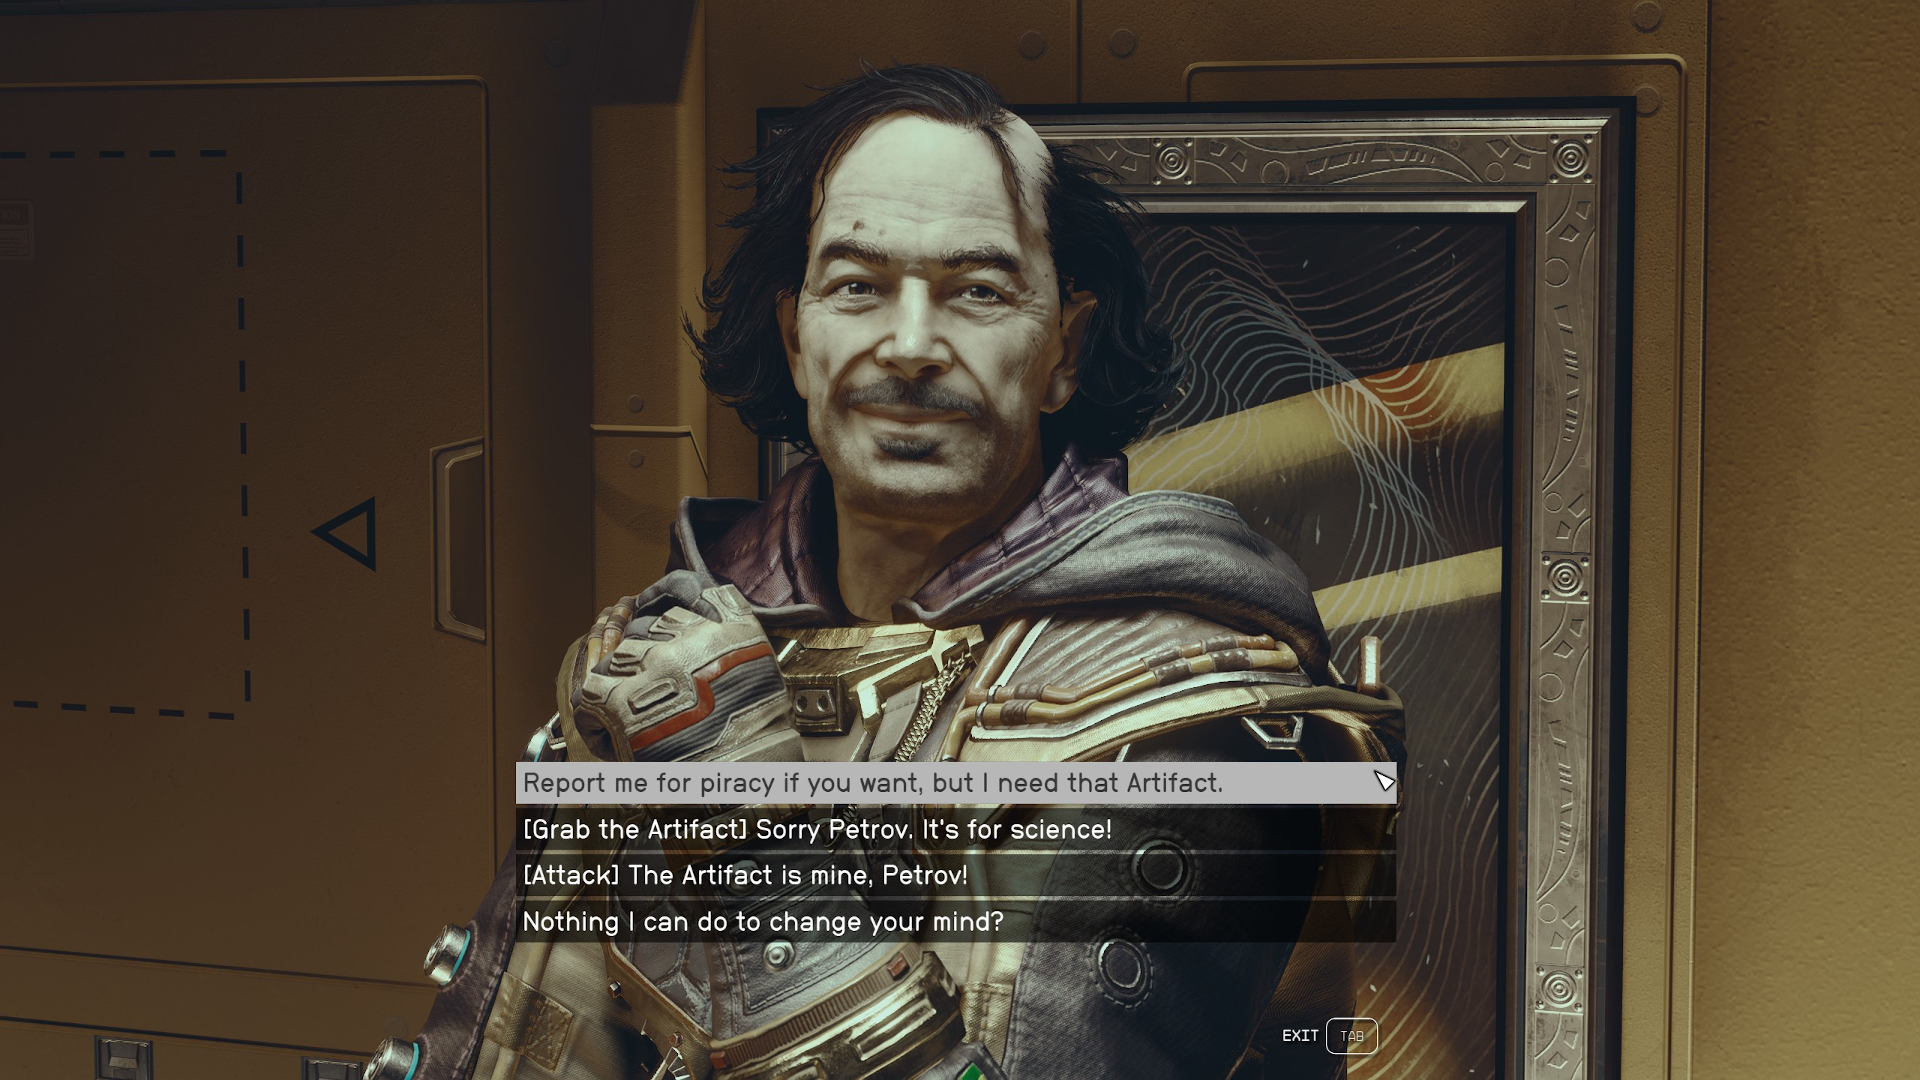
You can now speak with Petrov and choose to [Attack] or [Grab the Artifact], either of which will make Petrov and all of his guards hostile. Or you can say “Report me for piracy if you want, but I need that Artifact.” Sarah Morgan will like this, but it won’t get you anywhere and Captain Petrov won’t talk to you anymore. You’ll have to attack him or take the artifact in front of him.
Image 16Image 17
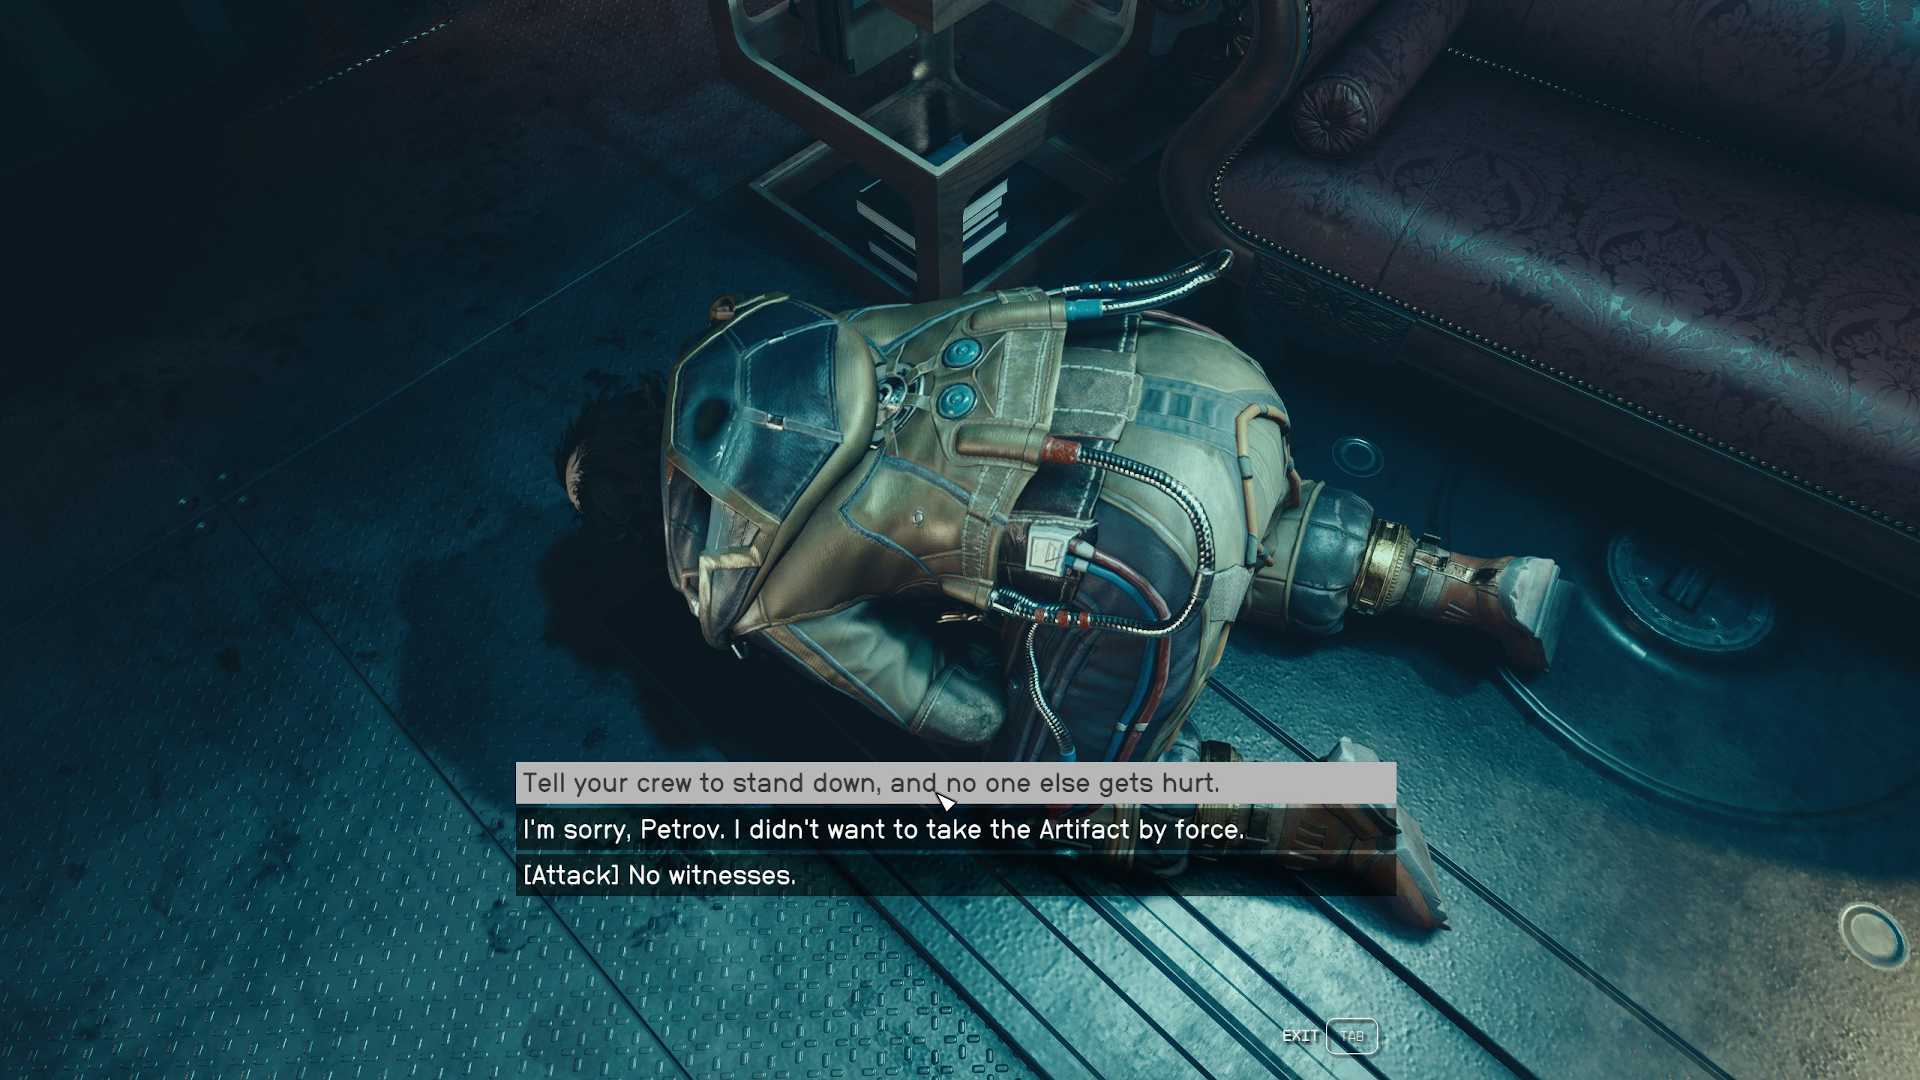
There’s no way to walk out of the Scow with the artifact without stealing it. Whether you take the artifact or attack first, you’ll have to fight Petrov. Lucky for you, Petrov will immediately surrender if you do any damage to him. So you don’t have to kill anyone unless you want to.
When he surrenders, if you tell Petrov “Tell your crew to stand down, and no one else gets hurt,” Sarah Morgan will like that. If you choose “[Attack] No witnesses,” she will dislike it.
You’ll still be able to complete the remaining optional objectives if you wish, but they aren’t necessary. We’ll cover those in the sections below. Otherwise, skip ahead to the section “Steal the Artifact.”
Option B: Fight Petrov
If you choose the [Attack] option at any point, or just start shooting, Petrov and all of his lackeys will become hostile. If you’ve recruited the trio of scavengers in Petrov’s room, they can make quick work of most of the guards in the room. Petrov himself will try to run if you let him, but if you shoot him once or twice, he’ll surrender and the guards will stop attacking. Do this quickly enough and you won’t have to fight anyone else. Alternatively, you can shoot the place up and you’ll be able to loot all the guards, then chase him down last.
If you tell Petrov “Tell your crew to stand down, and no one else gets hurt,” Sarah Morgan will like that. If you choose “[Attack] No witnesses,” she will dislike it. Choosing either of the top two options will get you Petrov’s Vault Key. If you decide to kill Petrov, you’ll have to loot it from his corpse instead.
You’ll still be able to complete the other optional objectives if you wish, but they aren’t necessary. We’ll cover those in the sections below. Otherwise, skip ahead to the section “Steal the Artifact.”
Image 18
Option C: Release the Zoo Aliens
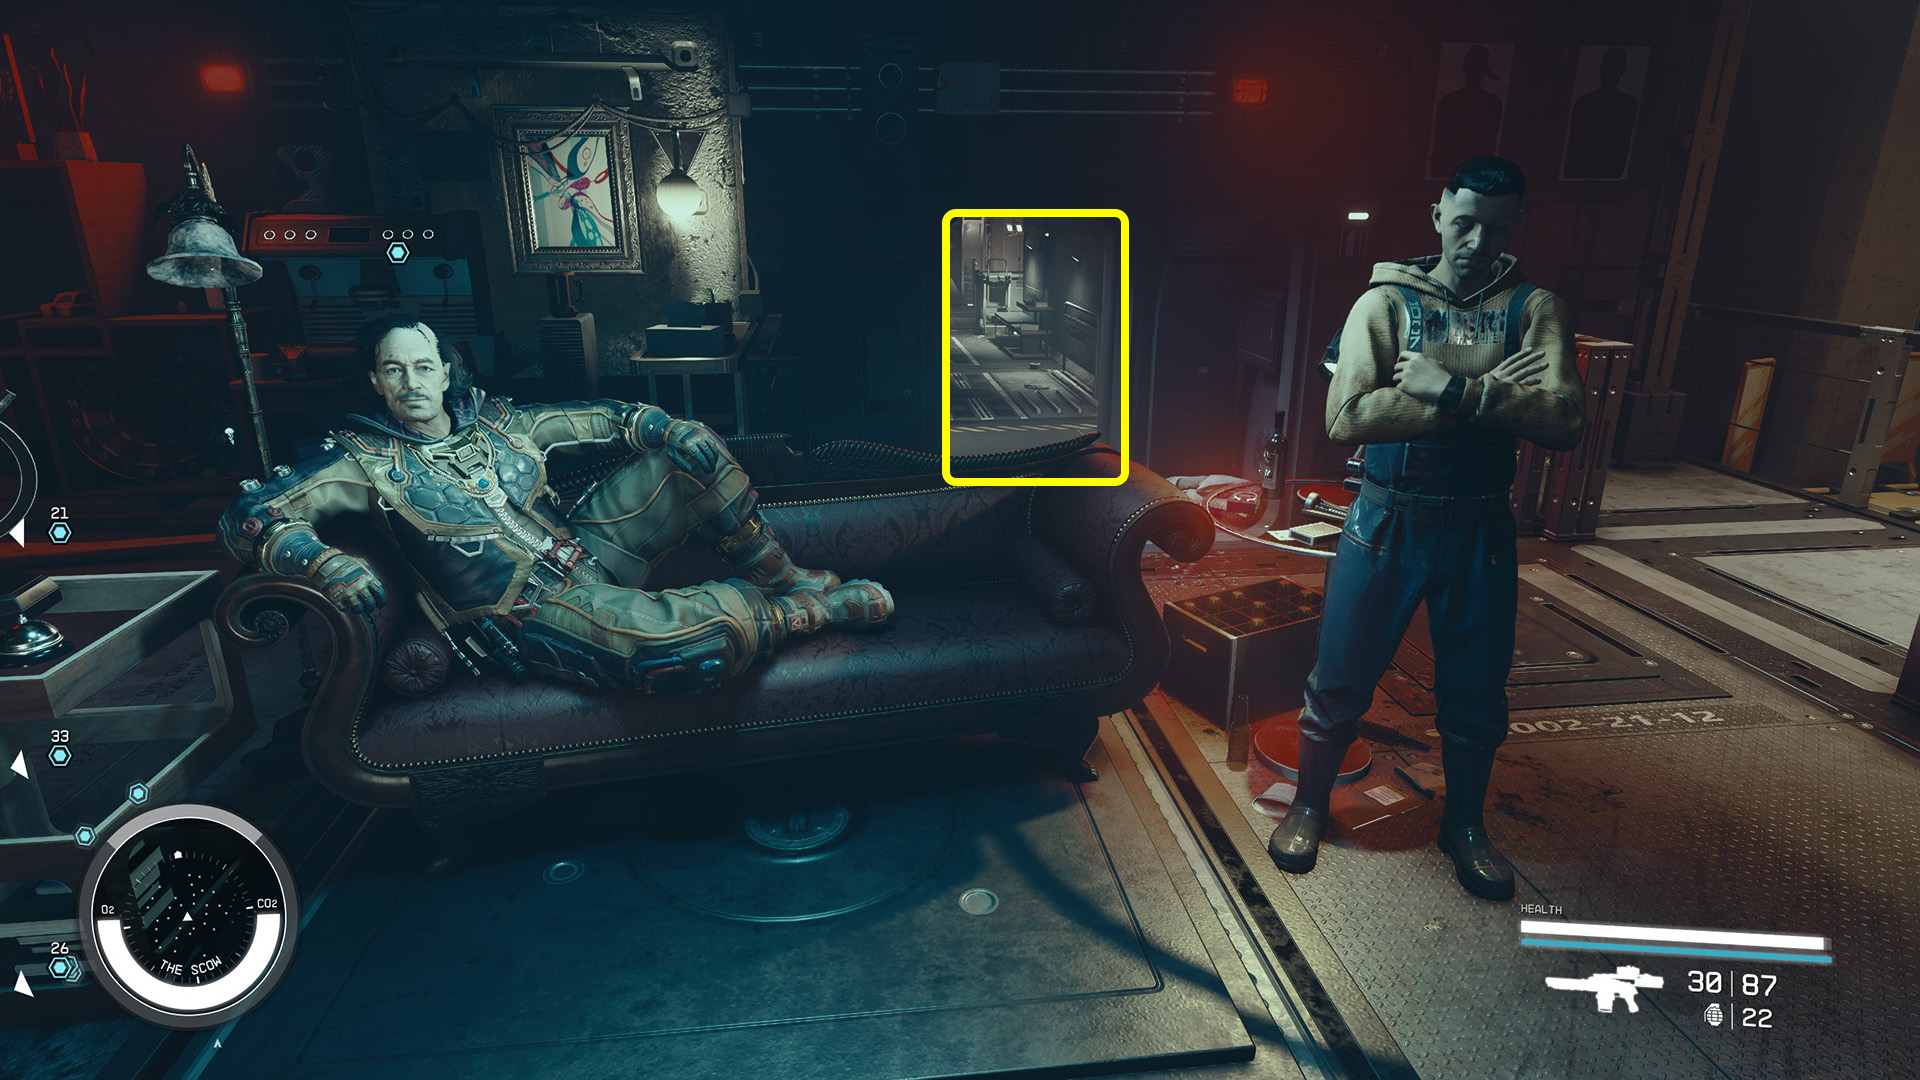
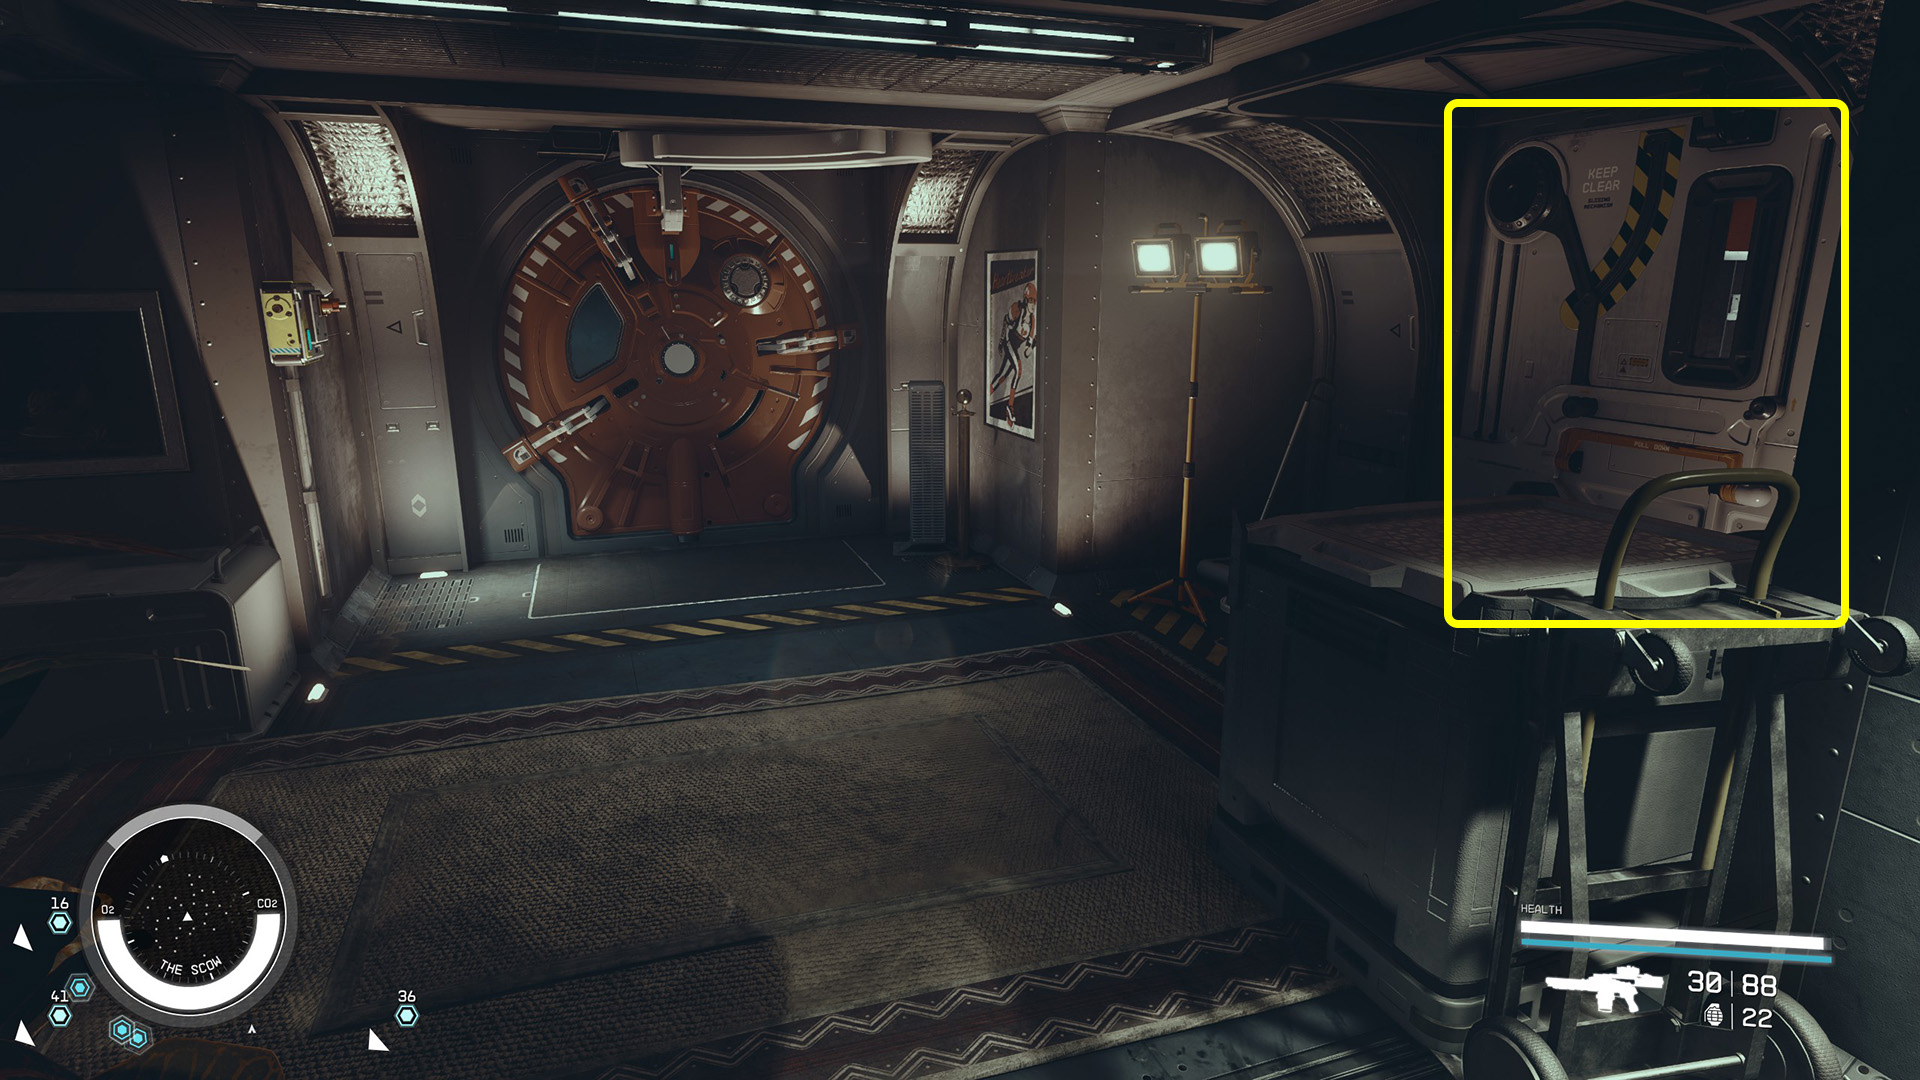
There are two ways to complete this objective. One way is to go through the door behind Petrov’s Couch (Image 19) and look for a locked door on the right side of the hallway (Image 20). This door can be opened with the Scow Service Key or rank 1 of the Security skill. The Scow Service Key can be pickpocketed from one of the Scow Crew members if you have the Theft skill.
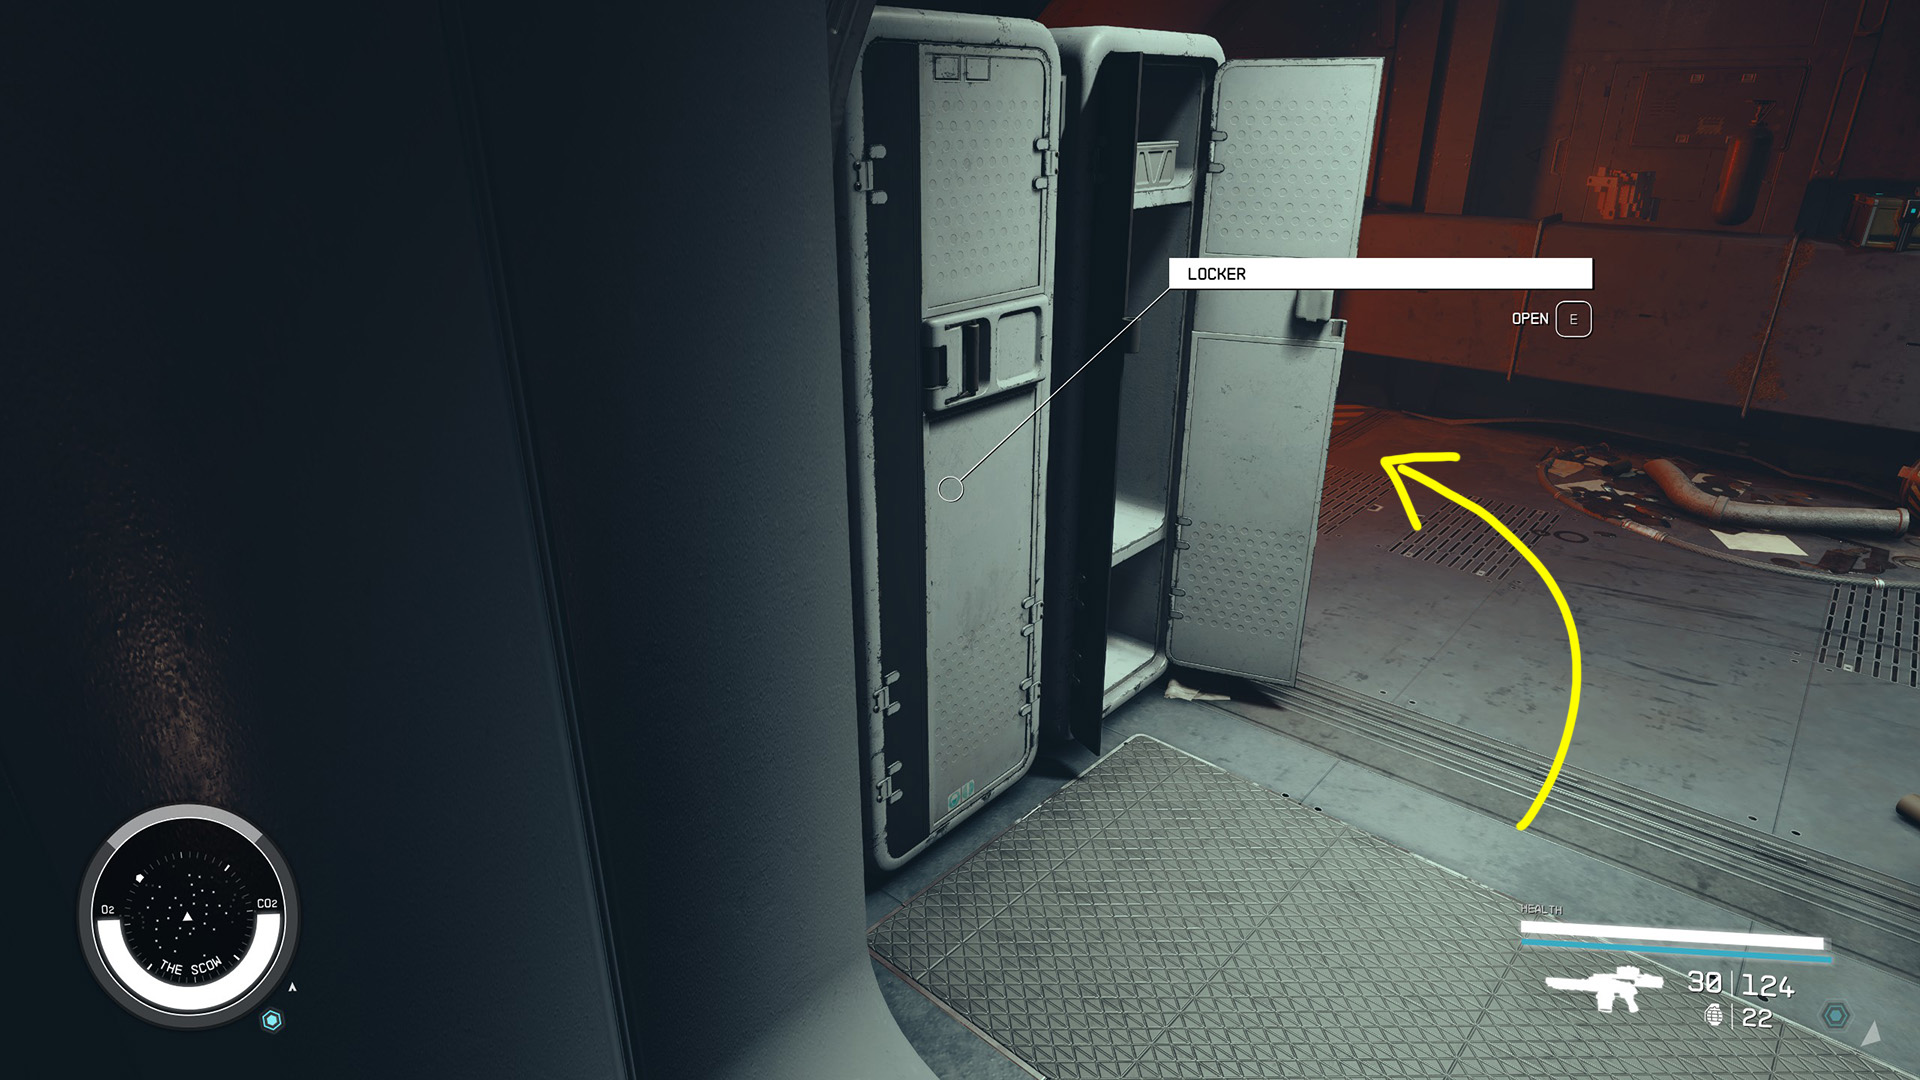
Once inside, go around the lockers to the left and jump down the narrow shaft (Image 21). You’ll find yourself in a large room. On one of the walls you’ll see a Secure Cell Control (Image 22). Activate it and select Open Doors, then exit out and watch the chaos through the window.
Image 19Image 20Image 21Image 22
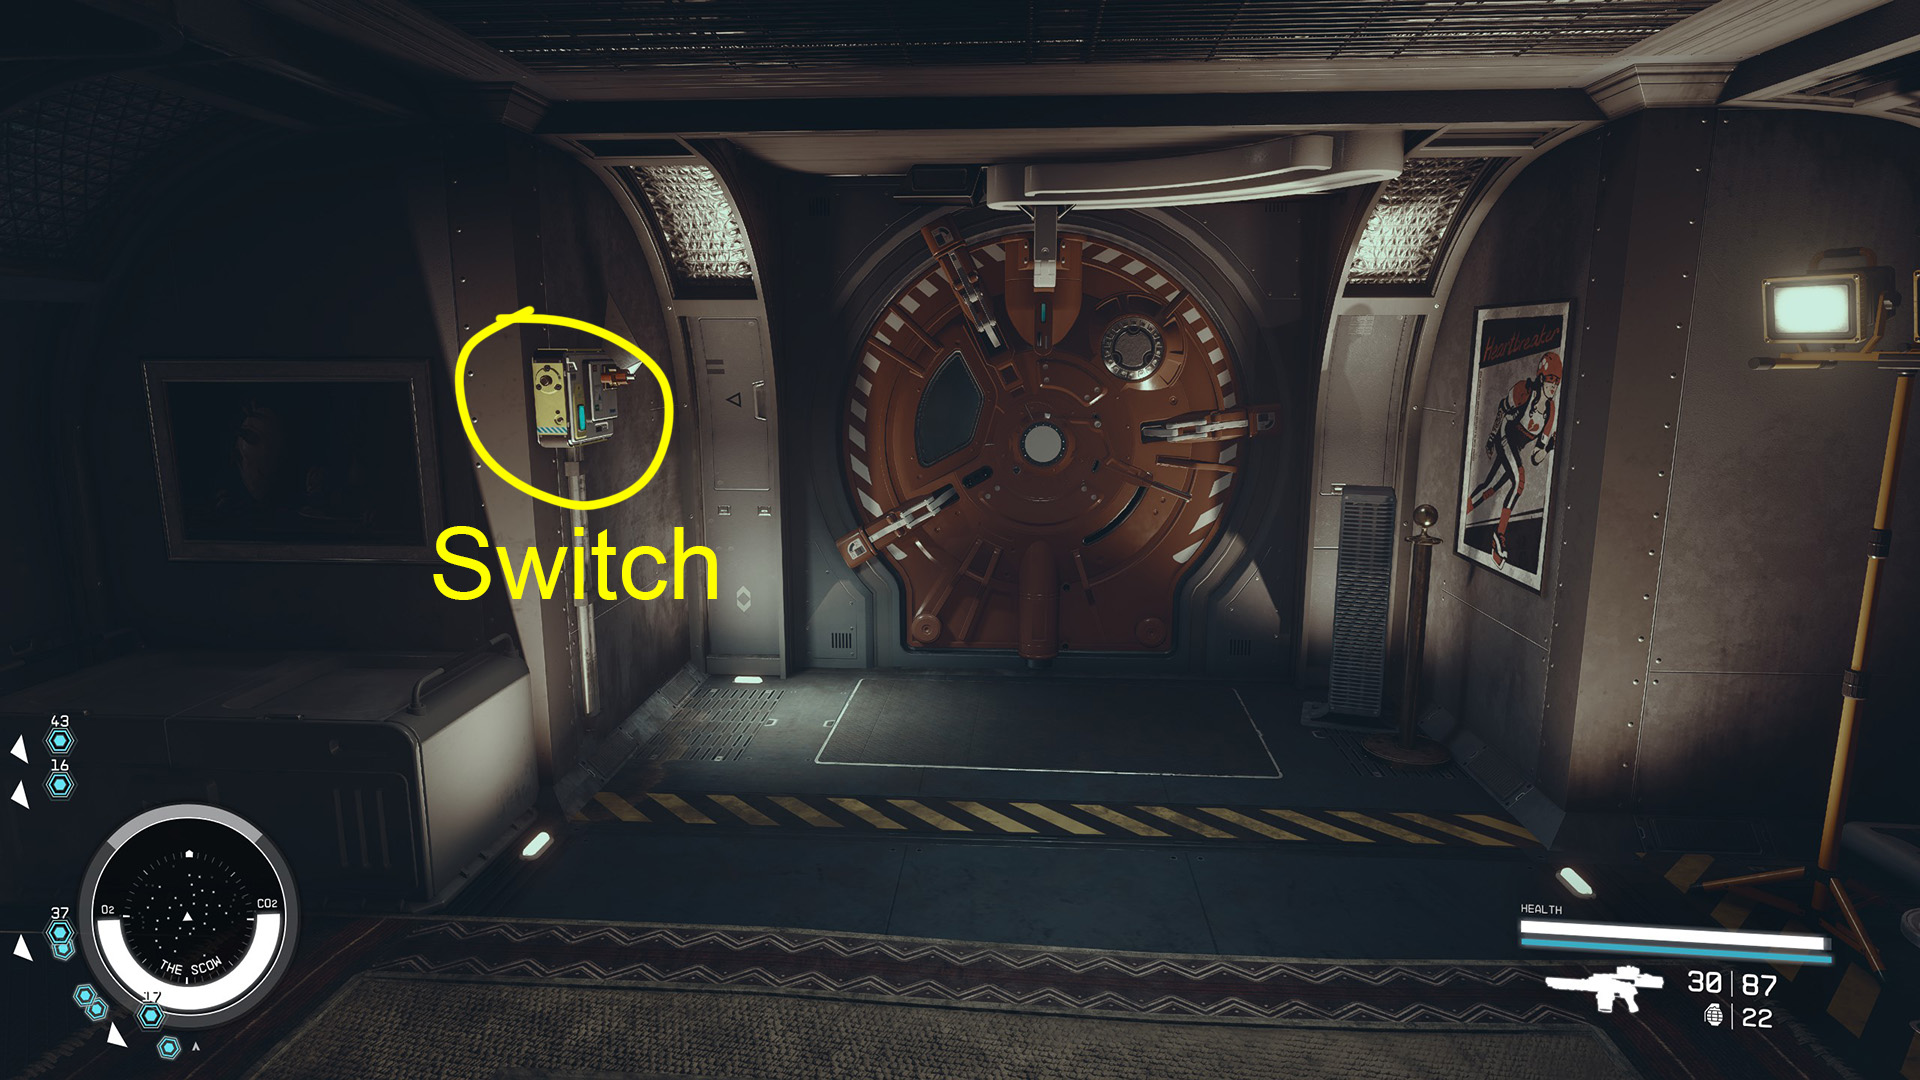
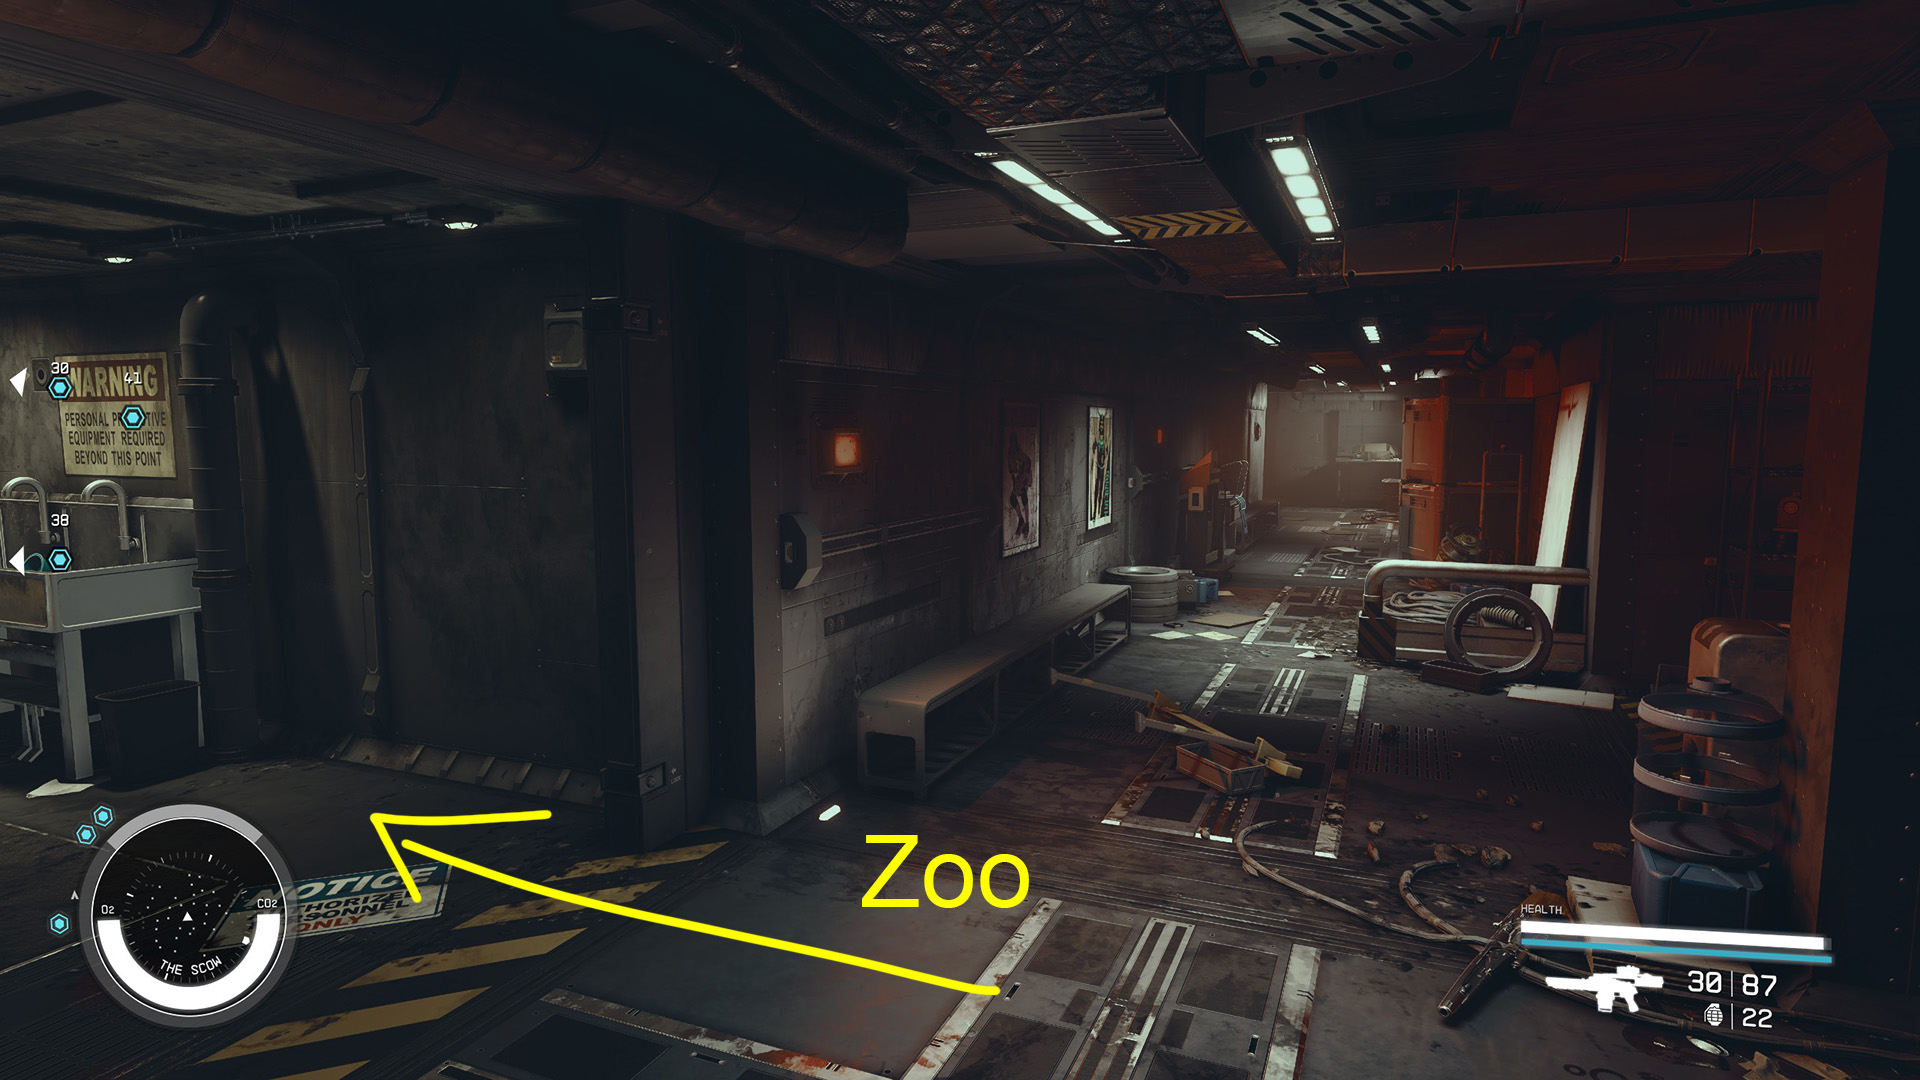
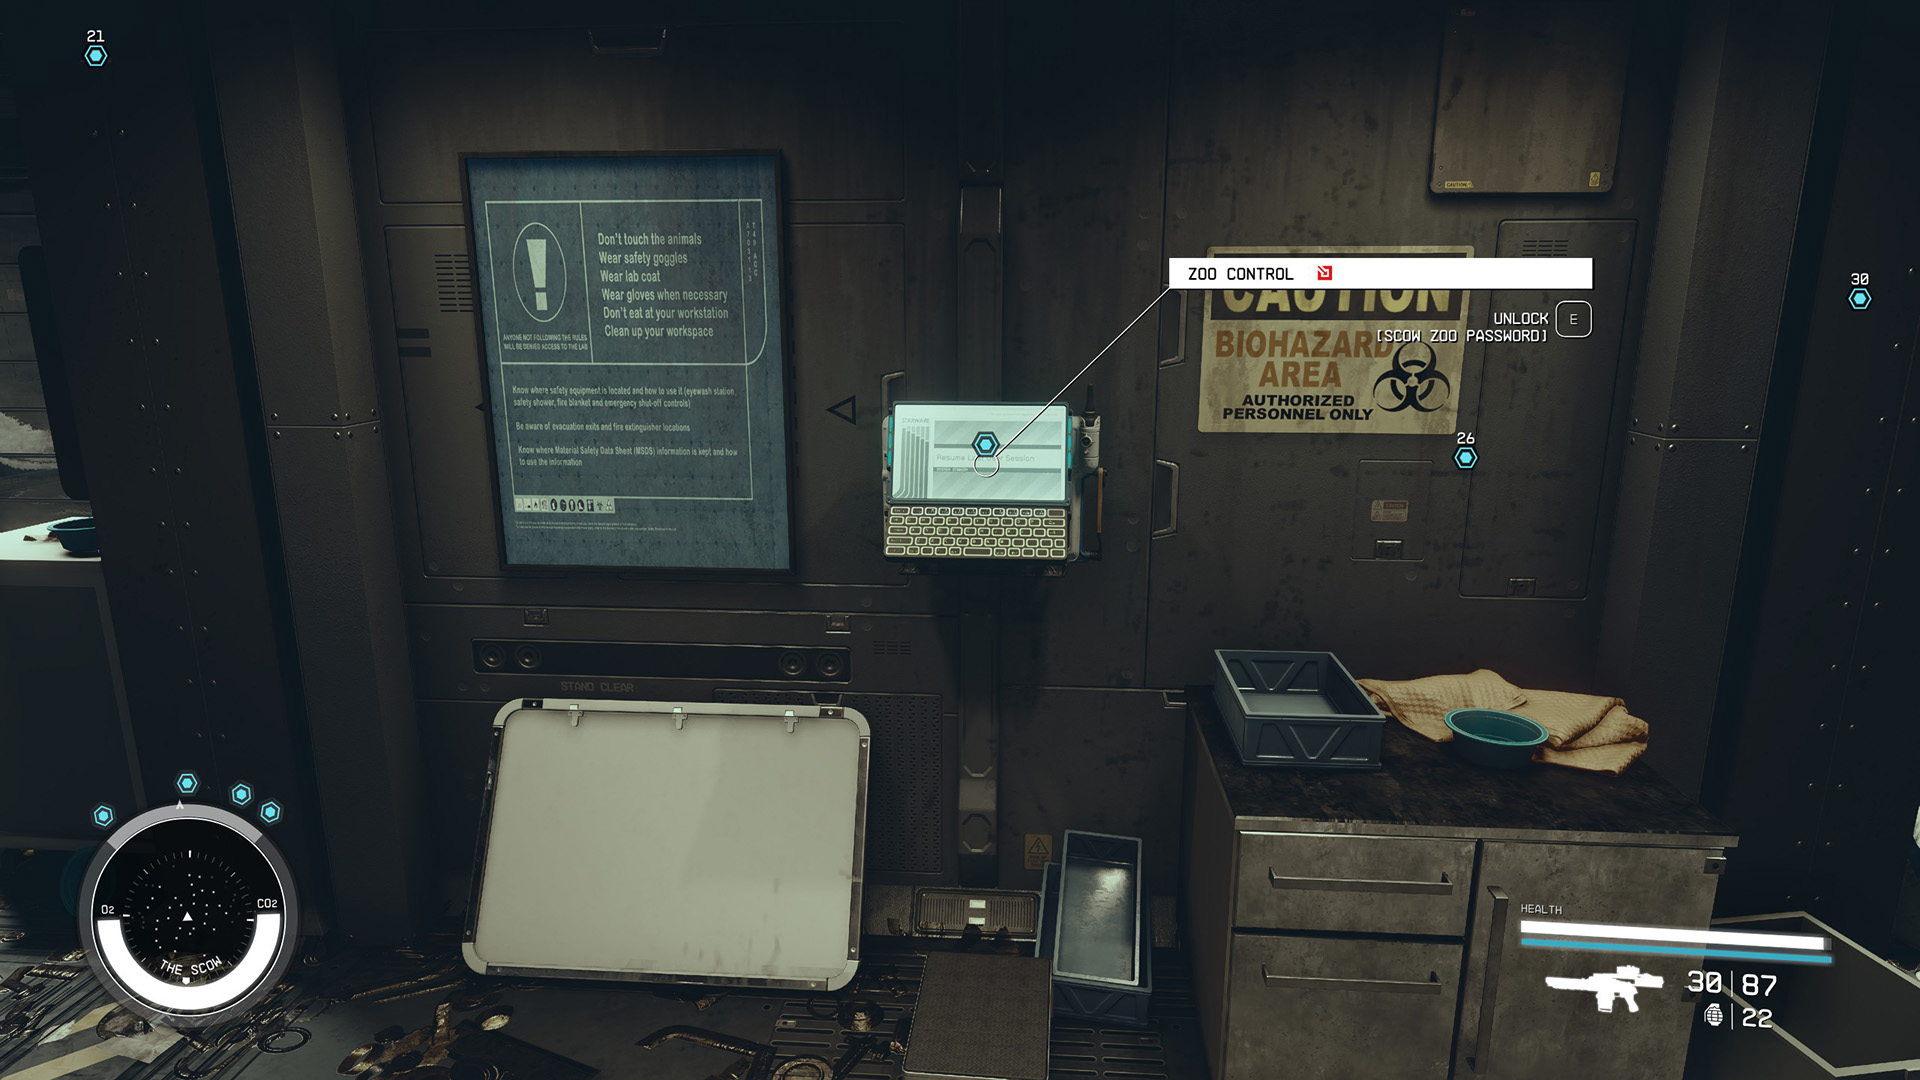
The other method is to use the Switch at the end of the hall to open the red door (Image 23). Head down the stairs and take the first left into a hallway with a large utility sink (Image 24). You’ll find yourself in a hallway lined with locked cells containing various types of hostile alien creatures. On the wall in the center is the Zoo Control computer (Image 25), which you can access if you obtained the Scow Zoo Password from the trio of scavengers in Petrov’s room. Otherwise you will need at least rank 3 of the Security skill to unlock it. Activate the Zoo Control and click Open Doors. Then exit the computer interface and watch the chaos as the creatures hunt down their captors.
Image 23Image 24Image 25
However you release them, the aliens will ignore you, but you can kill them for the loot and XP if you wish. Be sure to go into their open cells and loot those as well.
The aliens will clear out much of the back part of the ship, but they won’t really help you get into the vault. The aliens won’t kill Petrov or the three named scavengers, and everyone will return to their original places when all of the creatures have been killed, as if nothing happened.
Option D: Find the Thin Walls
For this objective you’ll need to enter the vault area, which is off limits unless you successfully persuaded Petrov or got him to surrender. If that’s the case, you can just walk right in and no one will care. Otherwise, if any of the guards spot you they’ll all turn hostile. You can try to be sneaky, but you will probably need heavy investment in stealth skills, and you’ll have to quietly take out a few guards along the way. Even if you do pull it off, everyone will turn hostile when you loot the artifact anyway.
Sneaking past the guards will be a lot easier if you have at least one rank in the Stealth skill, which allows you to see the stealth meter. You should also unequip your spacesuit and pack, as they make you less sneaky. Finally, ask Sarah Morgan to wait so she doesn’t charge in and blow your cover.
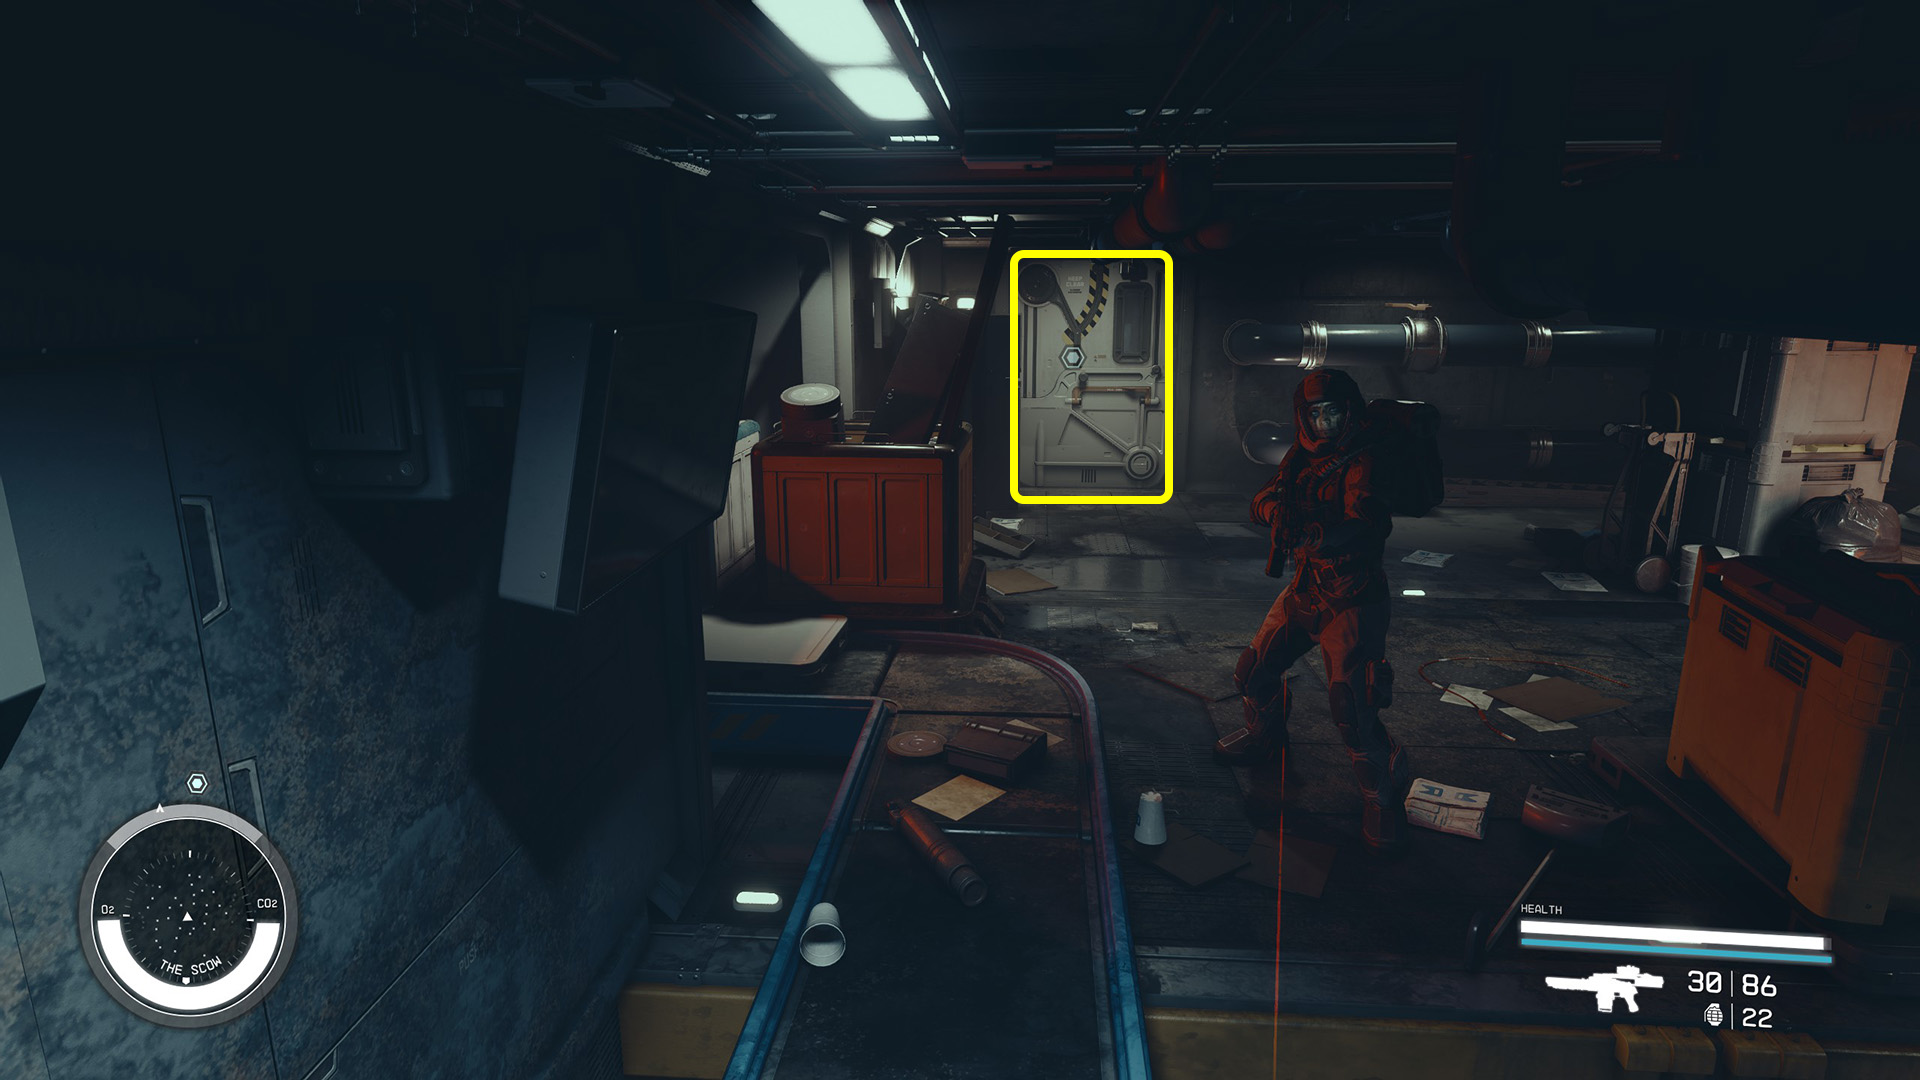
Head down the hallway past the zoo area and round the corner (Image A). As soon as you cross through the doorway at the end of the hall, you’ll be trespassing, so if you want to give stealth a shot, crouch down and wait for the guards to move away. If you released the aliens, you may get lucky and only have to deal with one guard. You can also use a ventilation shaft to get past the first two guards – look for the red sections of hallway nearby and jump up, then crawl through the duct work (Image B). Just be cautious and crouch before jumping down.
Image AImage B
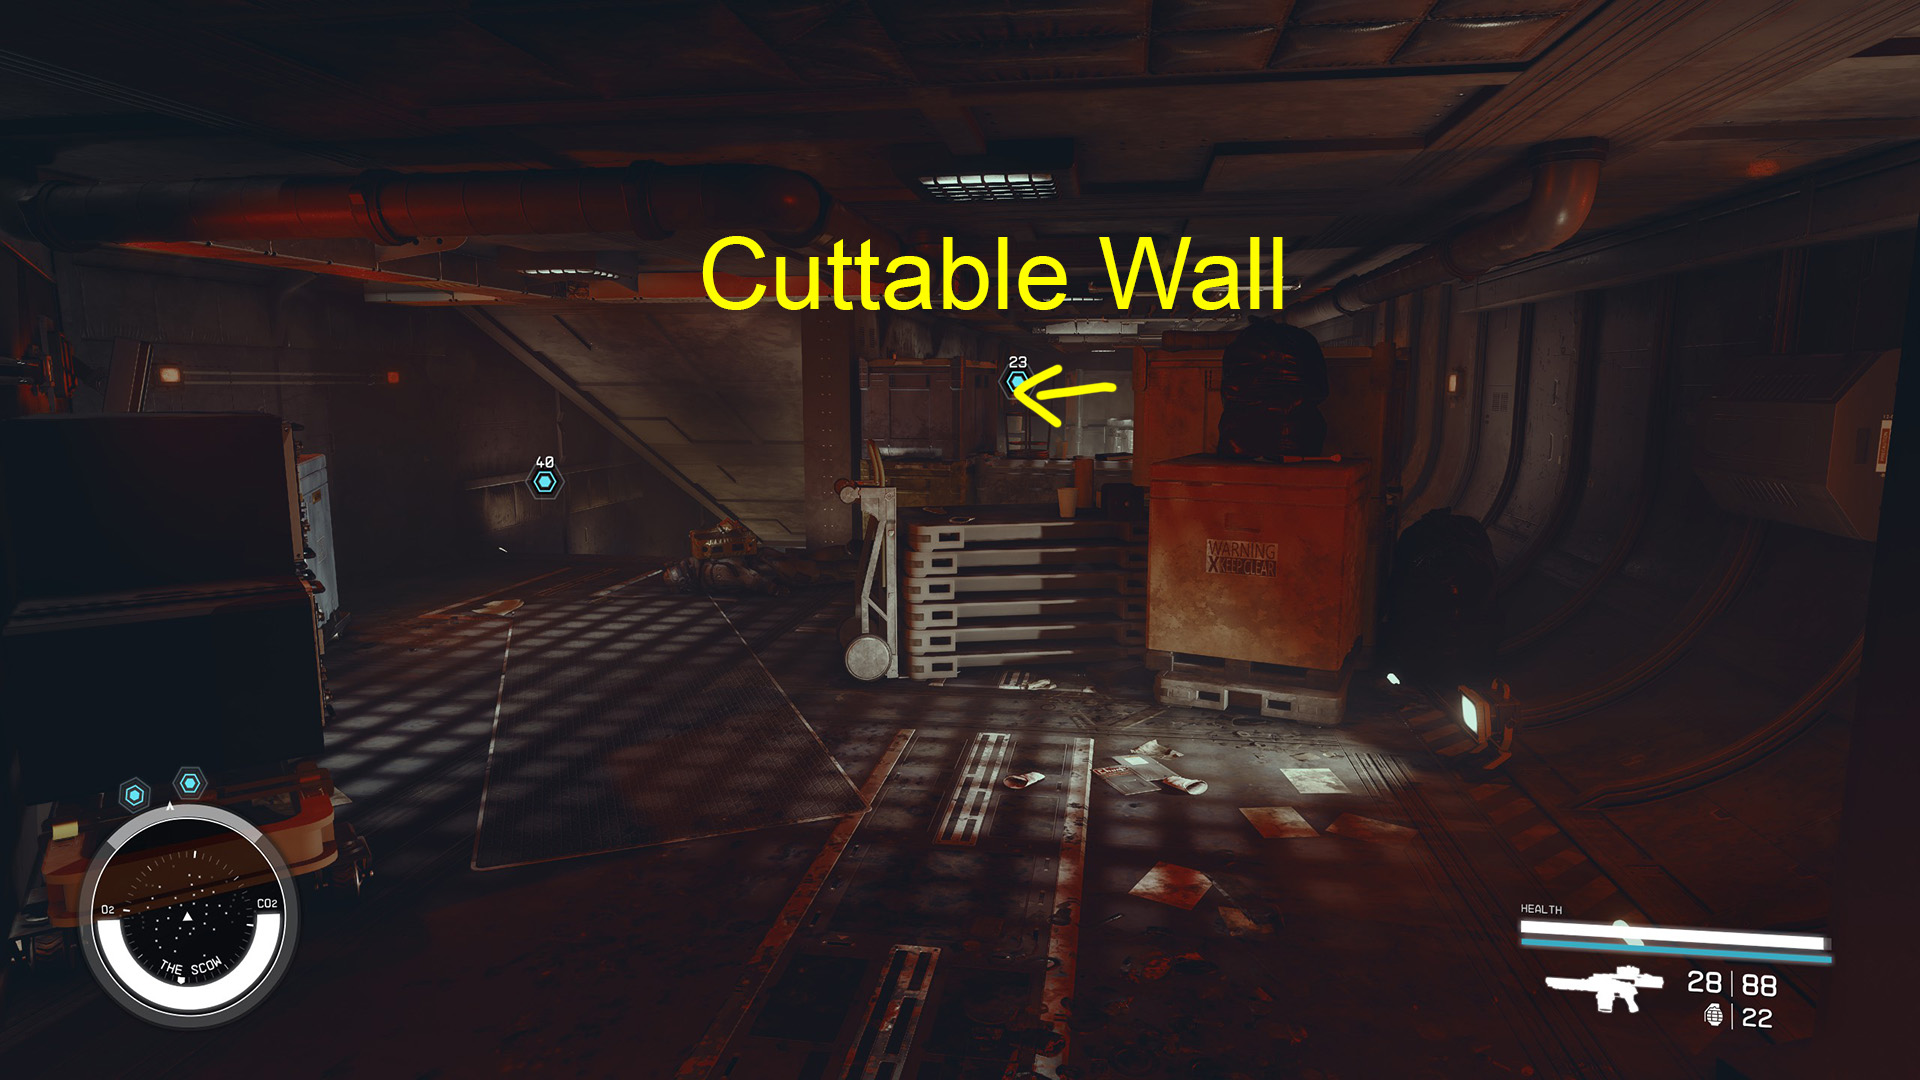
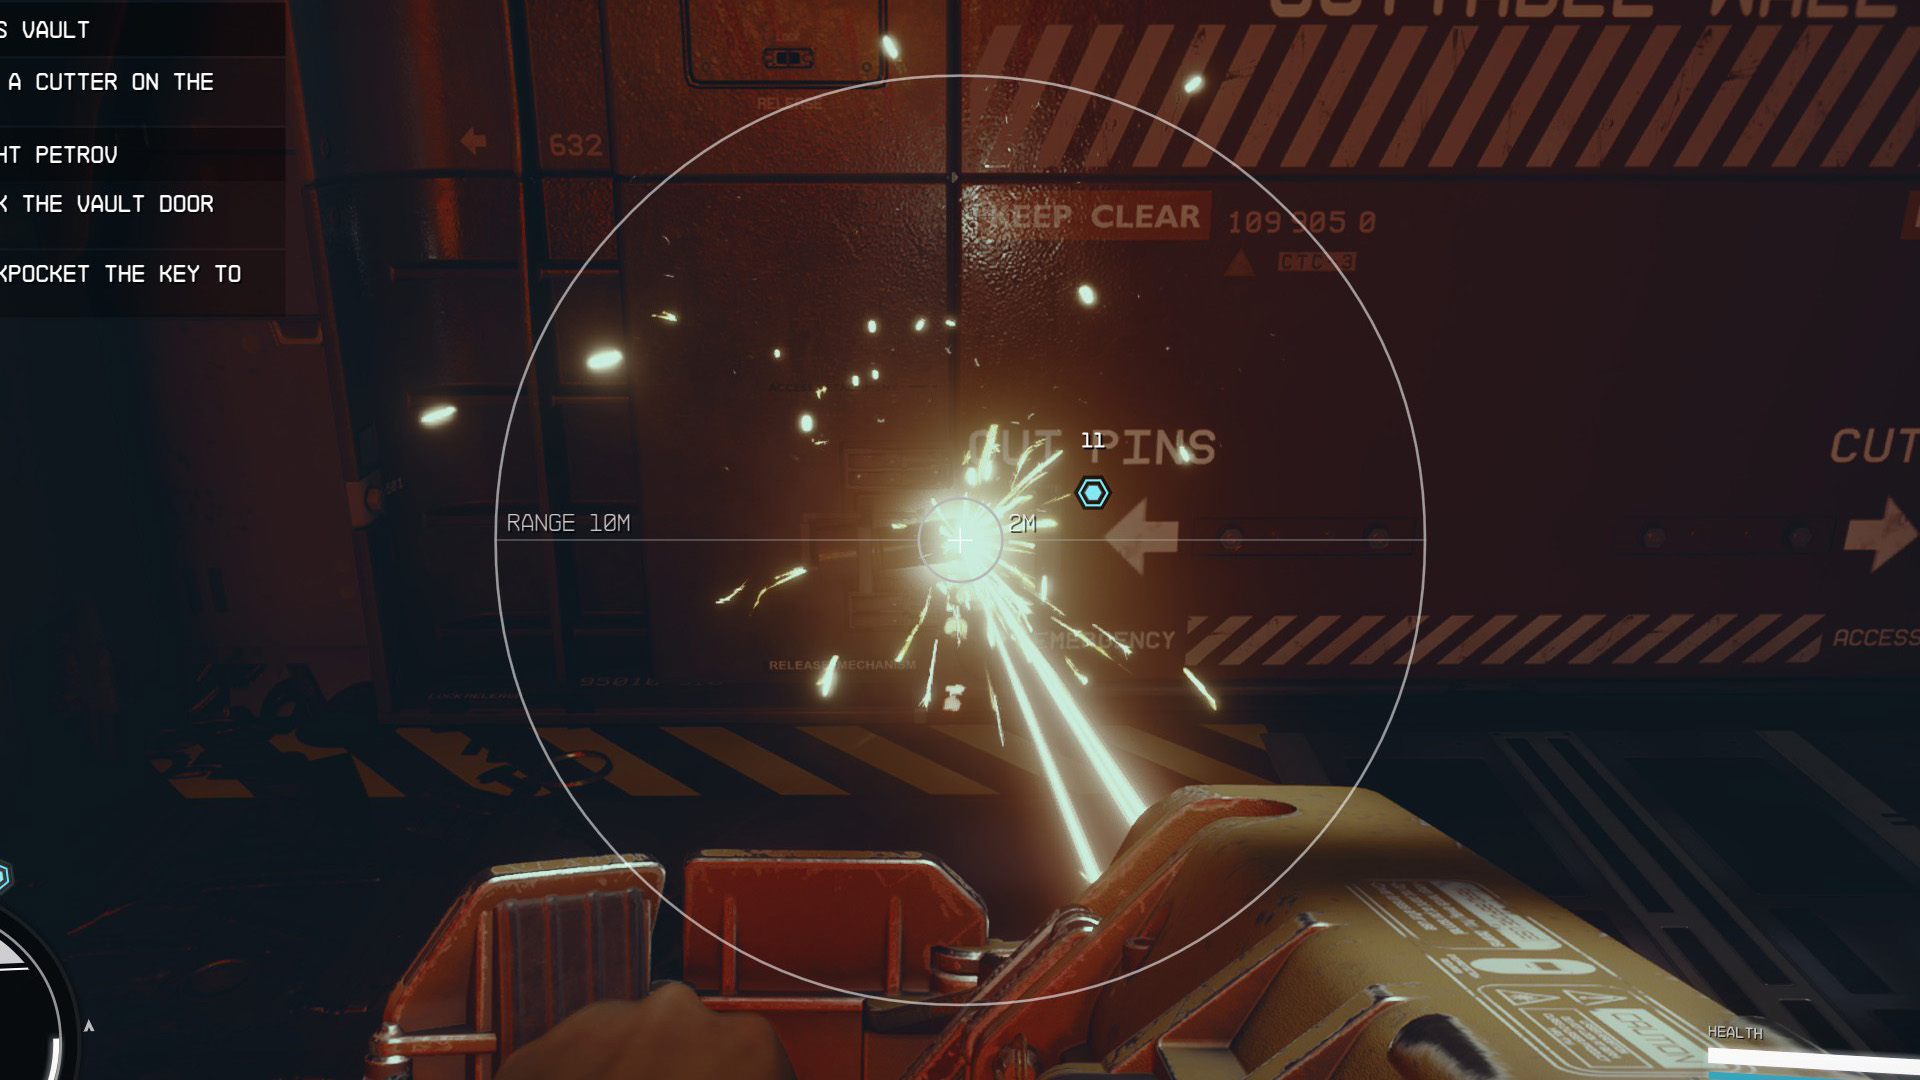
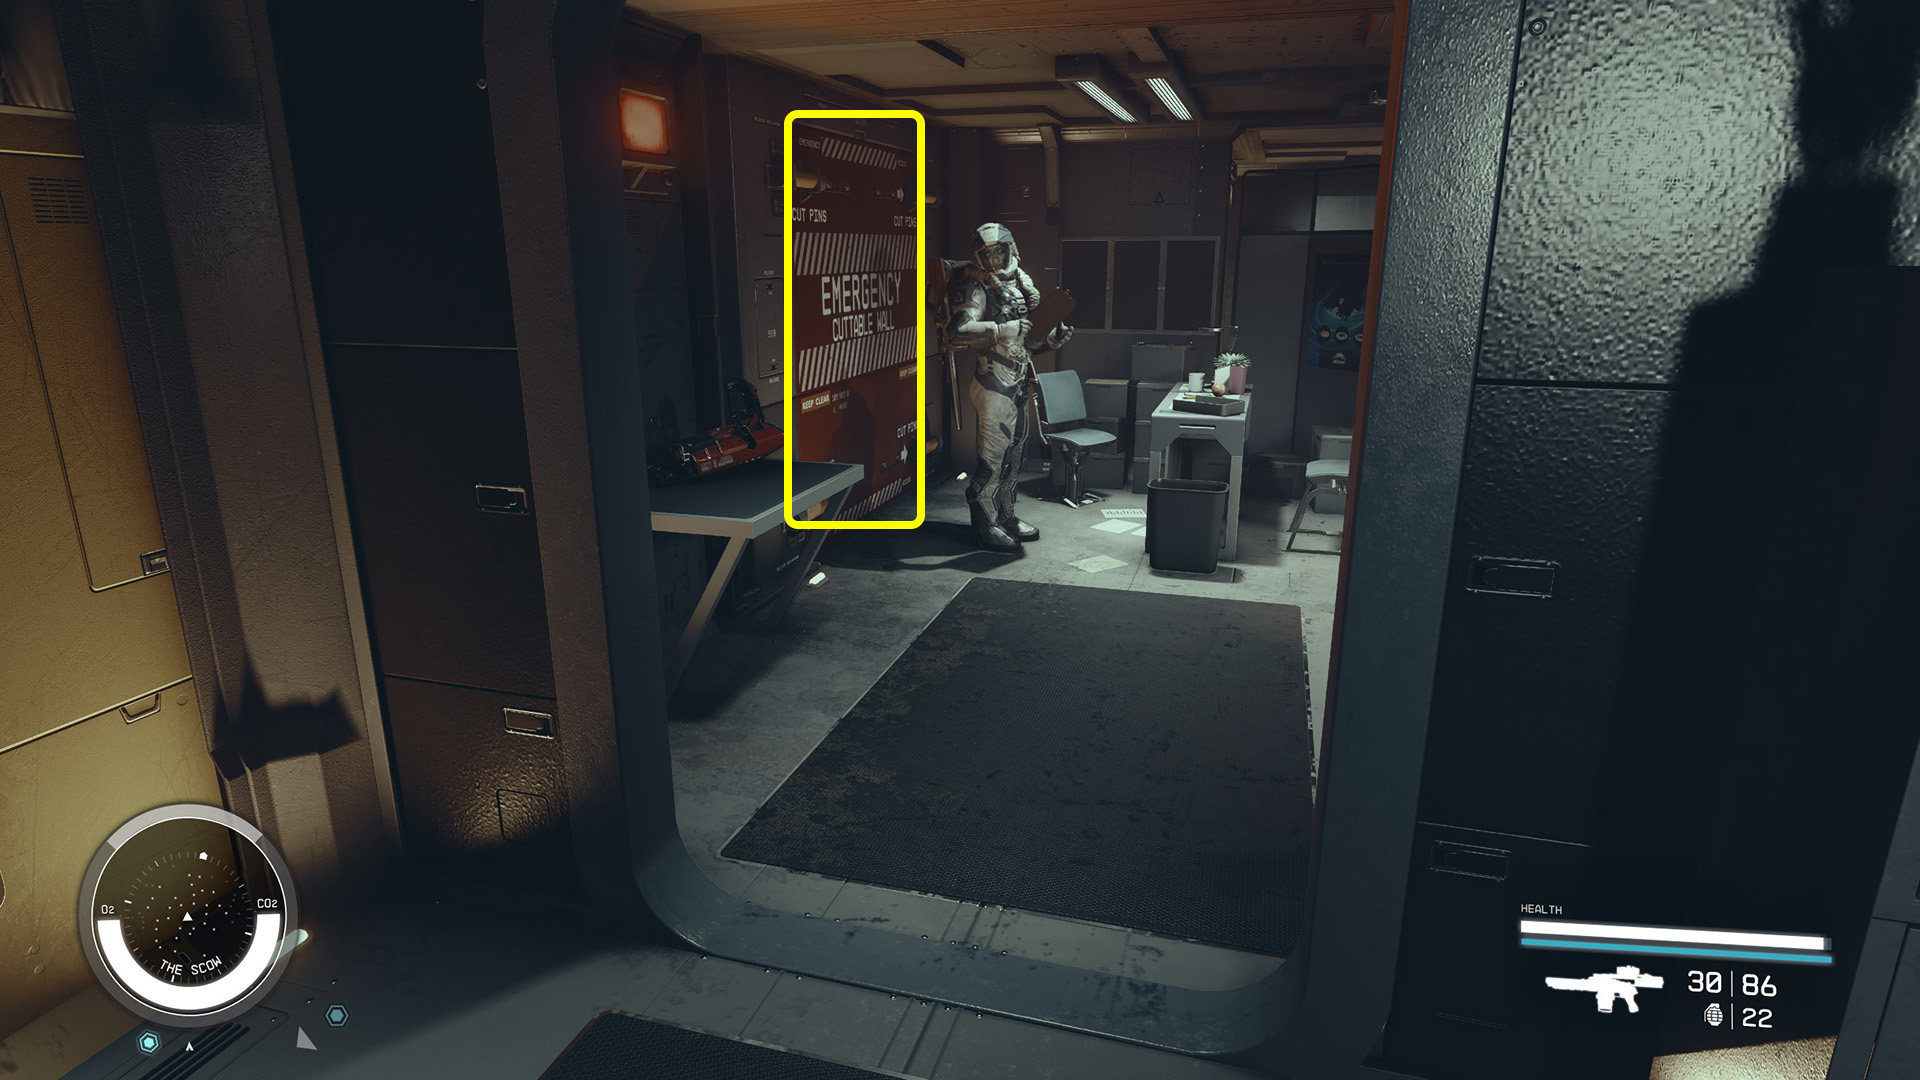
Go straight ahead to the back of this room, and you’ll come upon a red wall panel that says “EMERGENCY CUTTABLE WALL” (Image C). How convenient for us! Your objective will update to “Use a Cutter on the Four Bolts.” Open your scanner and left-click / to pull out your Cutter, and aim at the bolts that the arrows are pointing to on each corner of the panel (Image D). Cut all 4 and the door will fall open. The guards will most likely hear you, and even if they don’t, there will be a guard right on the other side of the wall, so be ready to deal with them.
Image CImage D
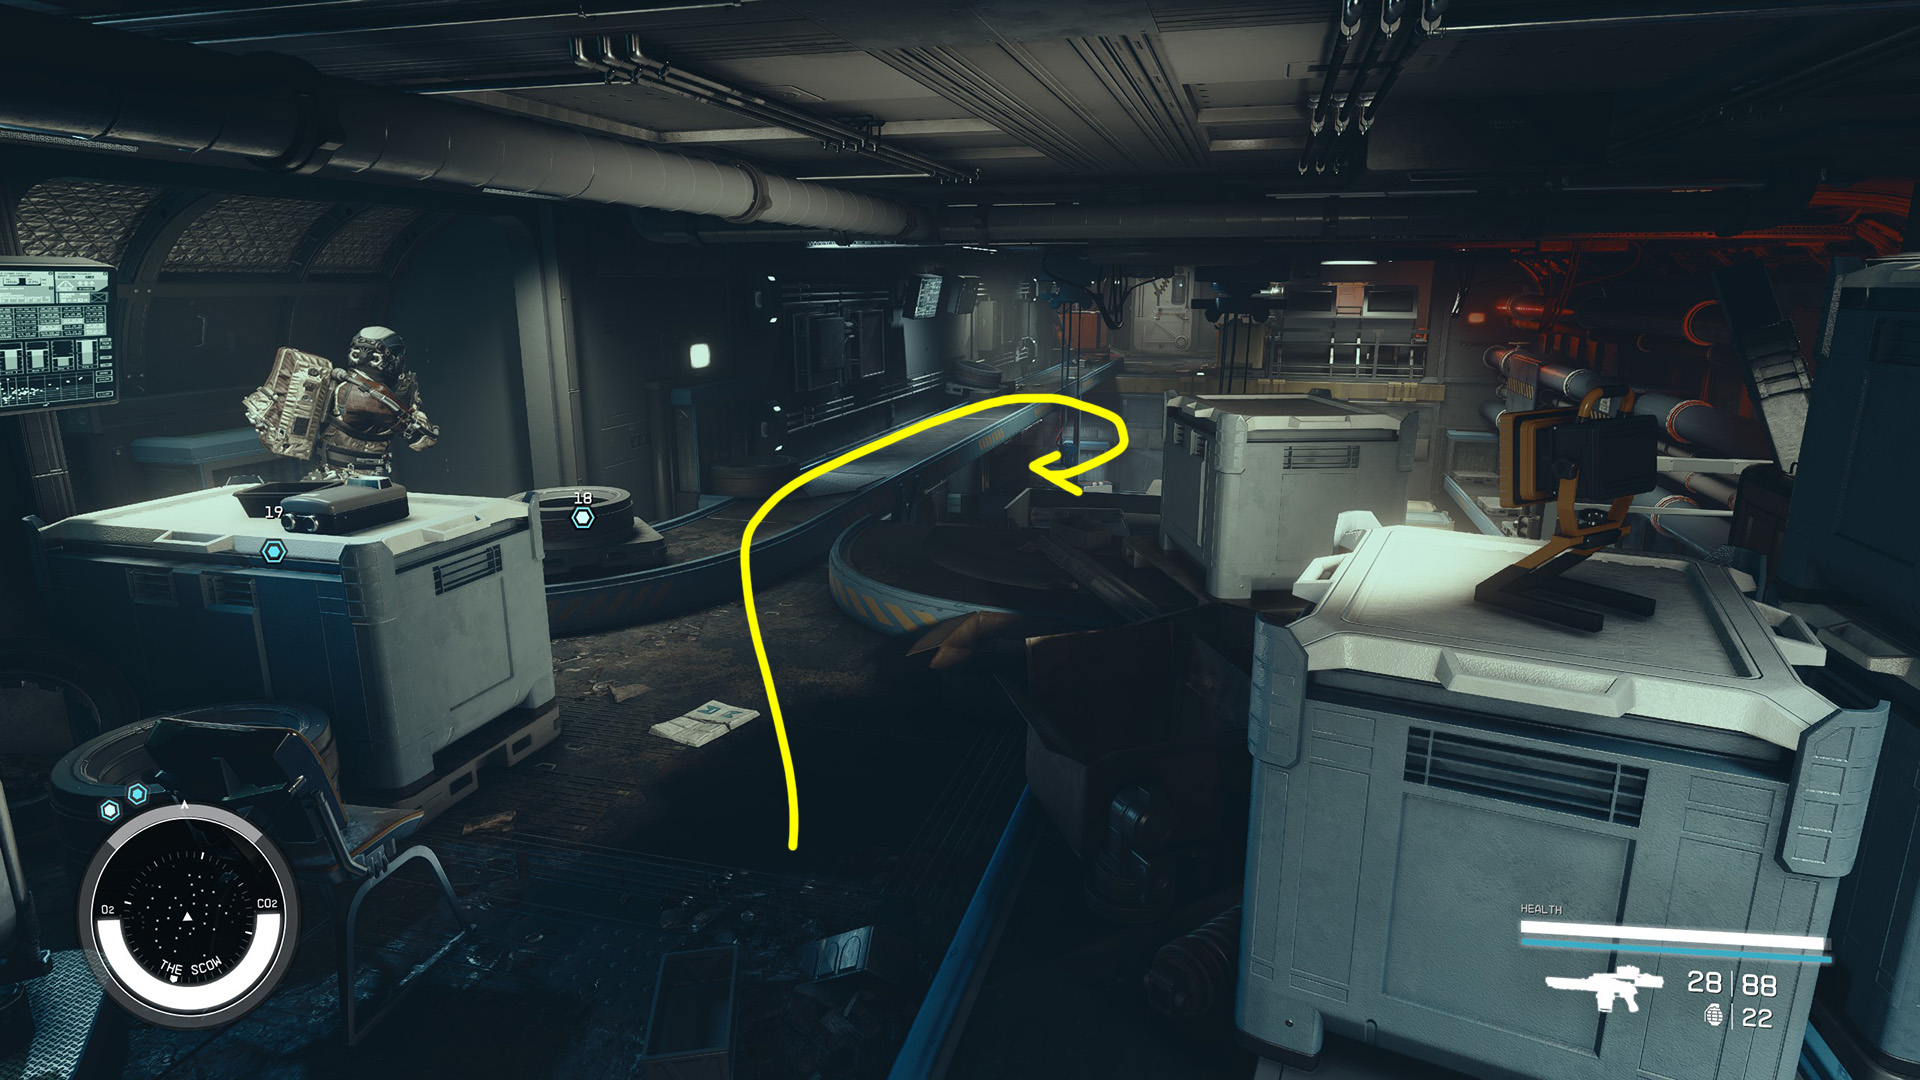
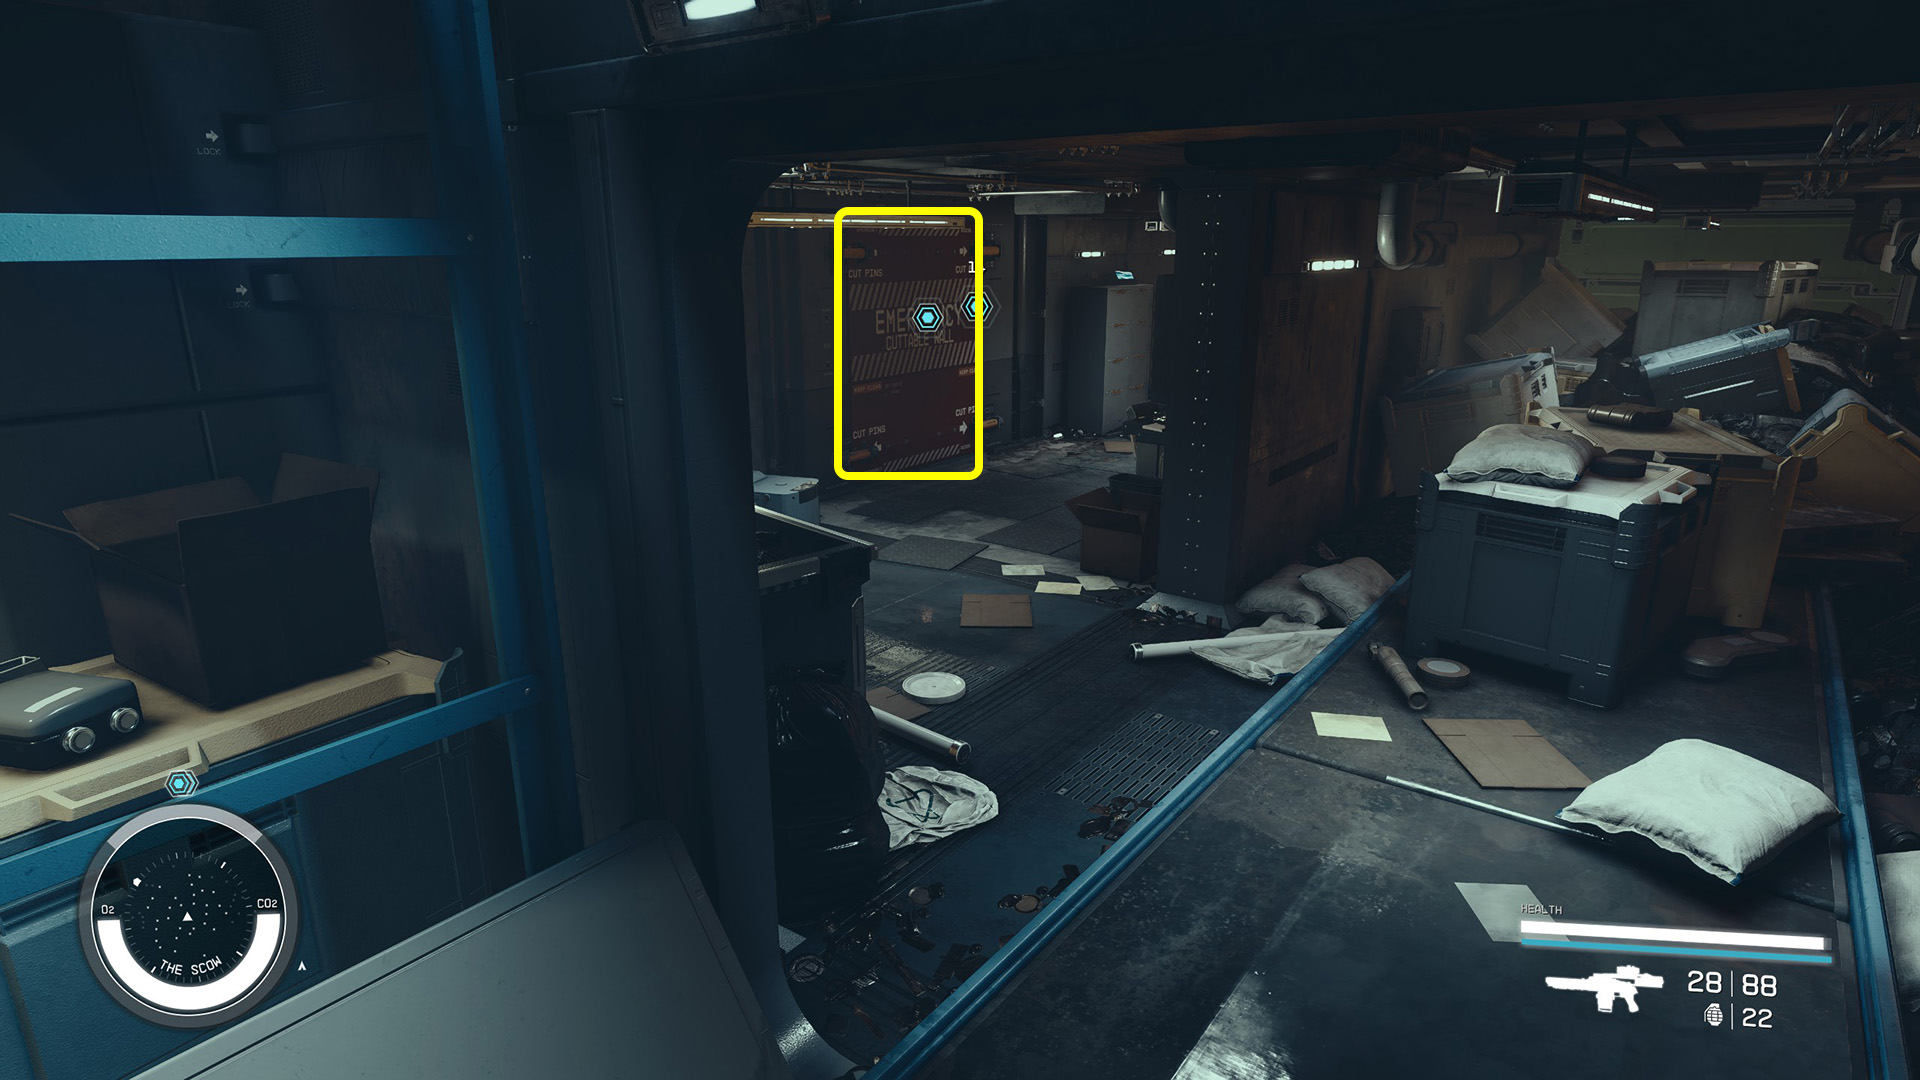
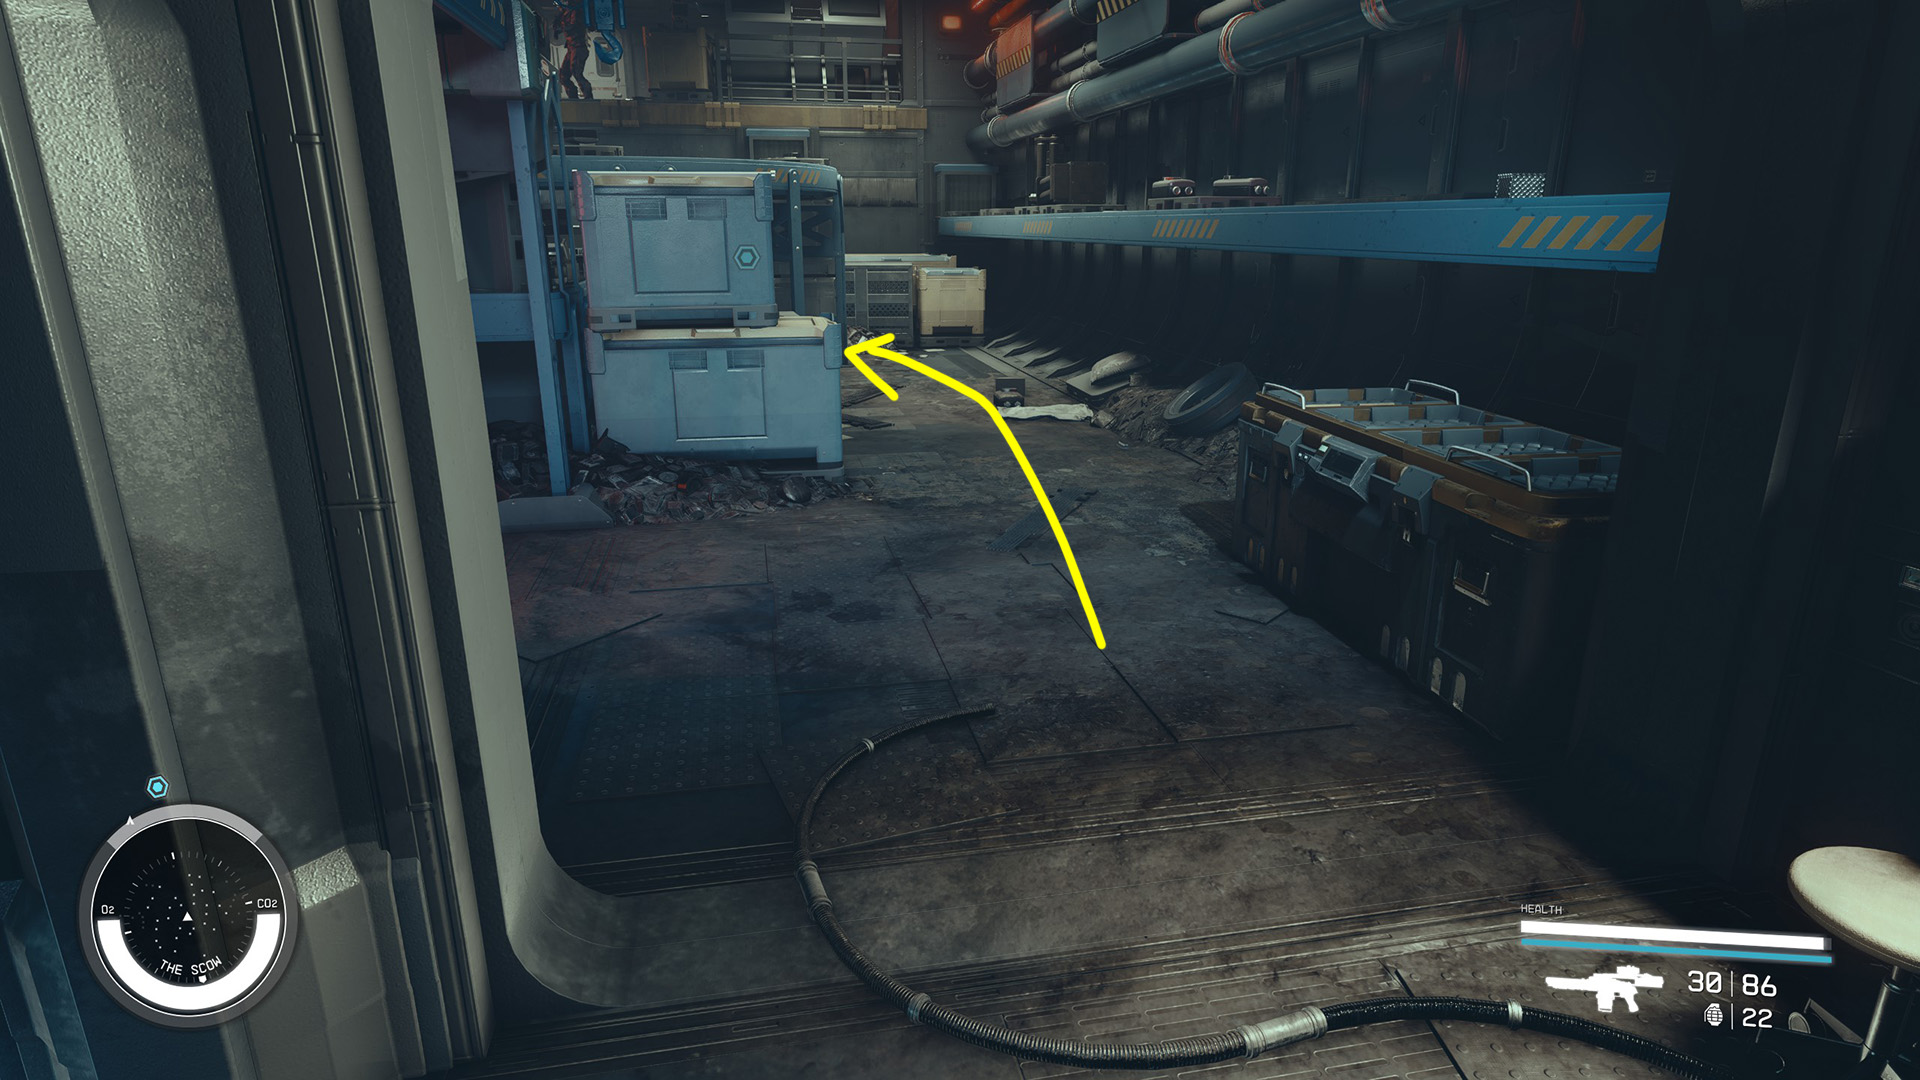
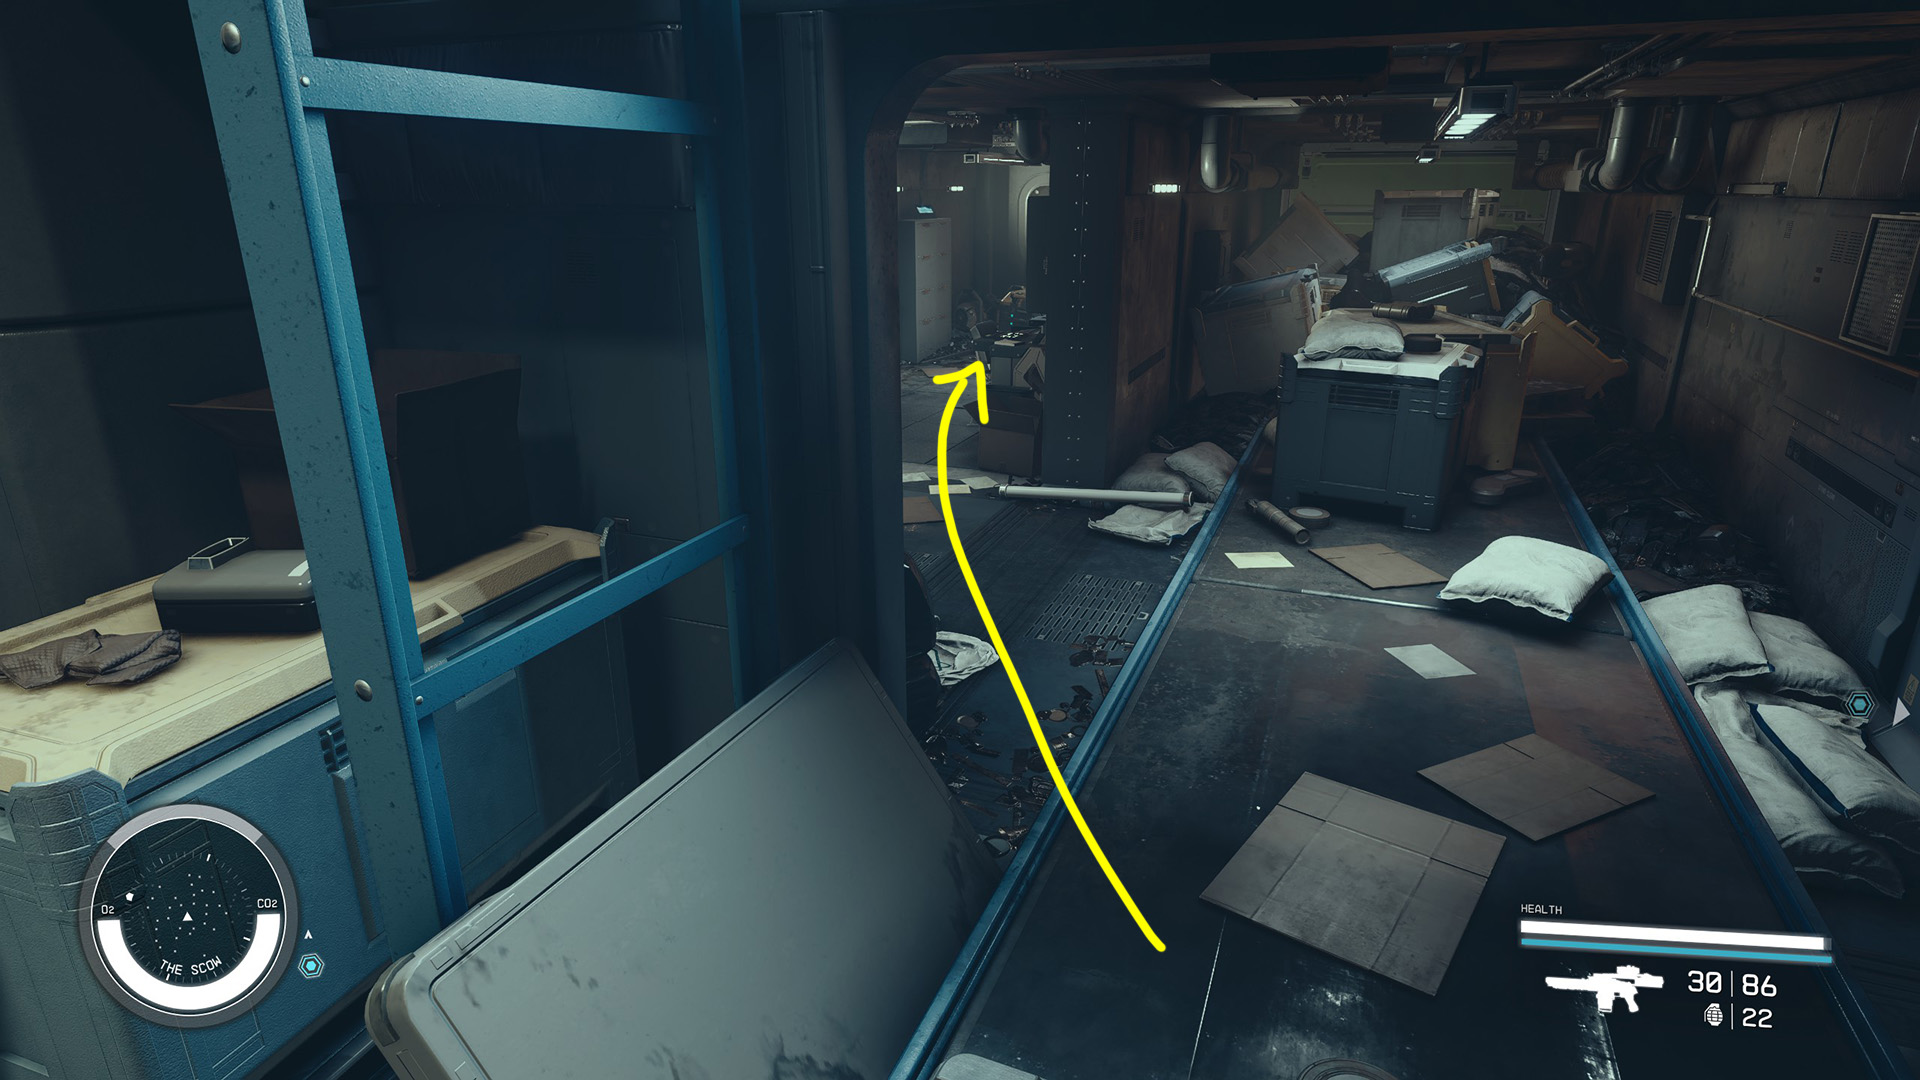
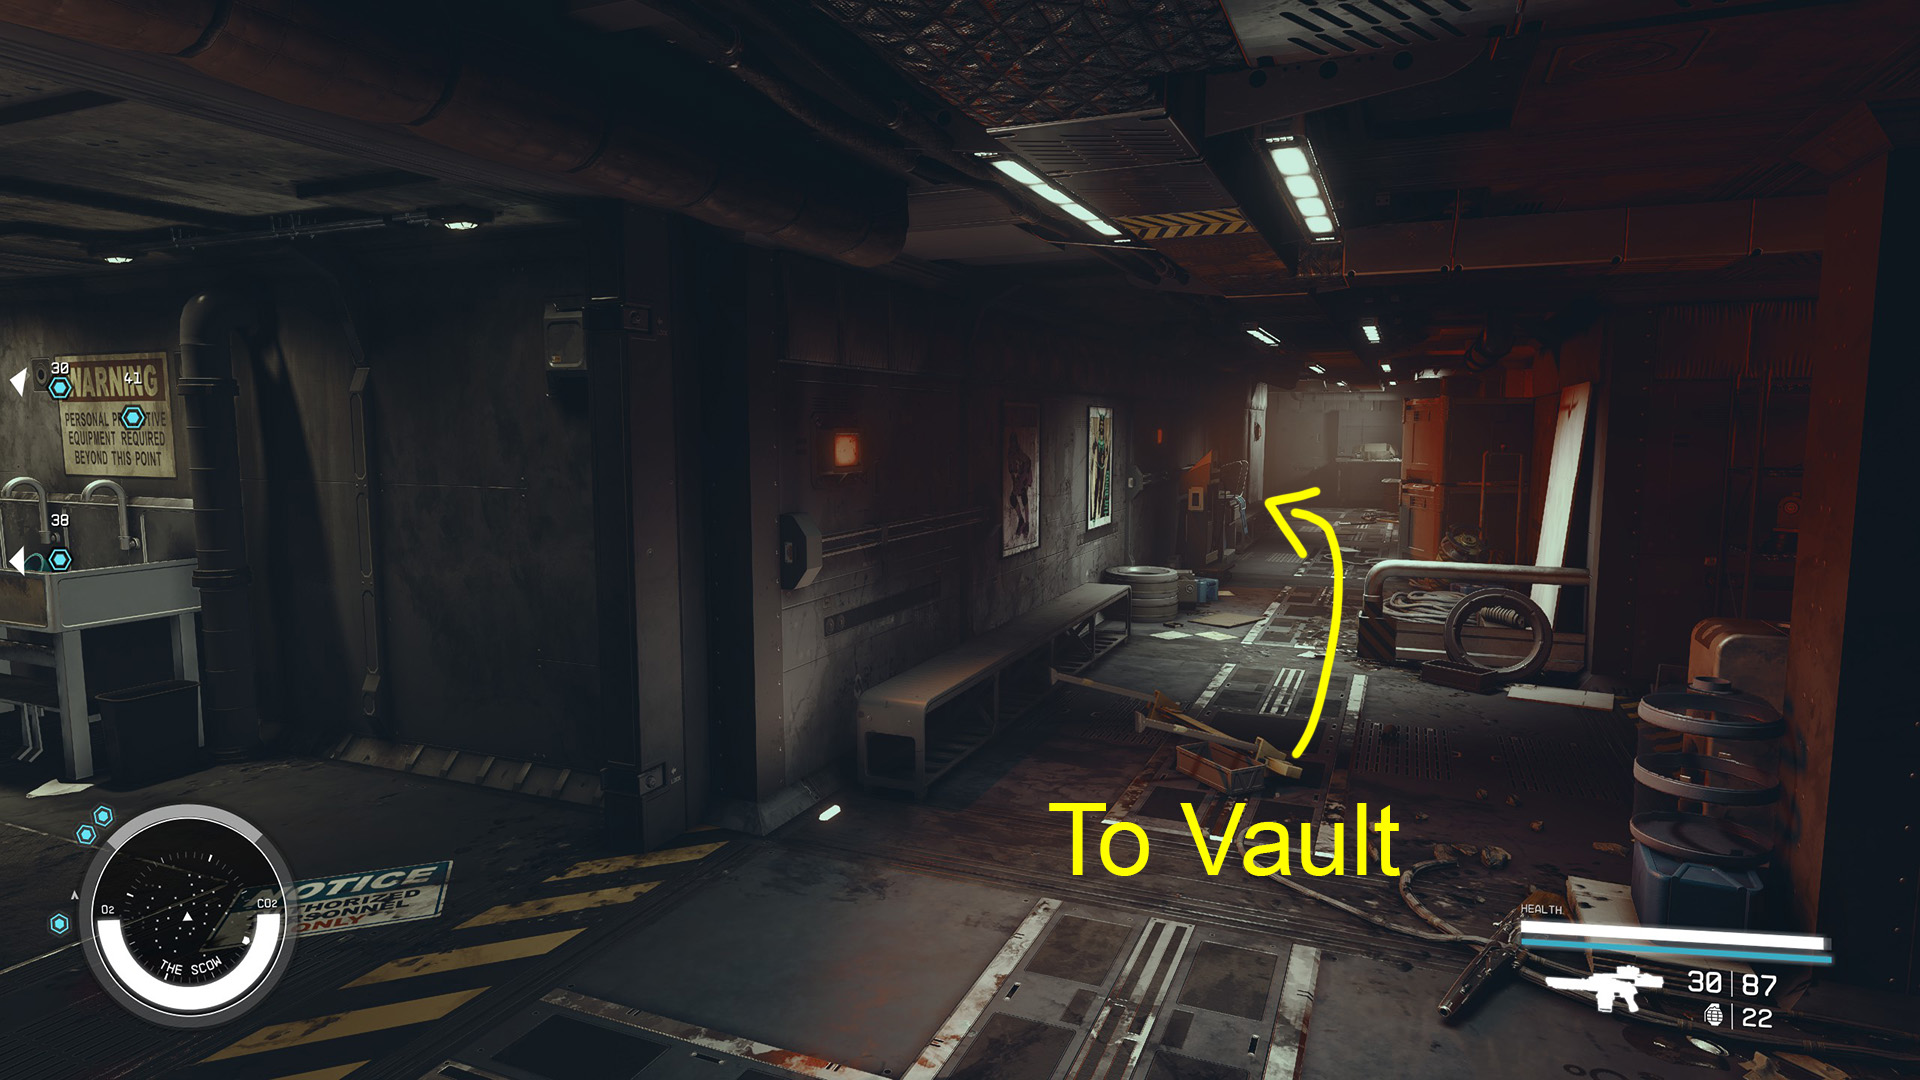
You’ll enter into a room with a conveyor belt (Image 26). There will likely be a guard very close to where you cut through the wall, and there will be another at the other end of the conveyor belt. Deal with the guards if you need to and jump down. Underneath the far end of the conveyor belt you’ll find another Emergency Cuttable Wall (Image 27). Do the same thing you did at the other one to knock it down, and you’ll find yourself inside the vault.
Image 26Image 27
You can now go back and complete some of the other optional objectives if you wish, but they aren’t necessary. Otherwise, skip ahead to the section “Steal the Artifact.”
Option E: Pickpocket the Key to the Vault
There are two ways to complete this objective, and one of them does not actually require pickpocketing.
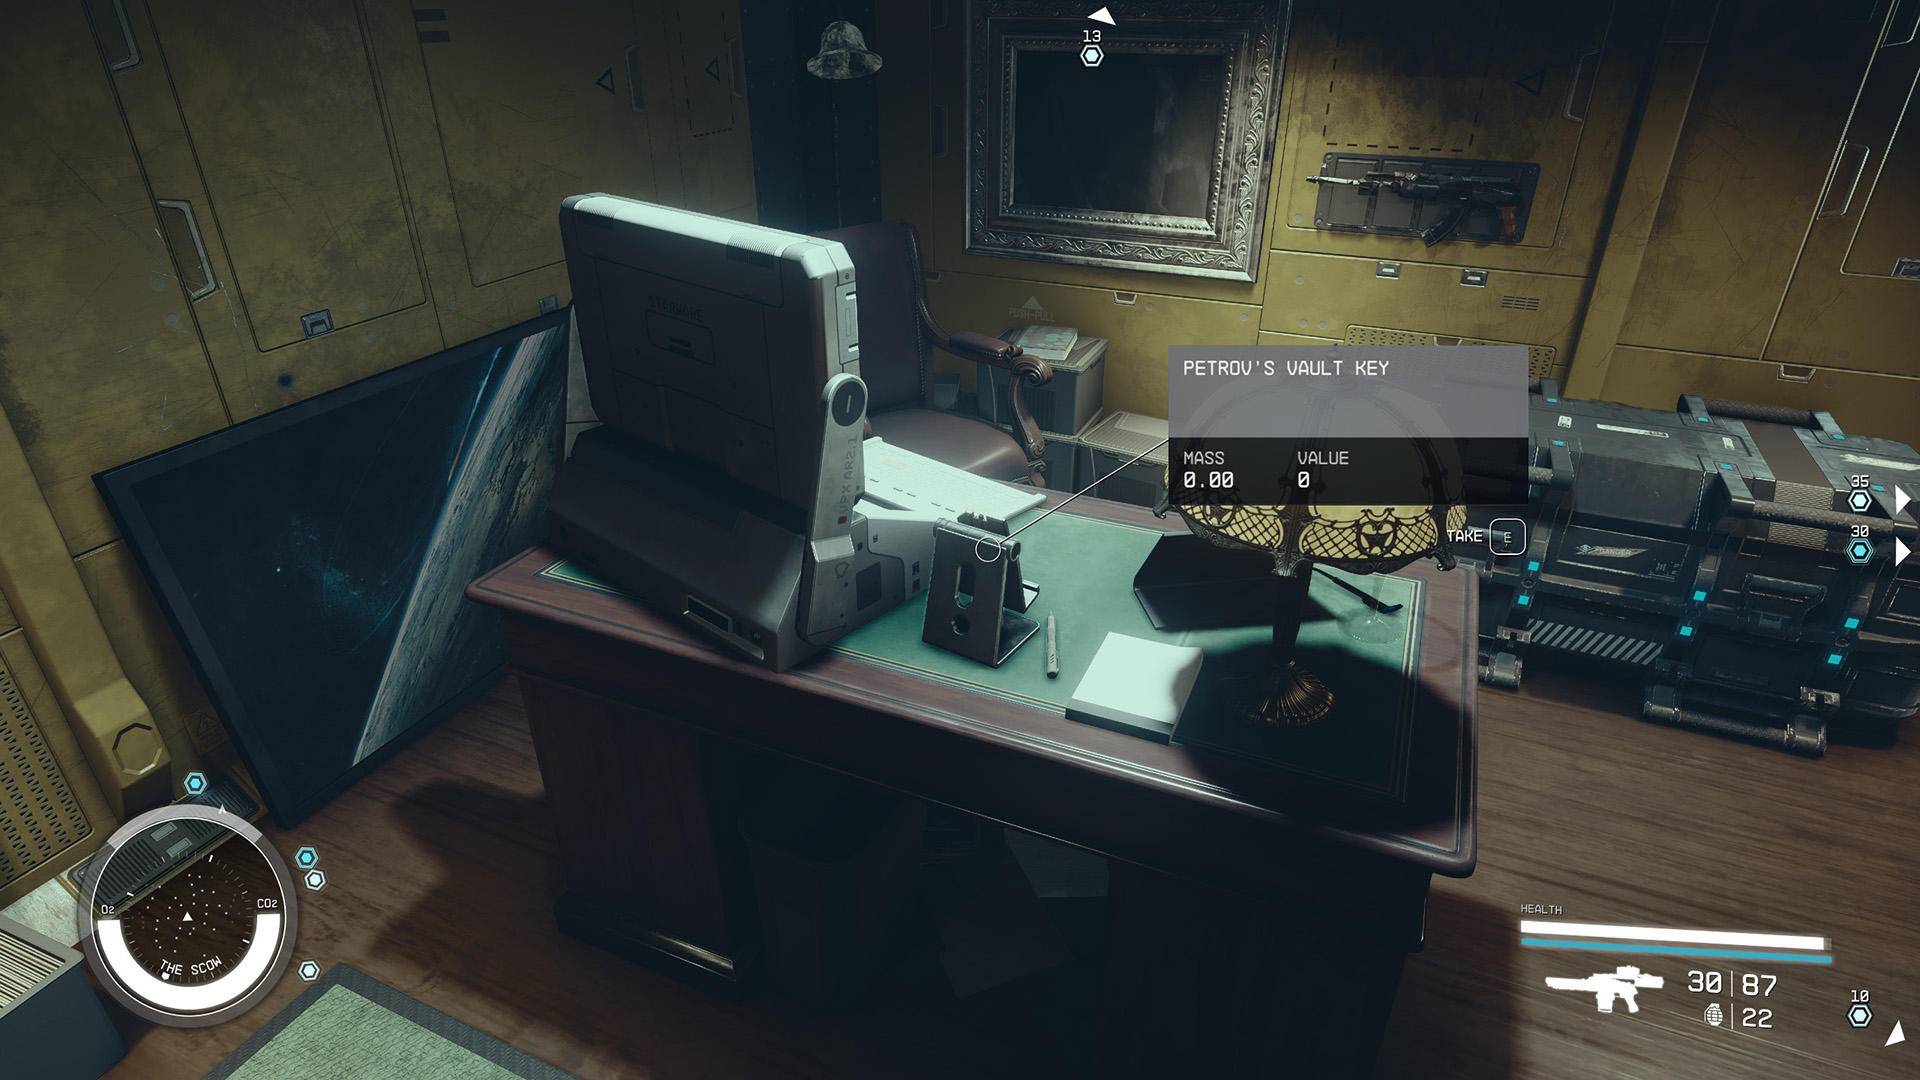
The easy way is to simply take the key off of the desk in Petrov’s quarters. Head down the hallway behind his couch (Image 28). Go through the door on the left side of the hallway (Image 29). Pass through two more doors to get to the office (Images 30 & 31).
Image 28Image 29Image 30Image 31
Petrov’s Vault Key is on his desk (Image 32). You can even take it without it counting as stealing.
If you want to pickpocket the key instead, you’ll need at least rank 1 of the Theft skill. Otherwise you won’t even have the option to pickpocket anyone. It will also be a lot easier if you have at least one rank in the Stealth skill so that you can see the stealth meter.
Crouch down somewhere out of sight and wait for the guard behind the couch to move away. Sneak closer to Petrov, and when no one detects you, pickpocket the key from him (Image 33). This will be tricky, as there are several sets of eyes nearby, but it is possible.
Image 32Image 33
However you get the key, you’ll have to take it to the vault door. For this, you’ll want to follow the directions in the next section, minus the part where you pick the lock.
Option F: Pick the Vault Door Lock
To pick the vault door, you’ll need to have at least rank 3 in the Security skill. But first you’ll have to get to the door. To do this you’ll need to enter the vault area, which is off limits unless you successfully persuaded Petrov or got him to surrender. If that’s the case, you can just walk right in and no one will care. Otherwise, if any of the guards spot you they’ll all turn hostile, so you’ll need to be sneaky. This will be a lot easier if you have at least one rank in the Stealth skill so that you can see the stealth meter. You should also unequip your spacesuit and pack, as they make you less sneaky.
Head down the hallway behind Petrov and use the Switch to open the red door. (Image 34). Go down the stairs and down the hall, past the zoo area and around the corner (Image 35). As soon as you cross through the doorway at the end of the hall, you’ll be trespassing, so if you want to be stealthy, crouch down and wait for the guards to move away. If you released the aliens, you may get lucky and only have to deal with one guard. You can also use a ventilation shaft to get past the first two guards – look for the red sections of hallway nearby and jump up, then crawl through the duct work. Just be cautious and crouch before jumping down. However you get past the guards, go down the stairs when it’s clear (Image 36).
Image 34Image 35Image 36
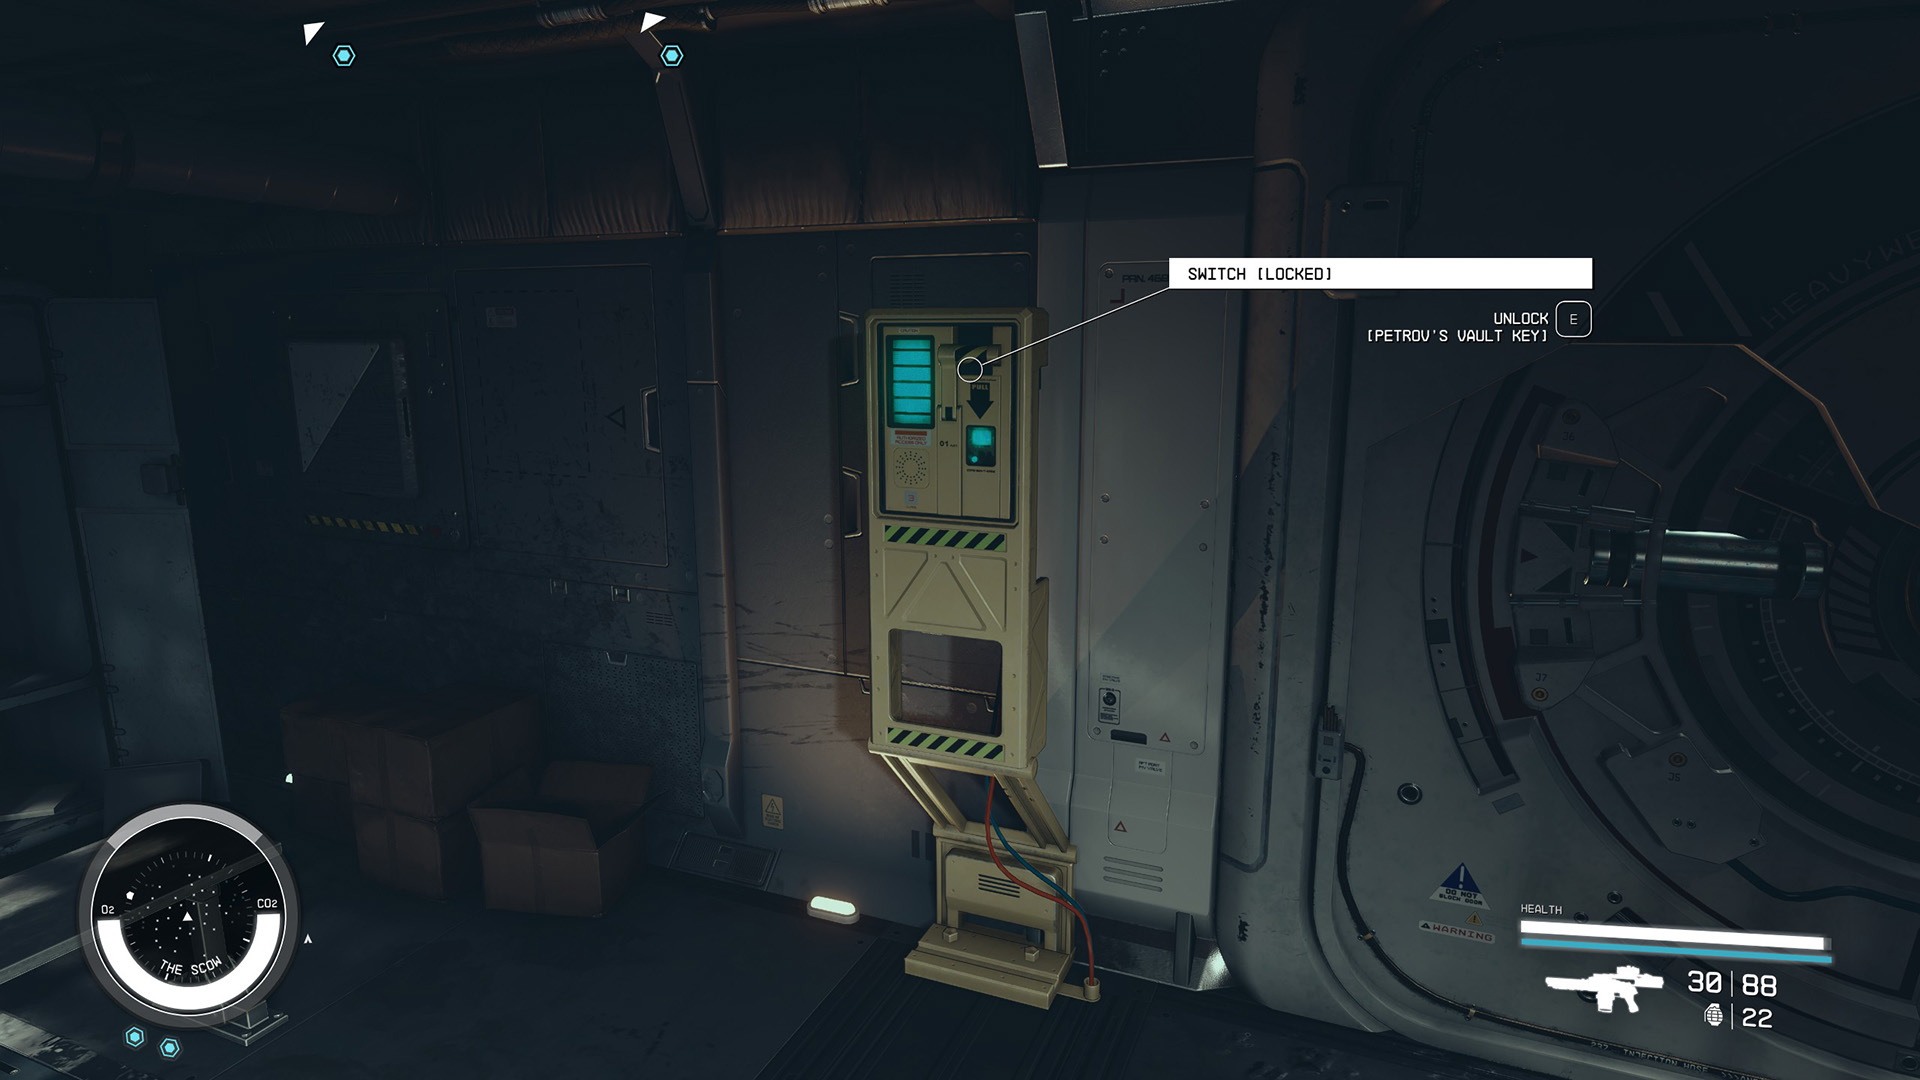
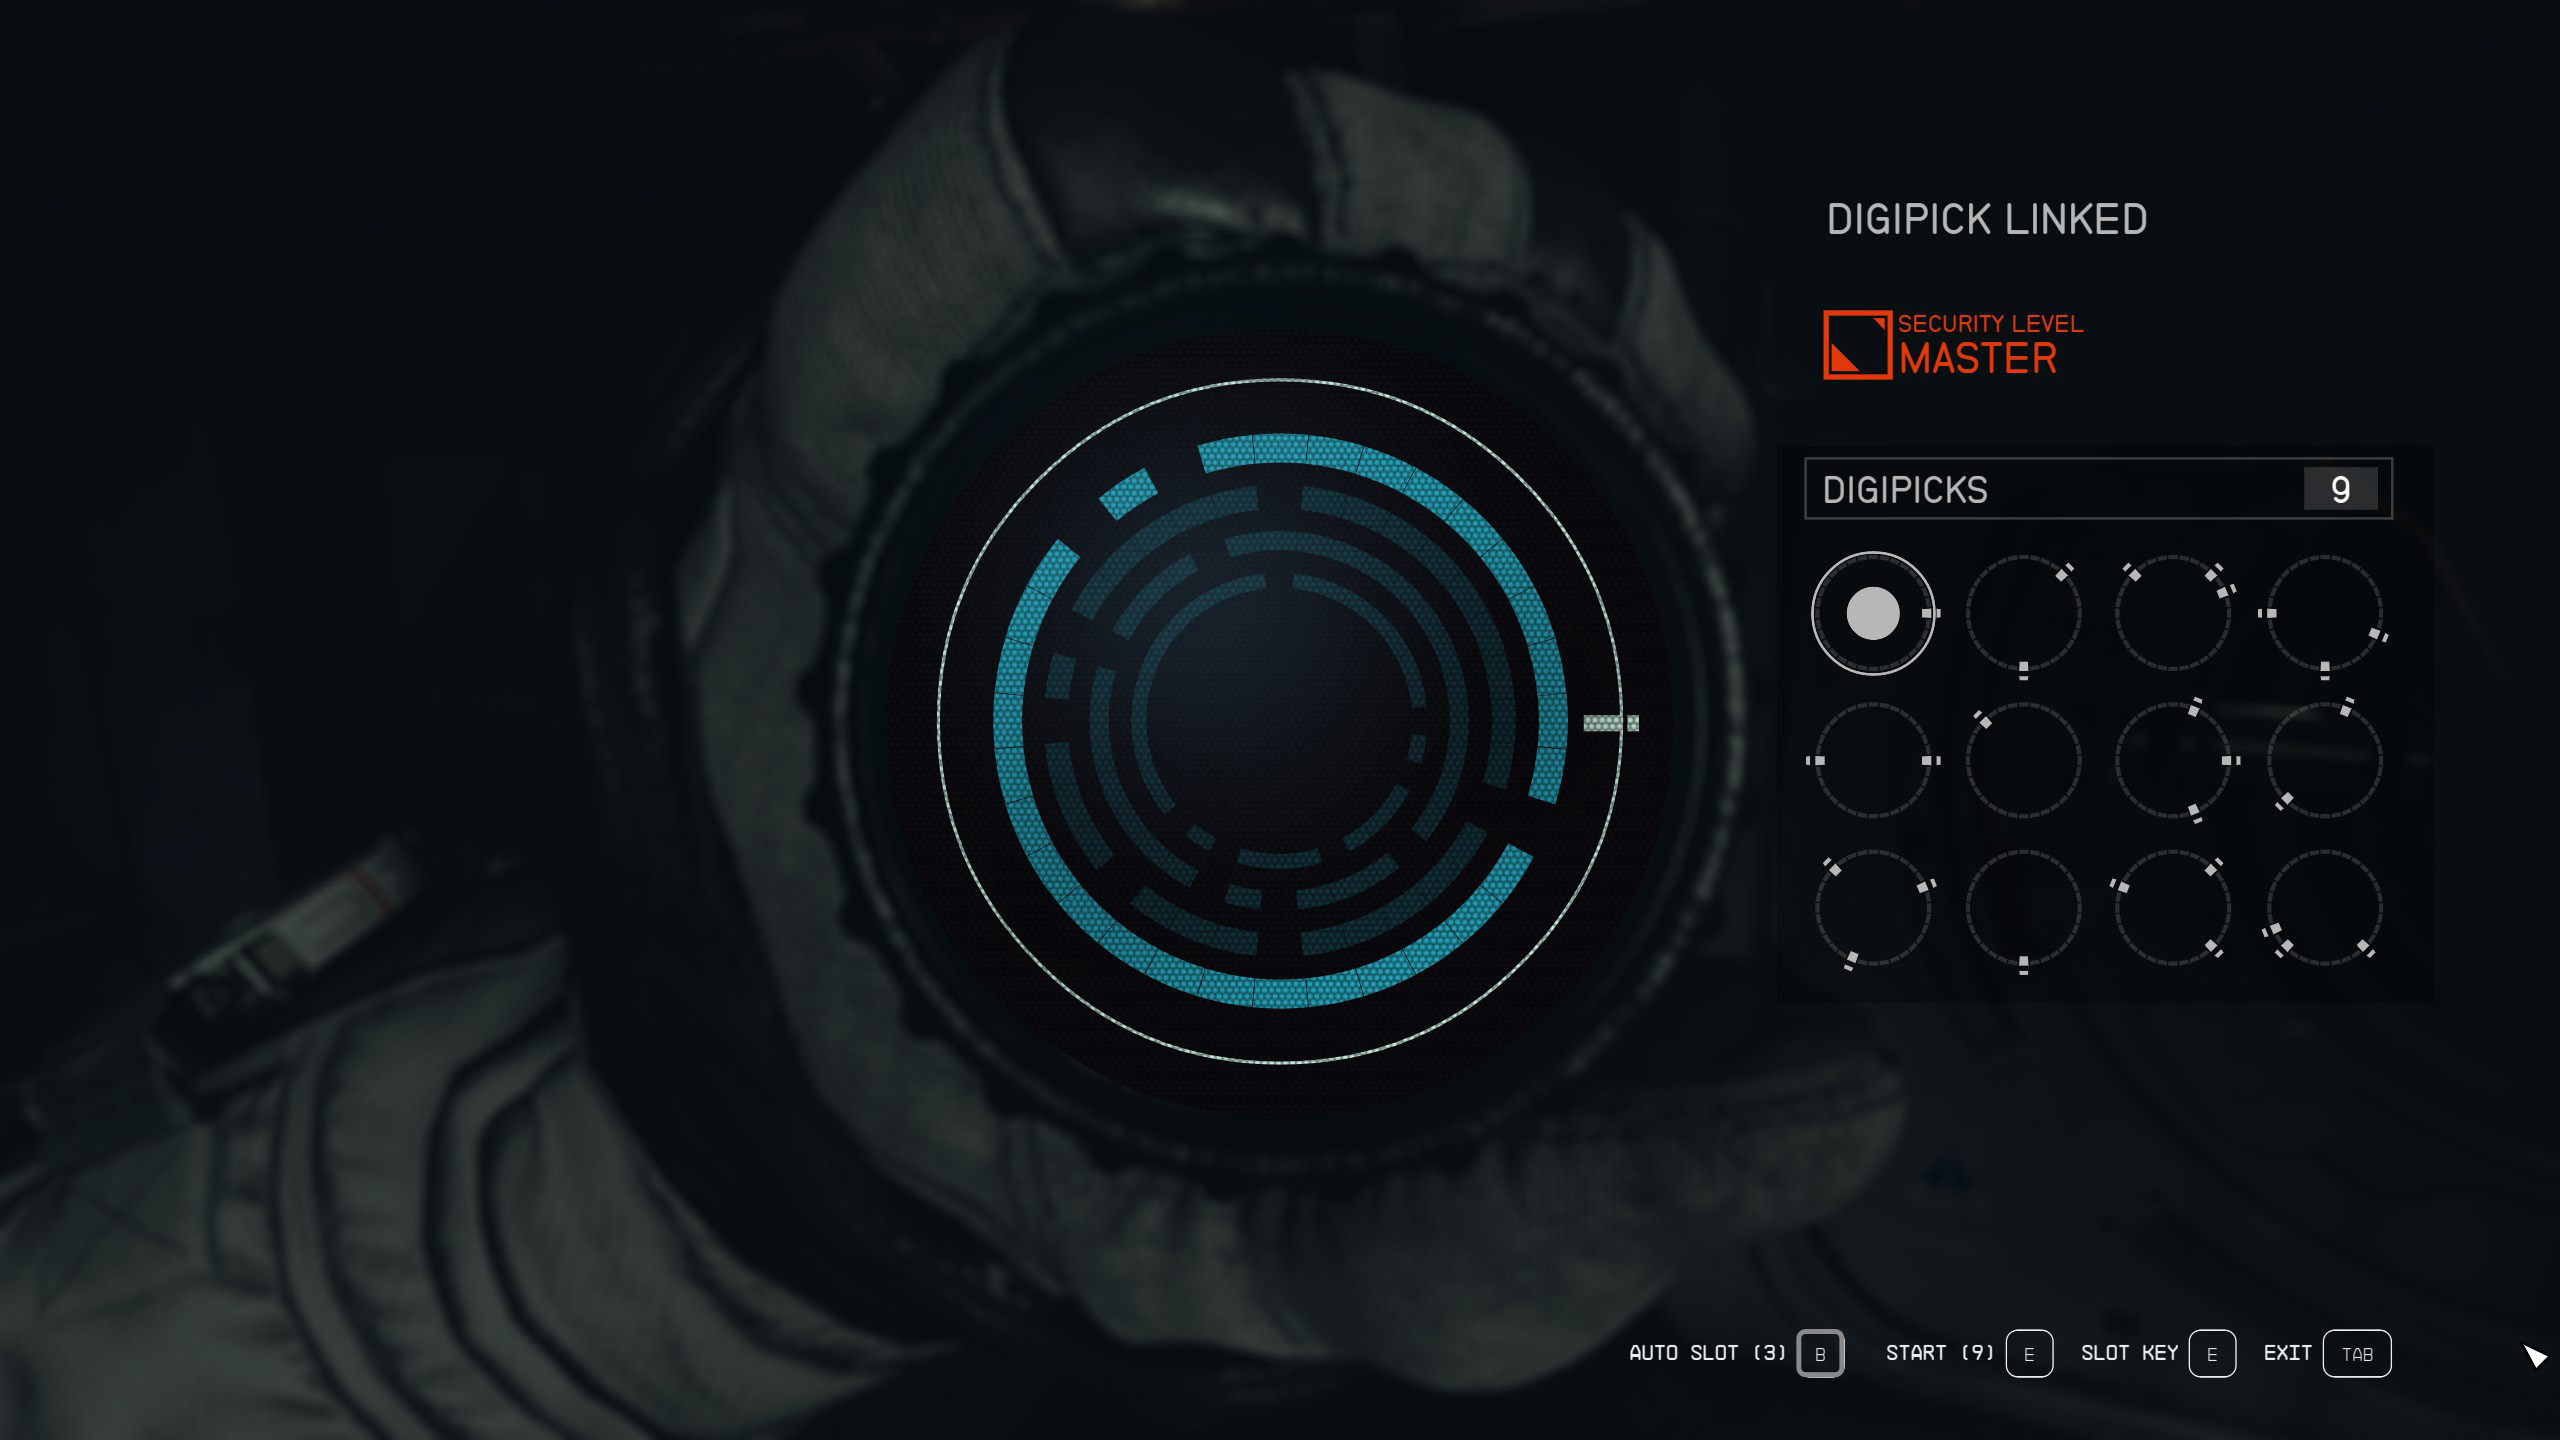
Look for the Switch beside the door on the opposite wall (Image 37). This is a master level lock, so it will be difficult, with 12 possible keys. Pick the lock and activate the switch to open the door (Image 38).
Image 37Image 38
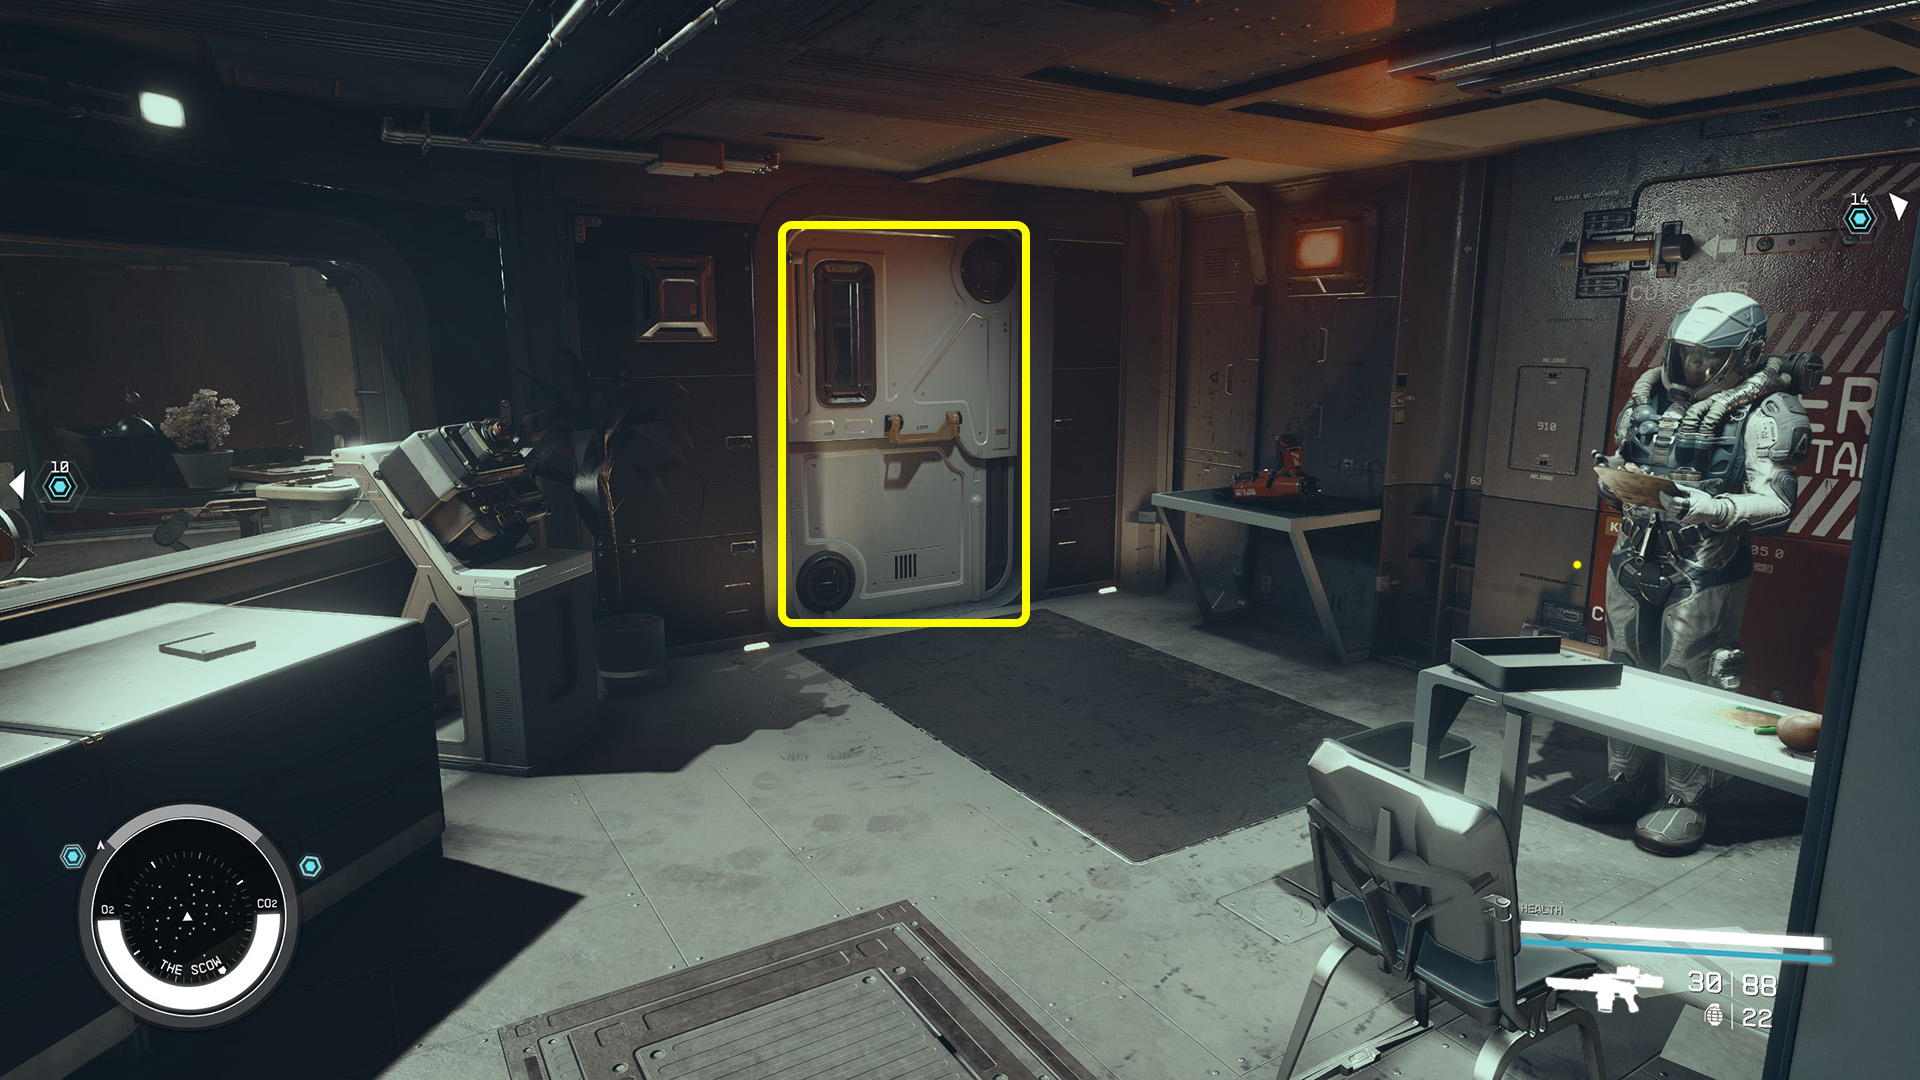
There will be a single guard inside the next room. Take them out or sneak past and go through the other door (Image 39). This will take you inside the vault.
Image 39
You can now go back and complete some of the other optional objectives if you wish, but they aren’t necessary. Otherwise, skip ahead to the section “Steal the Artifact.”
Disable the Engines
If you want to board the Scow by force, you’ll have to disable its engines first. To do this, you can either hail the ship and choose the [Attack] dialogue option, or you can just start shooting. Shooting first is preferable so you can target their engines and get some damage in before they turn their weapons on you.
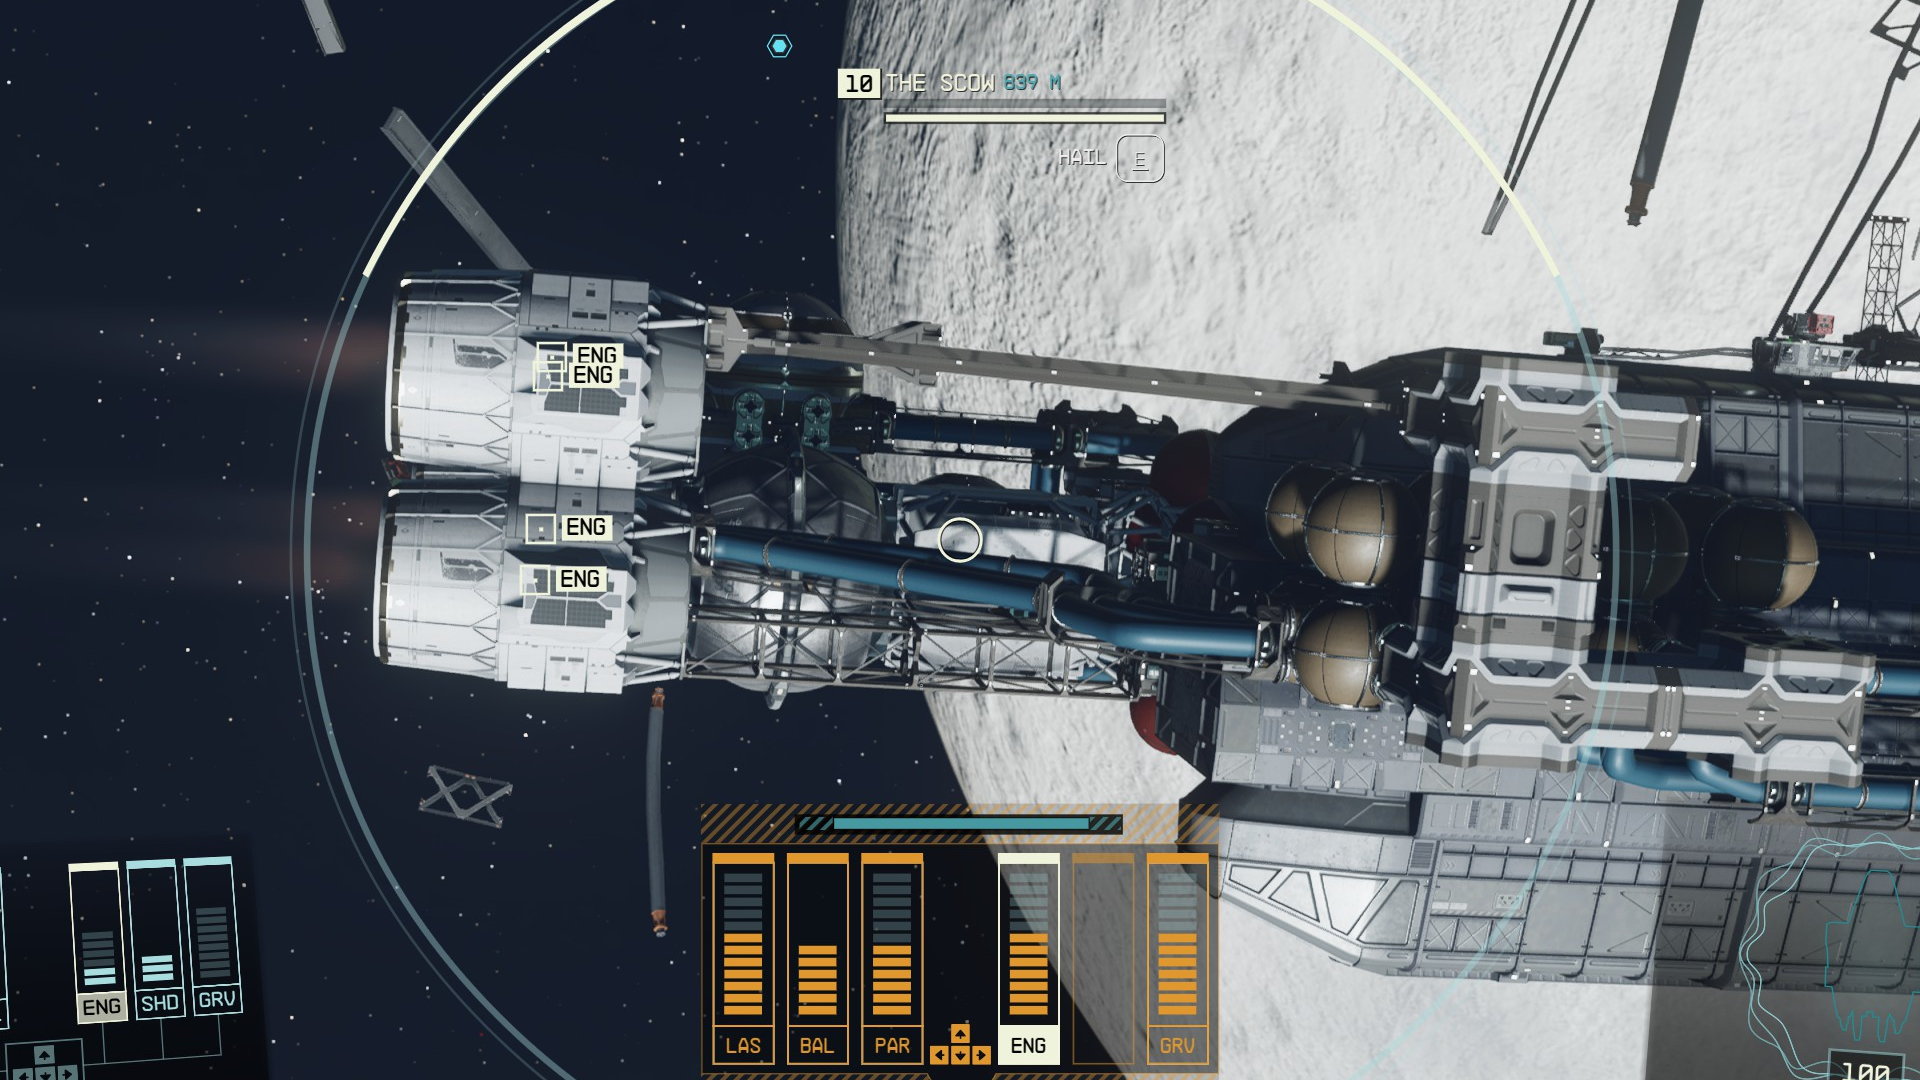
The Scow is a tough ship, and you’ll have a hard time defeating it if you haven’t invested in any ship skills or upgraded your ship at all. The Targeting Control Systems skill in particular will allow you to specifically target the Scow’s engines (Images 40 & 41), which will let you destroy them pretty efficiently and avoid wasting damage on other systems. Having an EM weapon on your ship will be a big help as well.
Image 40Image 41
If you need some help with ship-to-ship combat, check out our guide How to Board an Enemy Ship. We also have a list of the Ship Controls for both keyboard and controller.
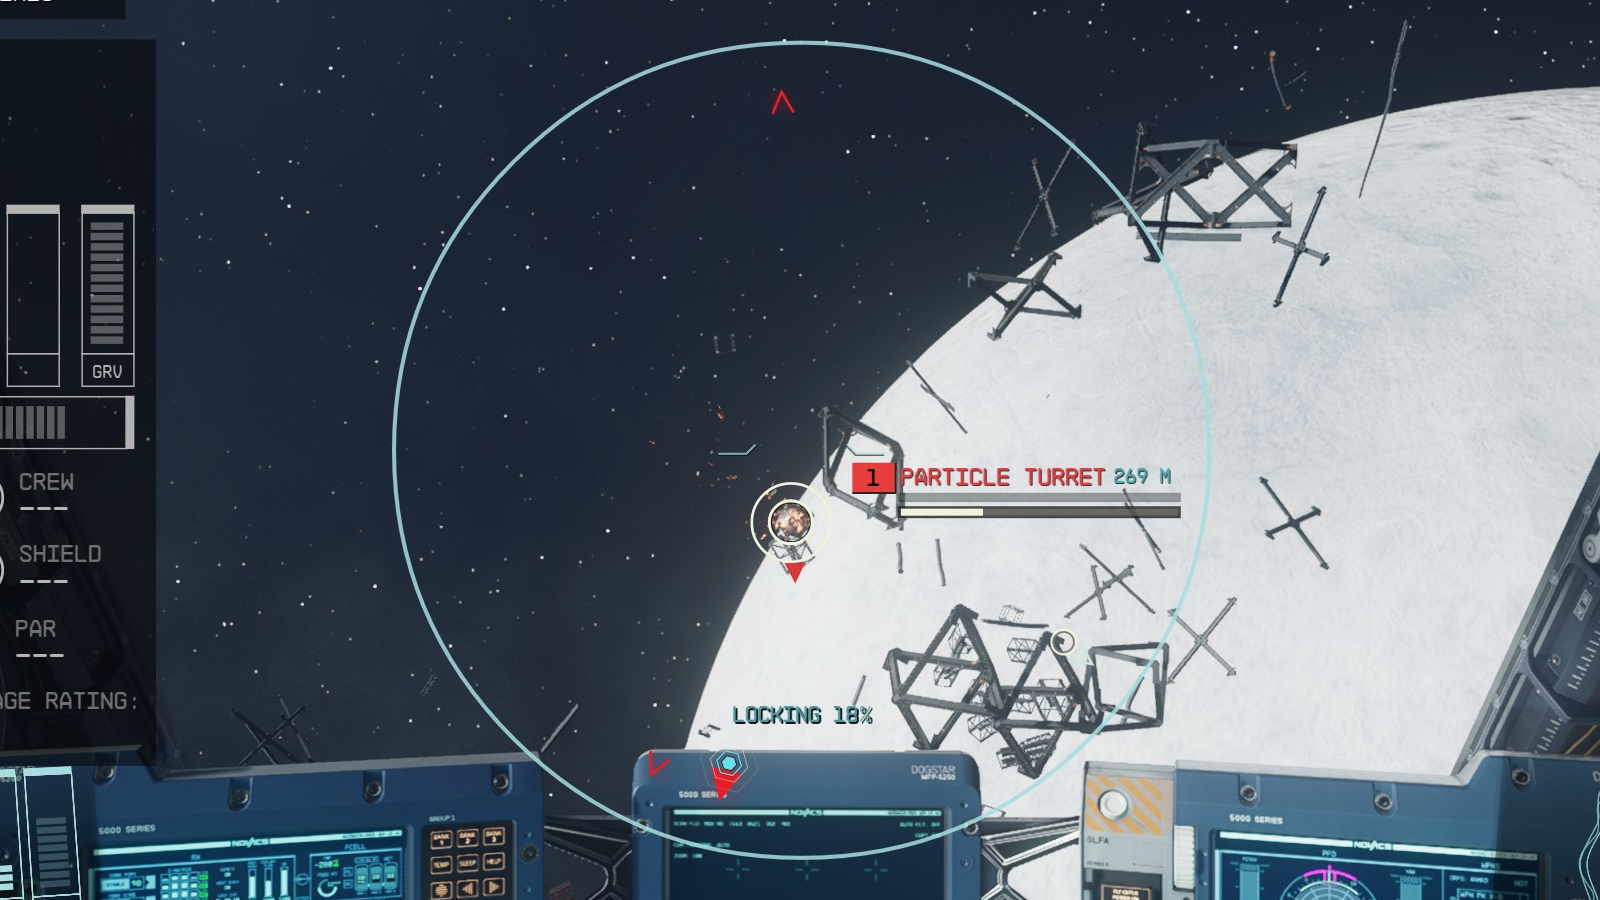
Note that as well as the Scow, there will be three Particle Turrets shooting at you (Image 42). These are easy enough to deal with, and you should do so in order to minimize the damage to your own ship. They will need to be destroyed before you’ll be able to board the Scow anyway.
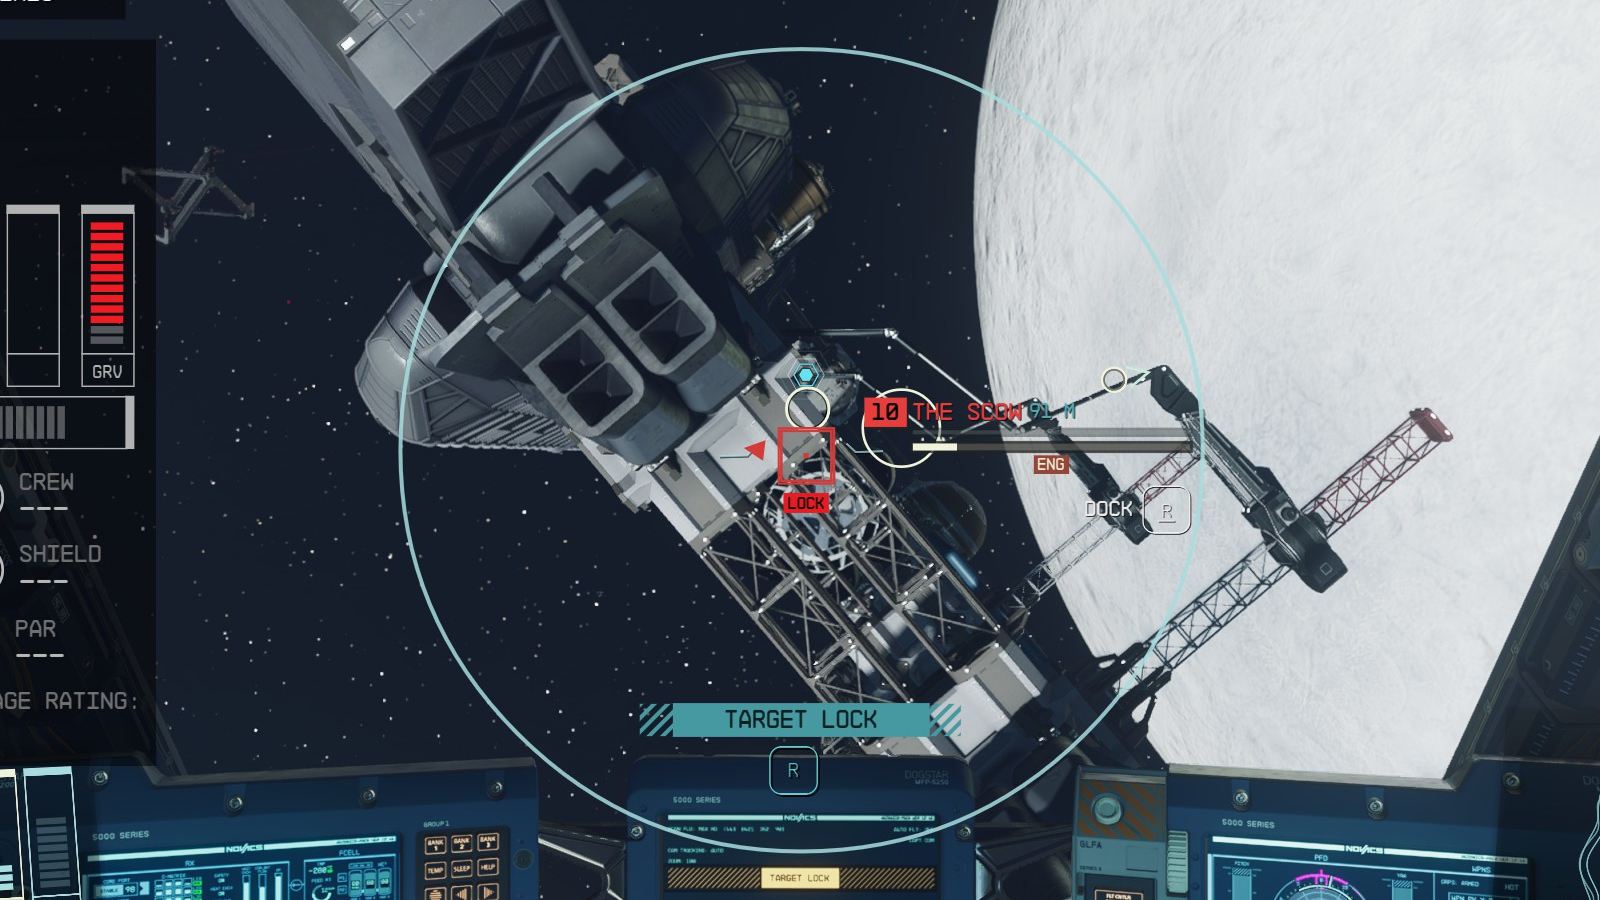
When you’ve disabled the engines, get close to the Scow and target it with with / / , then press / / to dock with it (Image 43).
Image 42Image 43
Board the Scow
Once on board, walk forward and use the Switch on the wall to open the door (Image 44). Don’t bother looting anything right now. You’ll be able to freely take anything on the ship later on.
Image 44
Go up the stairs and a scavenger named Tao Xun will talk to you. You can try to [Persuade] him to let you talk to the captain, or you can [Attack]. Sarah Morgan will like it if you succeed in persuading him, and dislike it if you choose violence.
If you succeed in persuading your way in, the rest of this mission will be the same as if you had persuaded your way onto the ship. Click on the “Option 1: Persuade” tab at the top of this section and scroll down to the heading “Find Captain Petrov.”
If you fail to persuade him or decide to attack instead, Tao Xun and the Scow Guards behind him will open fire and you’ll have to fight your way through the ship.
Find Captain Petrov
If you want to avoid fighting everyone on the ship, you can just run through the vessel to the back and deal with the captain. If you hit Captain Petrov once or twice, he’ll surrender and give up the key to his vault, and all of the guards will stop attacking as well.
To go straight to the captain, follow the route in the “Finding Captain Petrov” section of the “Option 1: Persuade” tab. He’ll likely be hiding in one of the rooms down the hall behind his couch.
If you want to fight your way through the ship instead, start by killing Tao Xun and the Scow Guards in this room. You can then loot the Scow Aux Weapons Key and the Scow Security key from Tao Xun. Then head through the door at the back of the room and up the stairs to another door (Images 45 & 46).
Image 45Image 46
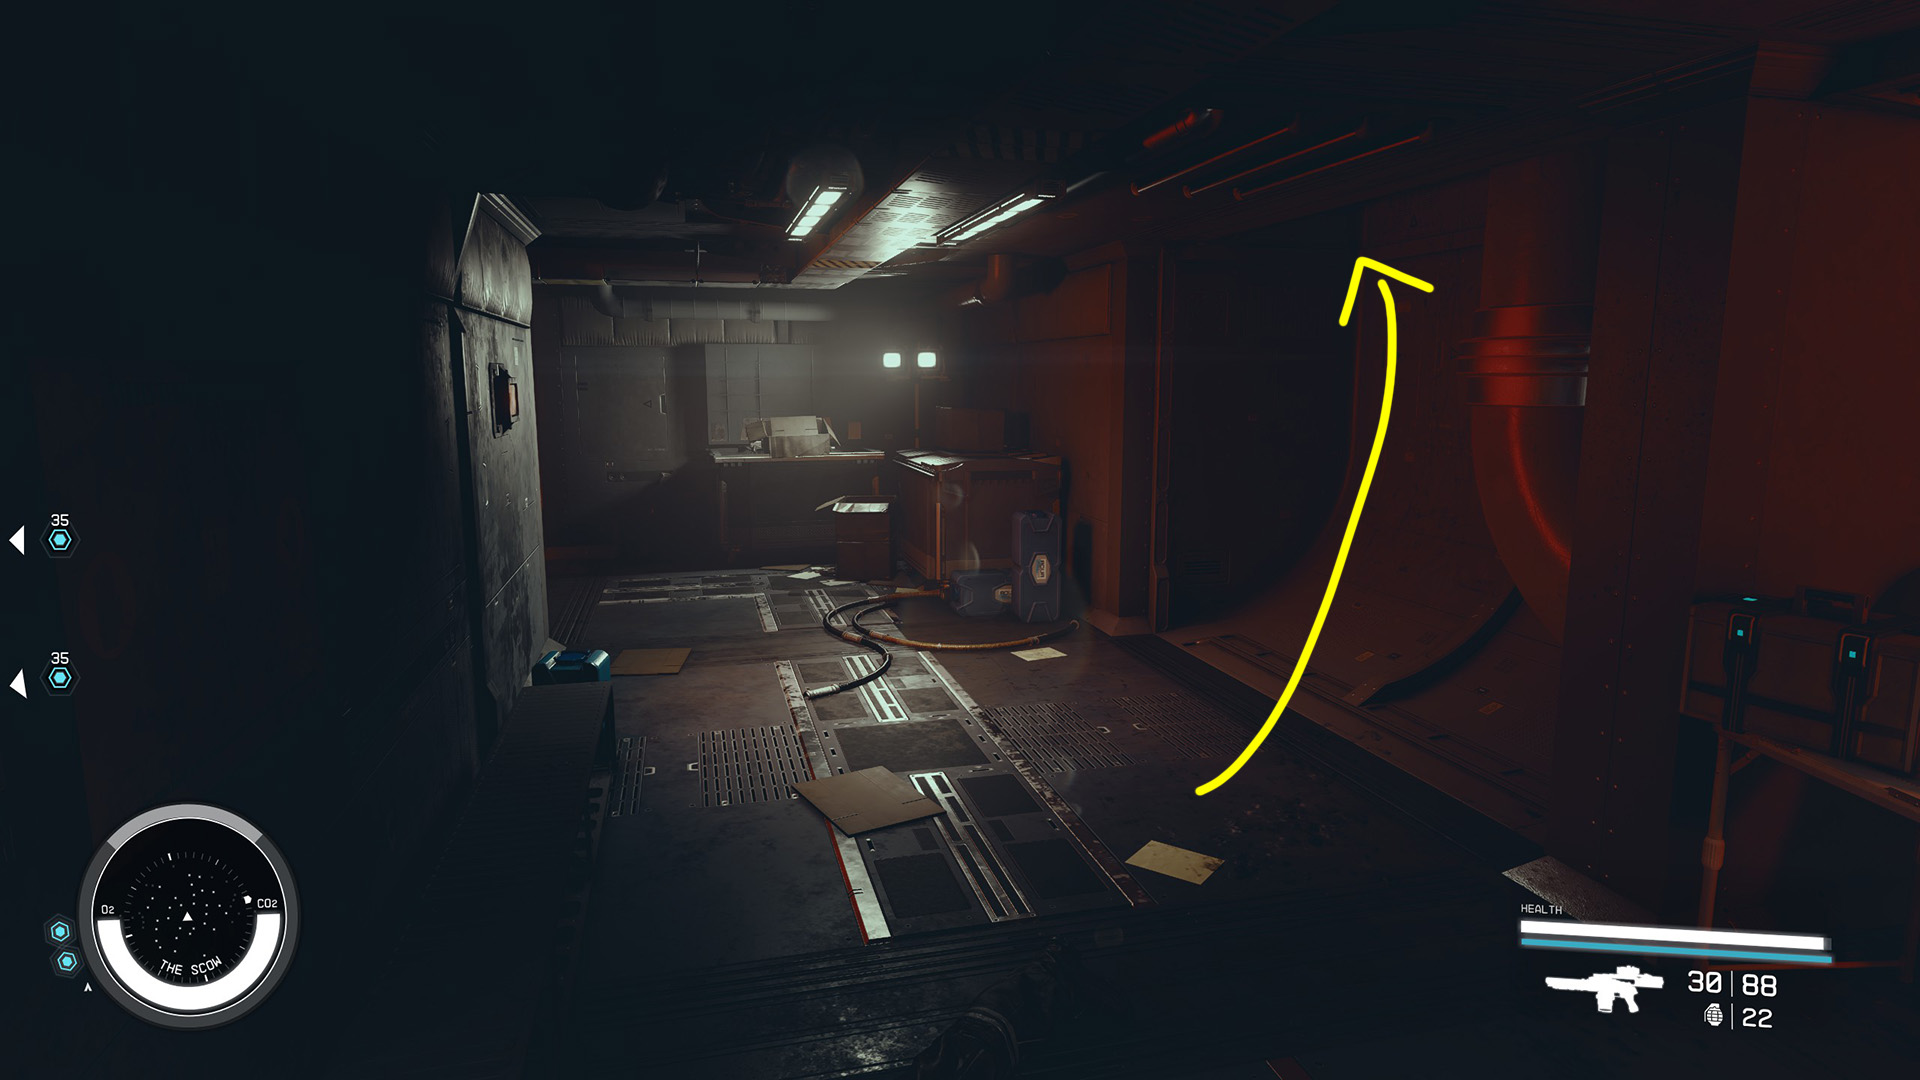
Opening this door, you’ll encounter some more Scow Guards. Take them out, and watch out for the grenades they’ll lob at you. Take a left and turn the corner, following the path up some stairs (Images 47 & 48). We won’t worry about looting the place now – it’ll be easier to do it on the way out.
Image 47Image 48
There will be four more Scow Guards inside the living quarters at the end of the hall. Take care of them and you’ll have a choice of which direction to go from here. If you go to the left, you’ll pass through a room with some vending machines into the ship’s armory. You can loot this room later, but you may want to raid it now if you need ammo or grenades. The door will open with one of the keys you looted from Tau Xun. There is only one guard inside, easily dealt with.
Back at the hallway outside the living quarters, you can follow the red carpet down the hallway toward the back of the ship (Images 49 & 50). You’ll encounter a Scow Crew member and more Scow Guards along the way. Continue through the round doorway to the end of the hall and go around the wall to the right or left (Images 51 & 52). You’ll reach a large room with four golden statues and many enemies inside.
Image 49Image 50Image 51Image 52
Along with several more Scow Guards and Crew, there will be some named enemies in this room. Vadik should be no trouble, but Erin September, Raptor, and Bull are all pretty tough. They were level 20 for us. Move into the room carefully so you don’t wind up taking on too many at once. The named scavengers should have some pretty good items when you’re able to loot them.
Access Petrov’s Vault
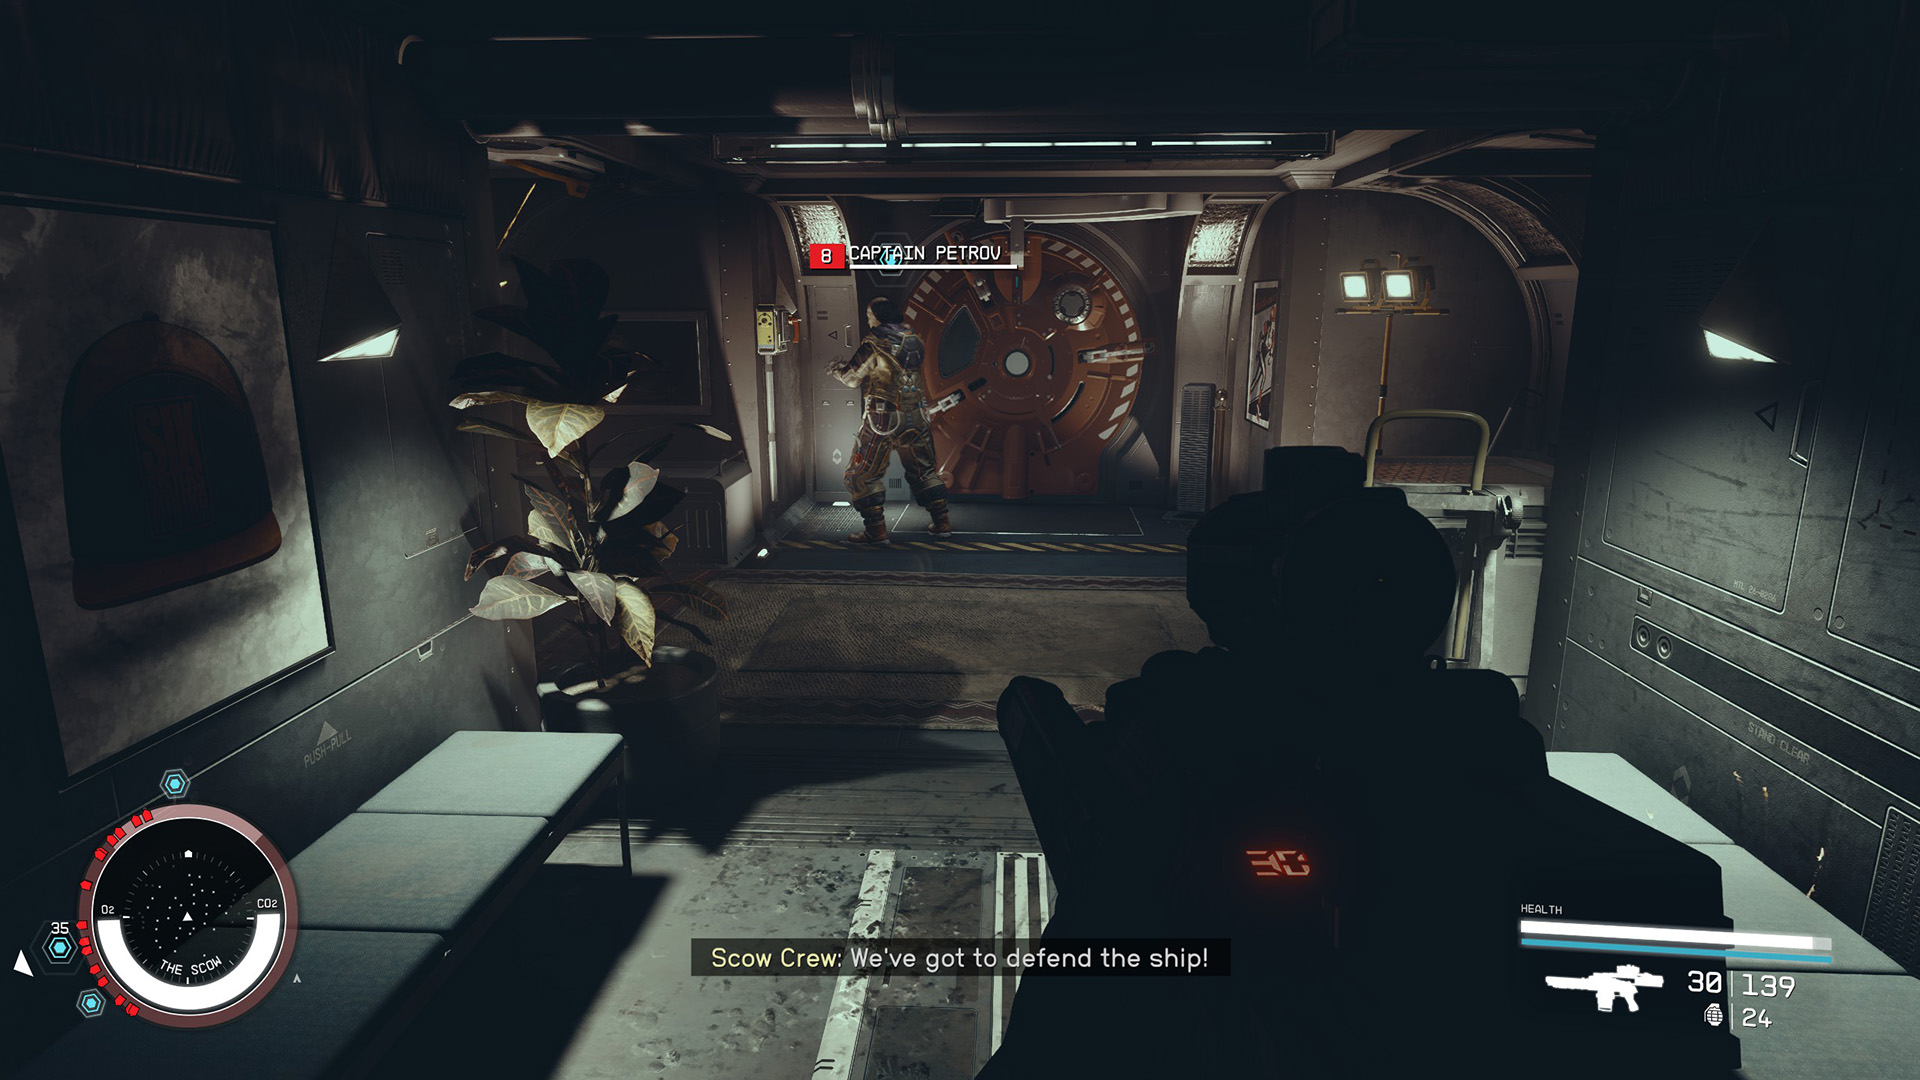
Head back through the door behind the couch (Image 53) and you may find Captain Petrov trying to flee through one of the doors (Image 54). You can deal with him now or let him run away. Keep in mind that he will surrender almost immediately if attacked, but you can choose to kill him anyway. Sarah Morgan will dislike it if you do. If he surrenders, he will give you his vault key and you can skip ahead to the “Steal the Artifact” section.
Image 53Image 54
If you let Petrov run or kill him, you’ll have to continue to fight your way through the ship. You’ll also need to find a way to get inside the vault when you get there. The easiest way is to pick up Petrov’s Vault Key by going through the door on the left side of this hallway (Image 55). This will take you to Petrov’s quarters. There will be a lone Scow Crew inside. Pass through two more doors (Images 56 & 57) and pick up the vault key on his desk (Image 58).
Image 55Image 56Image 57Image 58
Go through the red door now by activating the Switch on the wall, and continue to fight your way through the ship. There will be several Scow Guards and Scow Crew waiting down the stairs.
If you want to add to the chaos, you can duck into the hallway on the left with the large utility sink (Image 59). On the wall ahead you’ll see a Zoo Control computer (Image 60). You’ll need at least rank 3 of the Security skill to unlock it, as it is a master level lock. If you do unlock it, all you need to do is click Open Doors. You can then exit the computer interface and the alien creatures will all run out of their cells, chasing down any Scow personnel they can find. You can also kill the creatures yourself for some extra XP and loot.
Image 59Image 60
Continue down the hallway toward the vault (Image 61). You may encounter Petrov again if you haven’t dealt with him yet. He will run away again if you let him. There will be two more Scow Guards here to fight.
You can now choose to enter the vault through a back way if you don’t want to mess with getting the door open. If you want to do this, click on the “Option 1: Persuade” tab above and go to the section “Option D: Find the Thin Walls.”
To go through the vault door, head down the stairs to the left (Image 62), and look for the Switch beside the door (Image 63). If you have Petrov’s Vault Key, you’ll be able to open this automatically. If not, this is a master level lock, so you’ll need at least rank 3 in the Security skill to pick it.
Image 61Image 62Image 63
With the door open, there will be a single Scow Guard inside the room for you to deal with. The door inside the room will take you into the vault (Image 64). You can now continue with the “Steal the Artifact” section below.
Image 64
Steal the Artifact
However you manage to get inside the vault, you’ll now have to take the artifact in order to complete your mission. If you haven’t already gotten Petrov to surrender, looting the artifact will make everyone on the ship hostile. You will have to fight your way out, but do some damage to Petrov and he will surrender now, allowing you to leave in peace. Even if he lets you go, though, you’ll leave with a 500 credit bounty with the United Colonies no matter what.
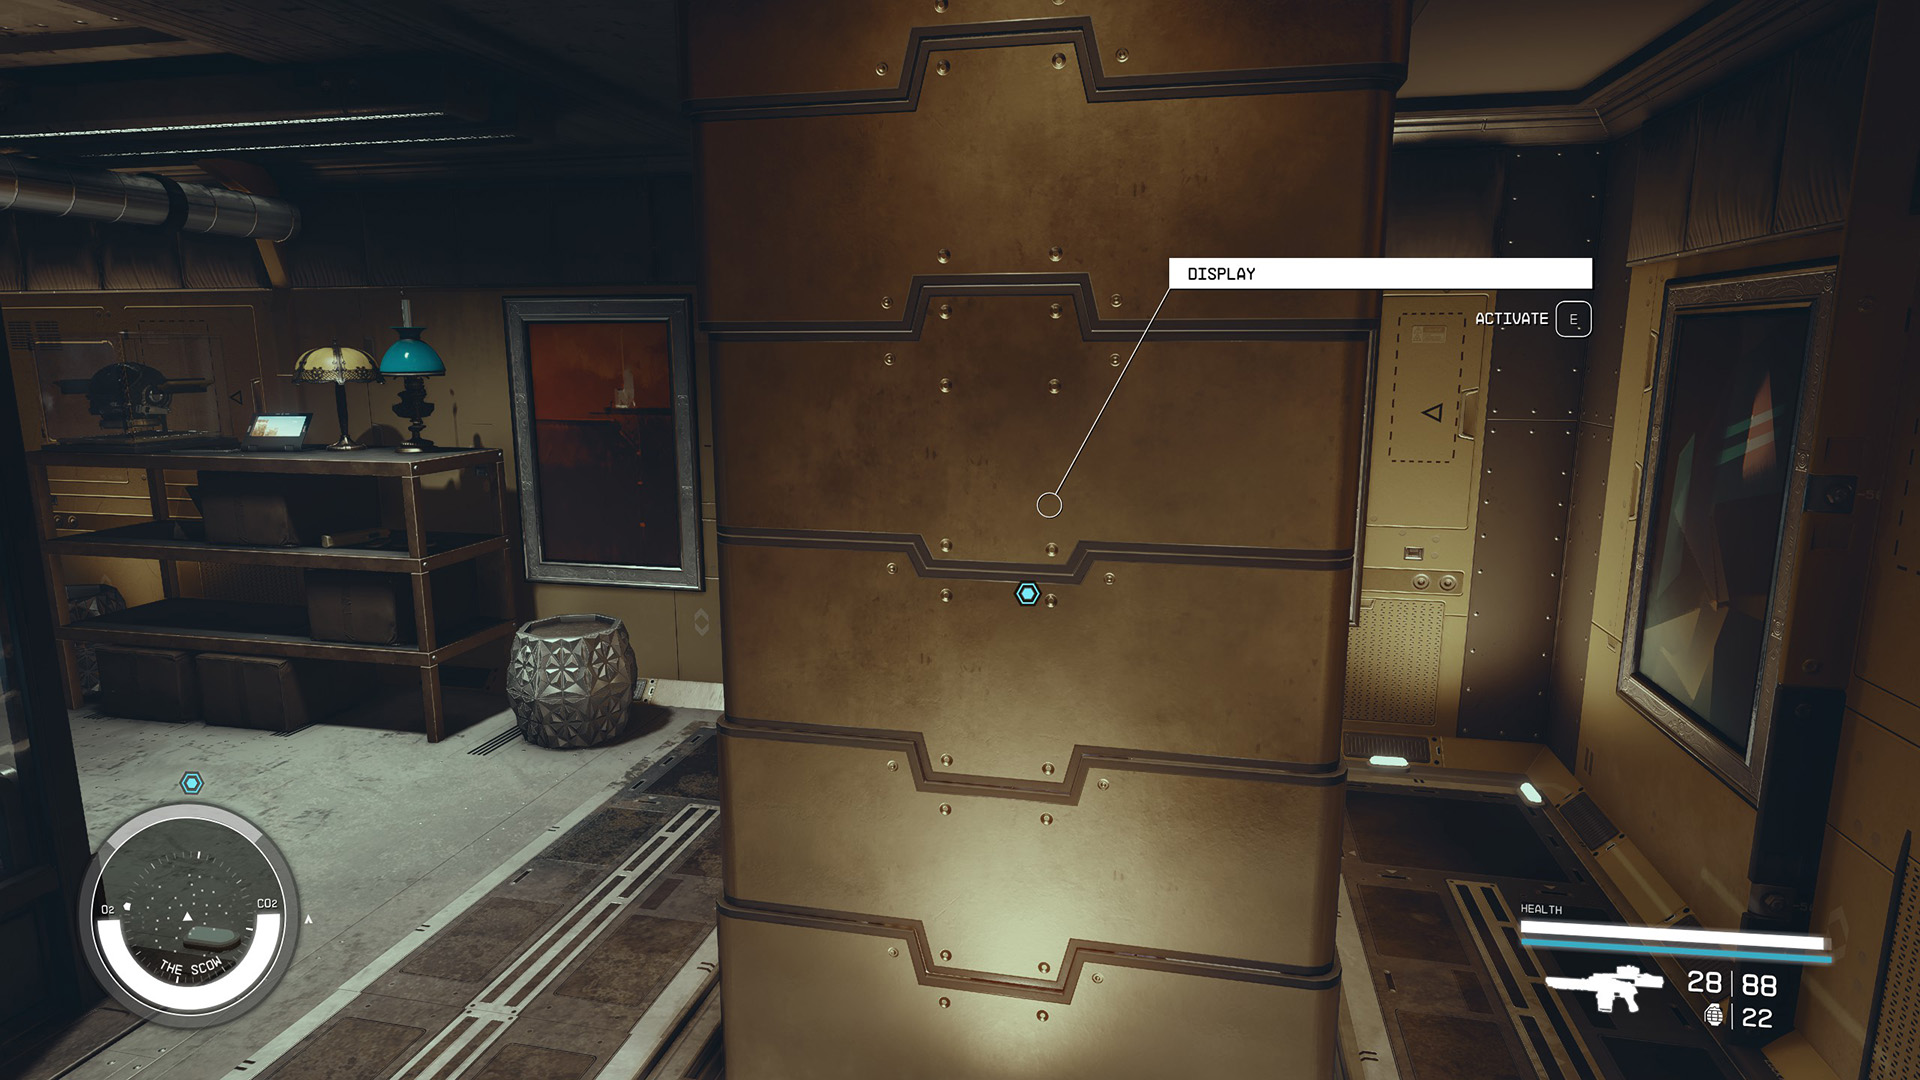
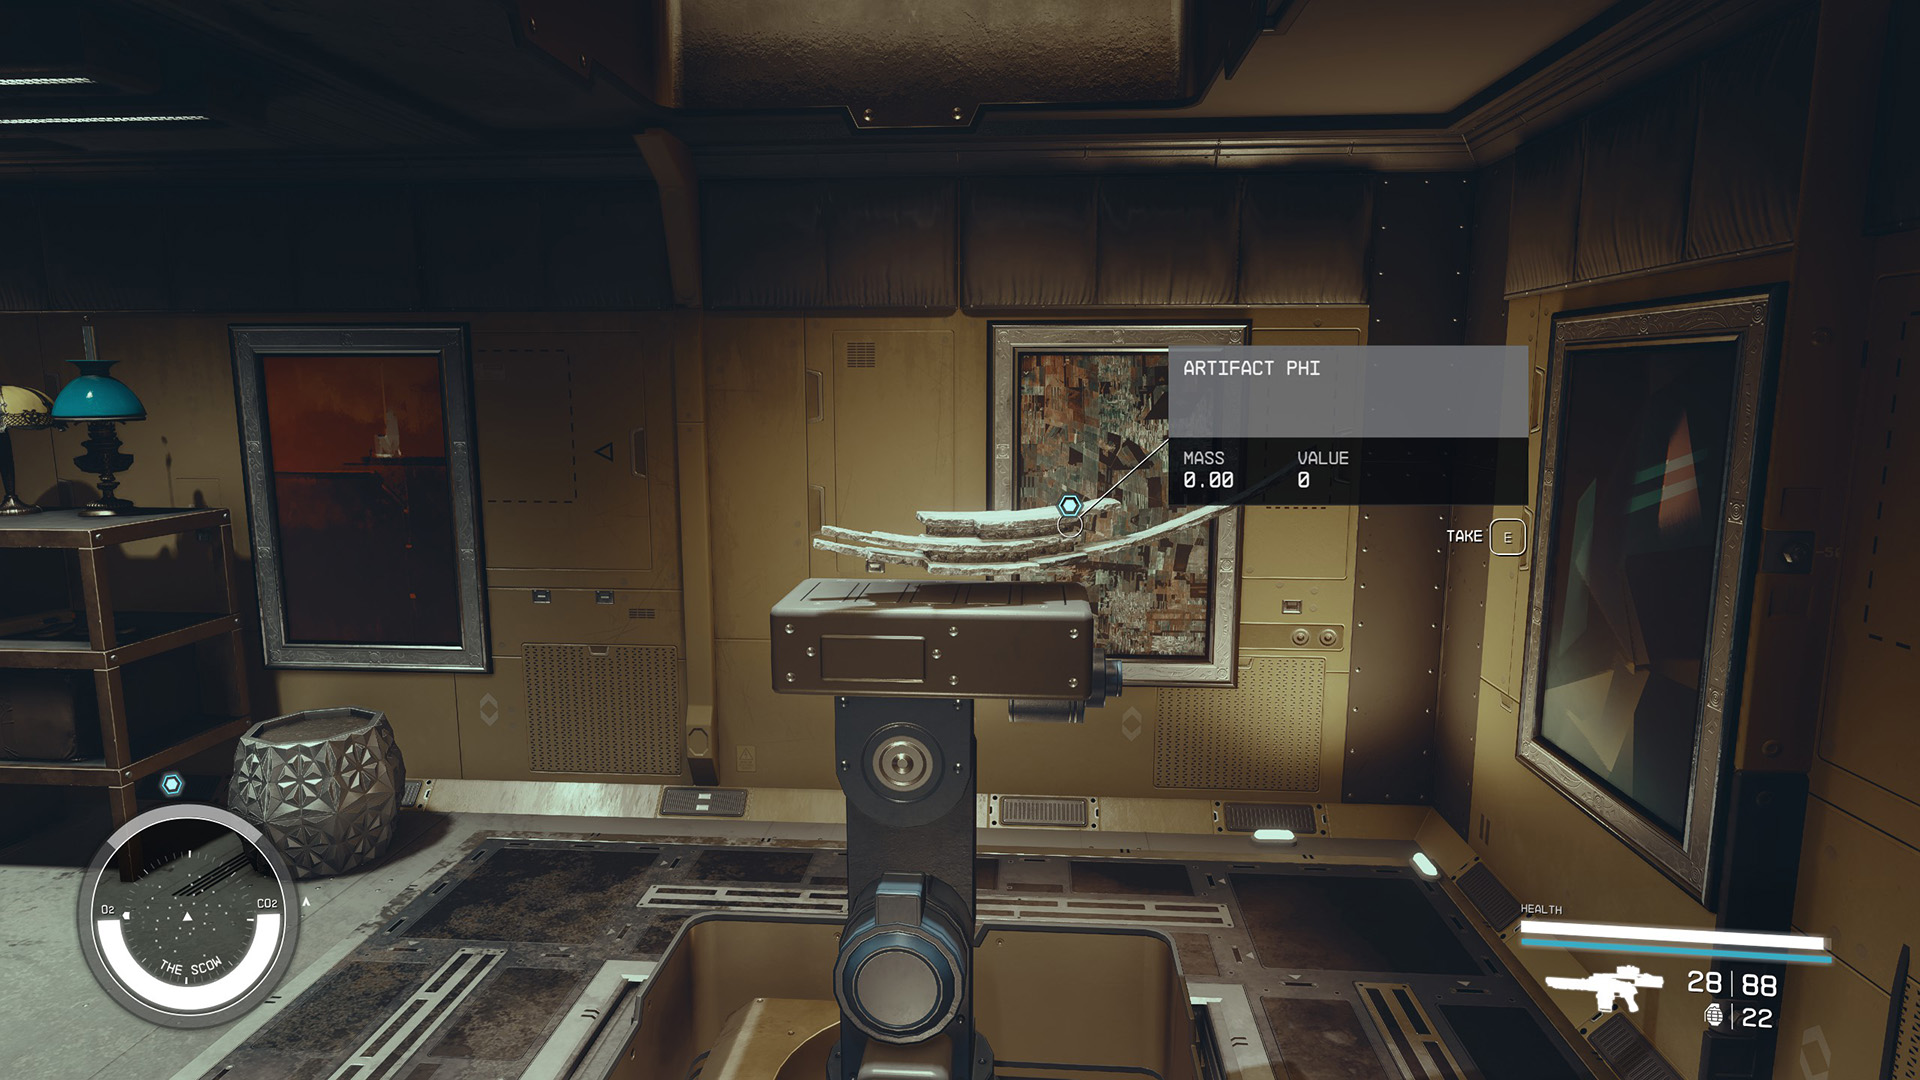
To take the artifact, you may first need to activate the Display (Image 65). This will reveal Artifact Phi, which you can now pick up (Image 66).
Image 65Image 66
After Petrov surrenders, you’ll be able to take anything and everything else on the ship – it won’t be marked as stealing anymore. If you choose to kill him anyway, this won’t be true.
You’re already a pirate now, so you may as well make that bounty worthwhile. The next section will point you to any notable loot on the ship. If you just want to leave with your artifact, you can head back to your ship now. When you get there, you can skip to the section “Add the Artifact to the Collection.”
Looting the Scow
We’ll start from the vault and work our way through the ship. If you accepted Petrov’s surrender, everything should be free to take. There doesn’t seem to be any way to open his collection’s display cases, so unfortunately you won’t be able to loot much else from Petrov’s collection. But there is still a ton of loot to be found on board the Scow. We’ll focus on the most valuable and unique items.
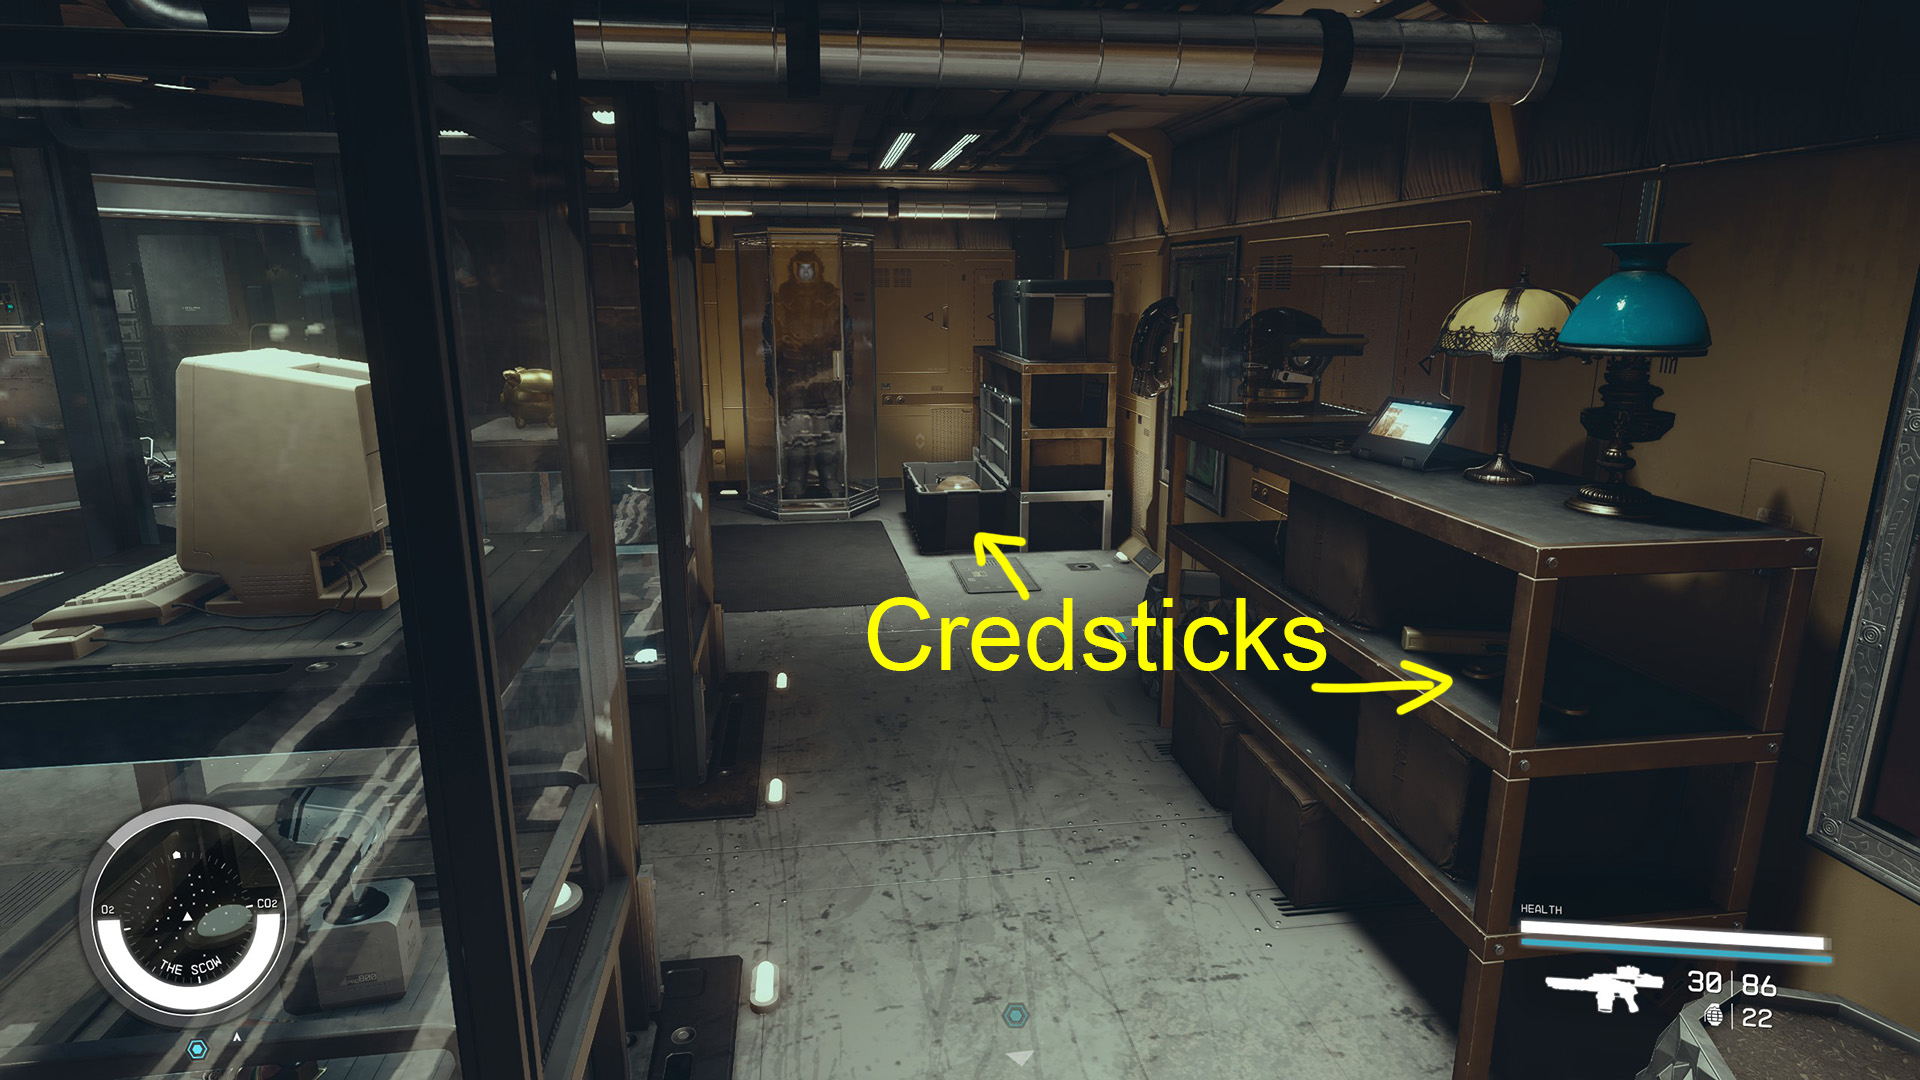
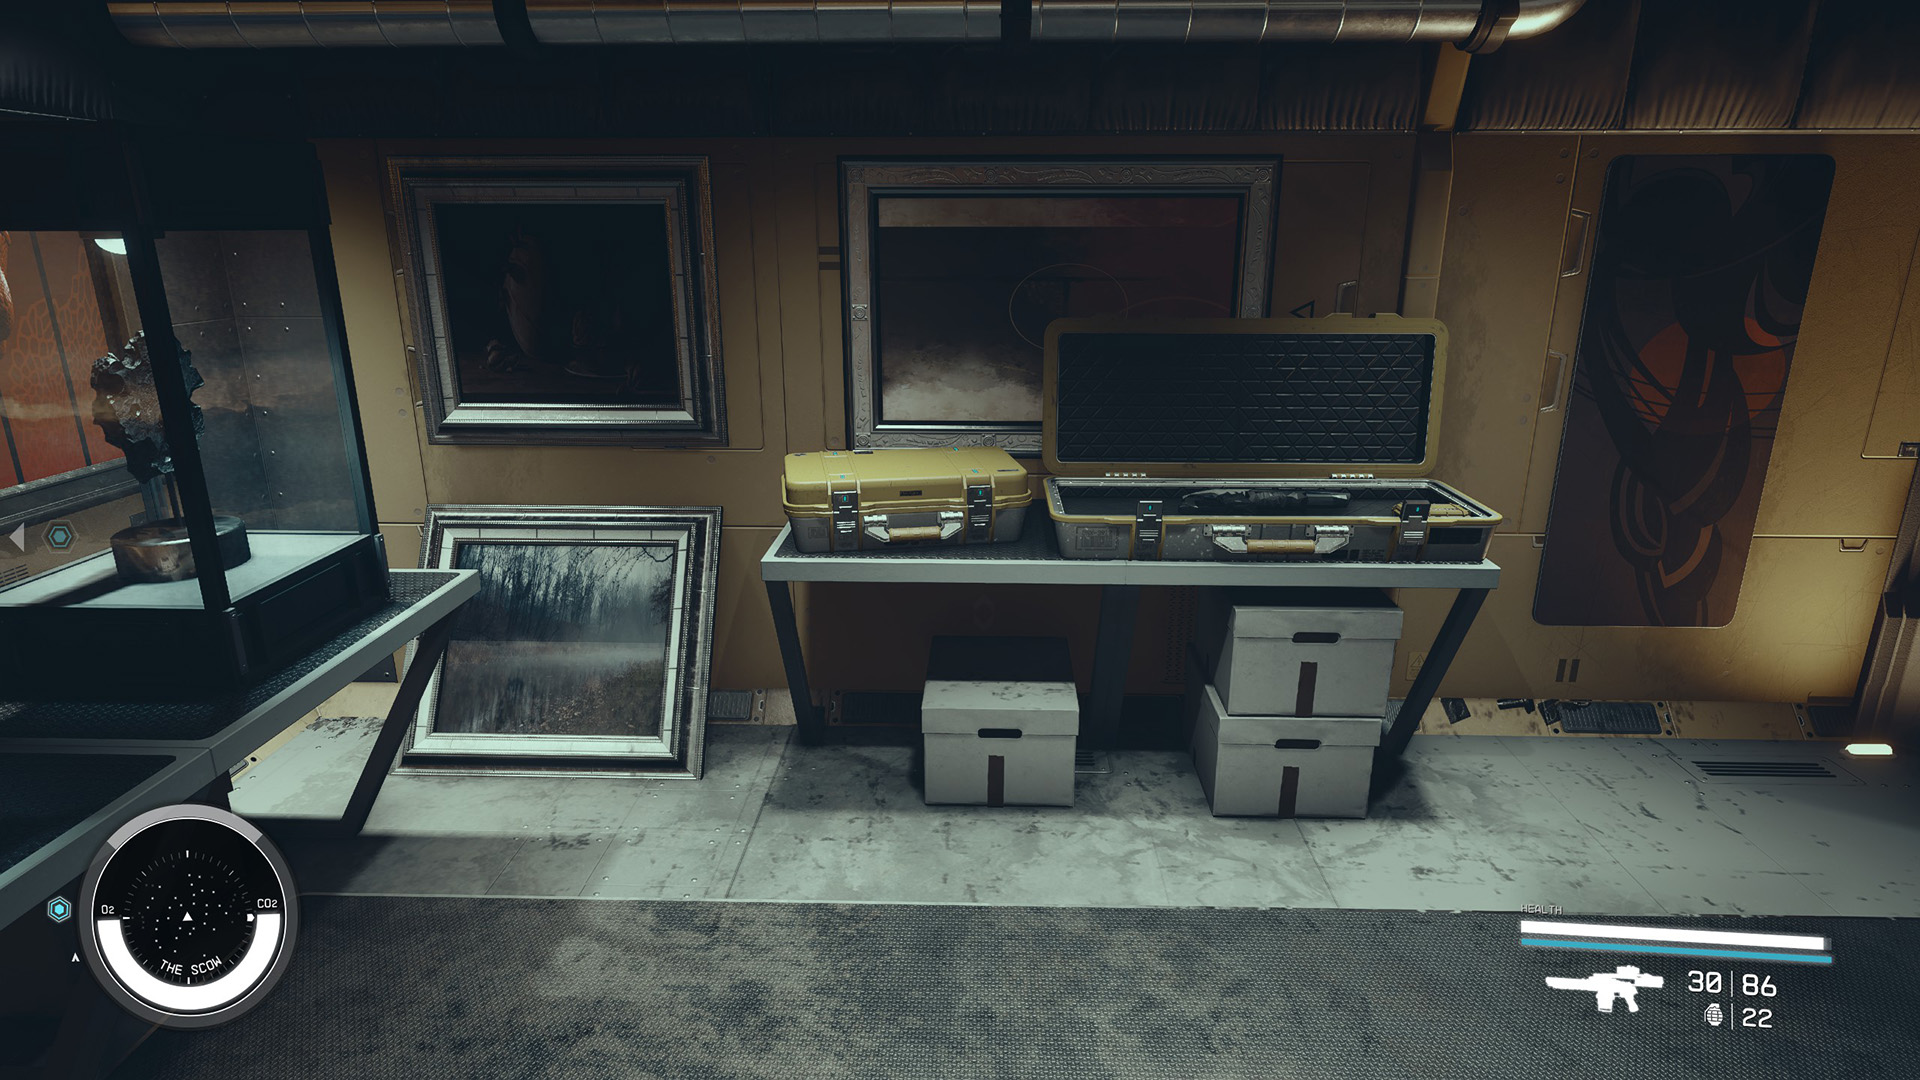
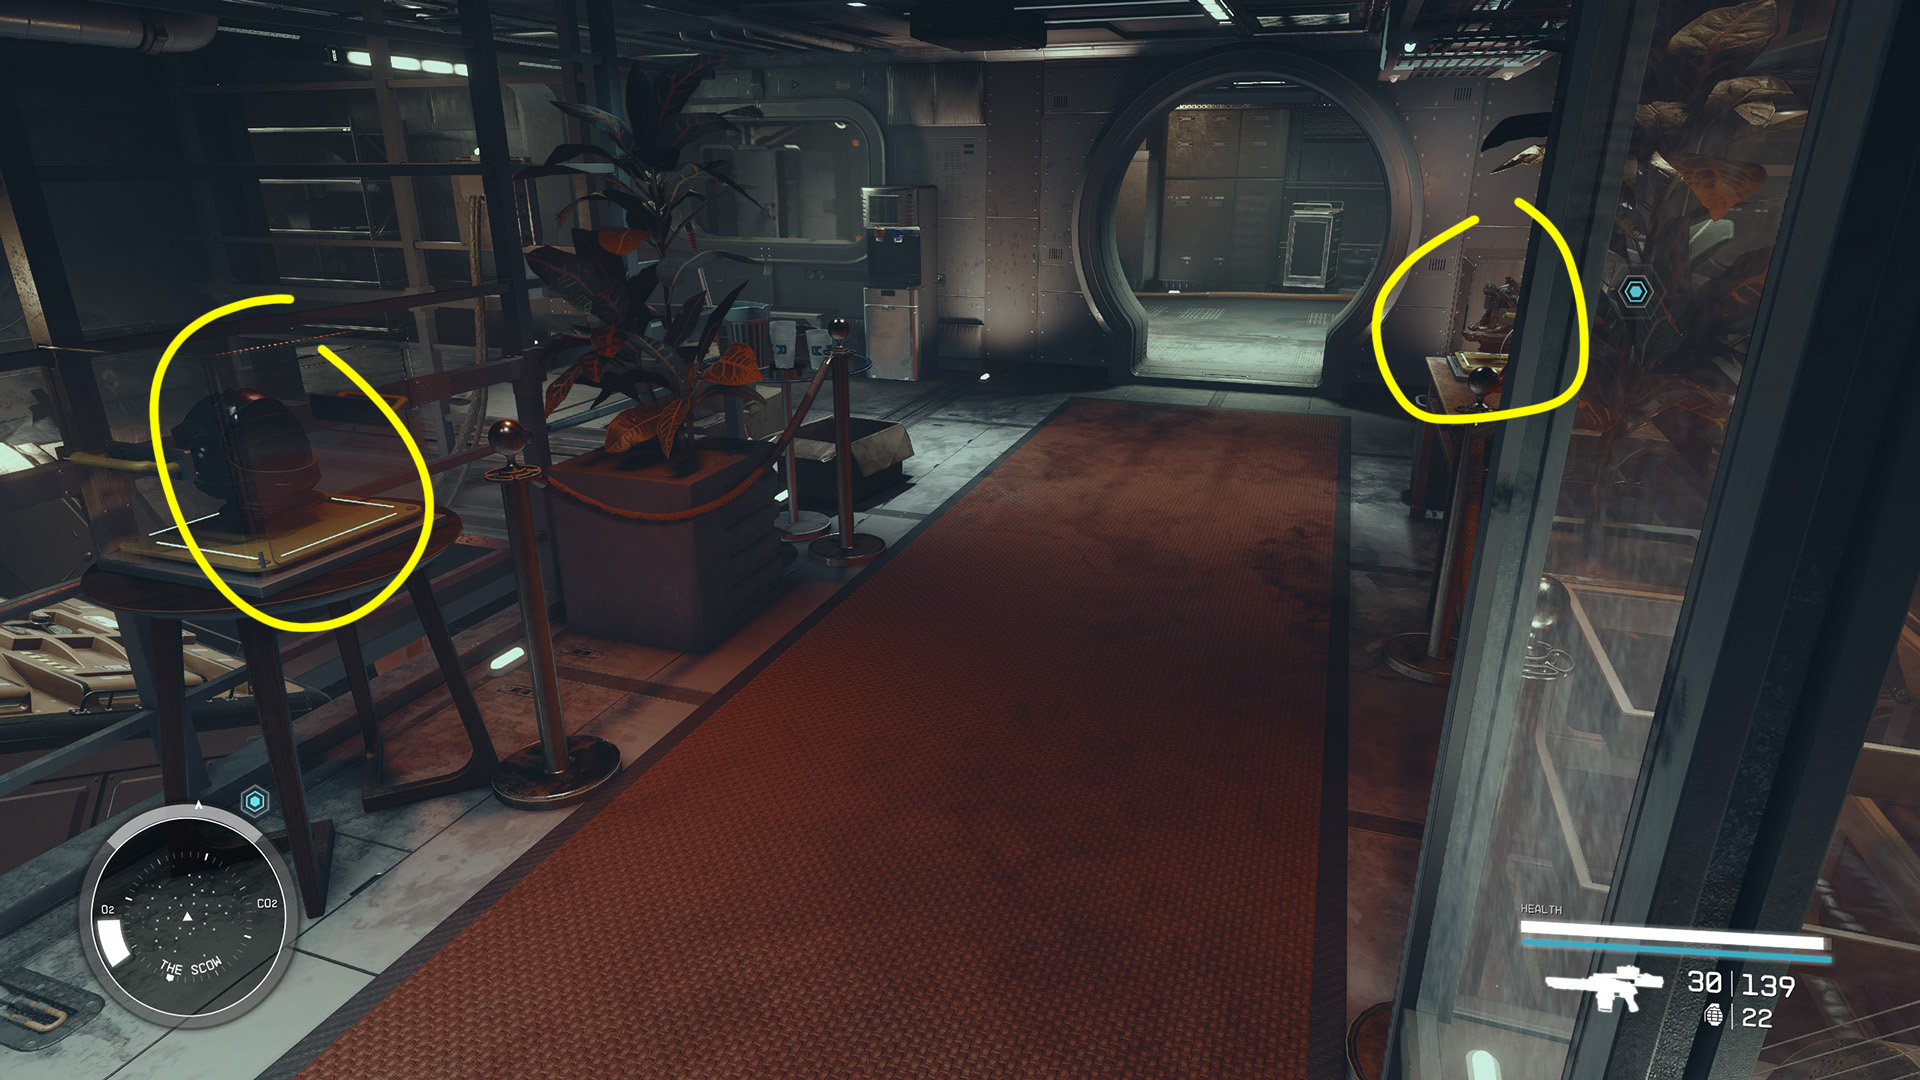
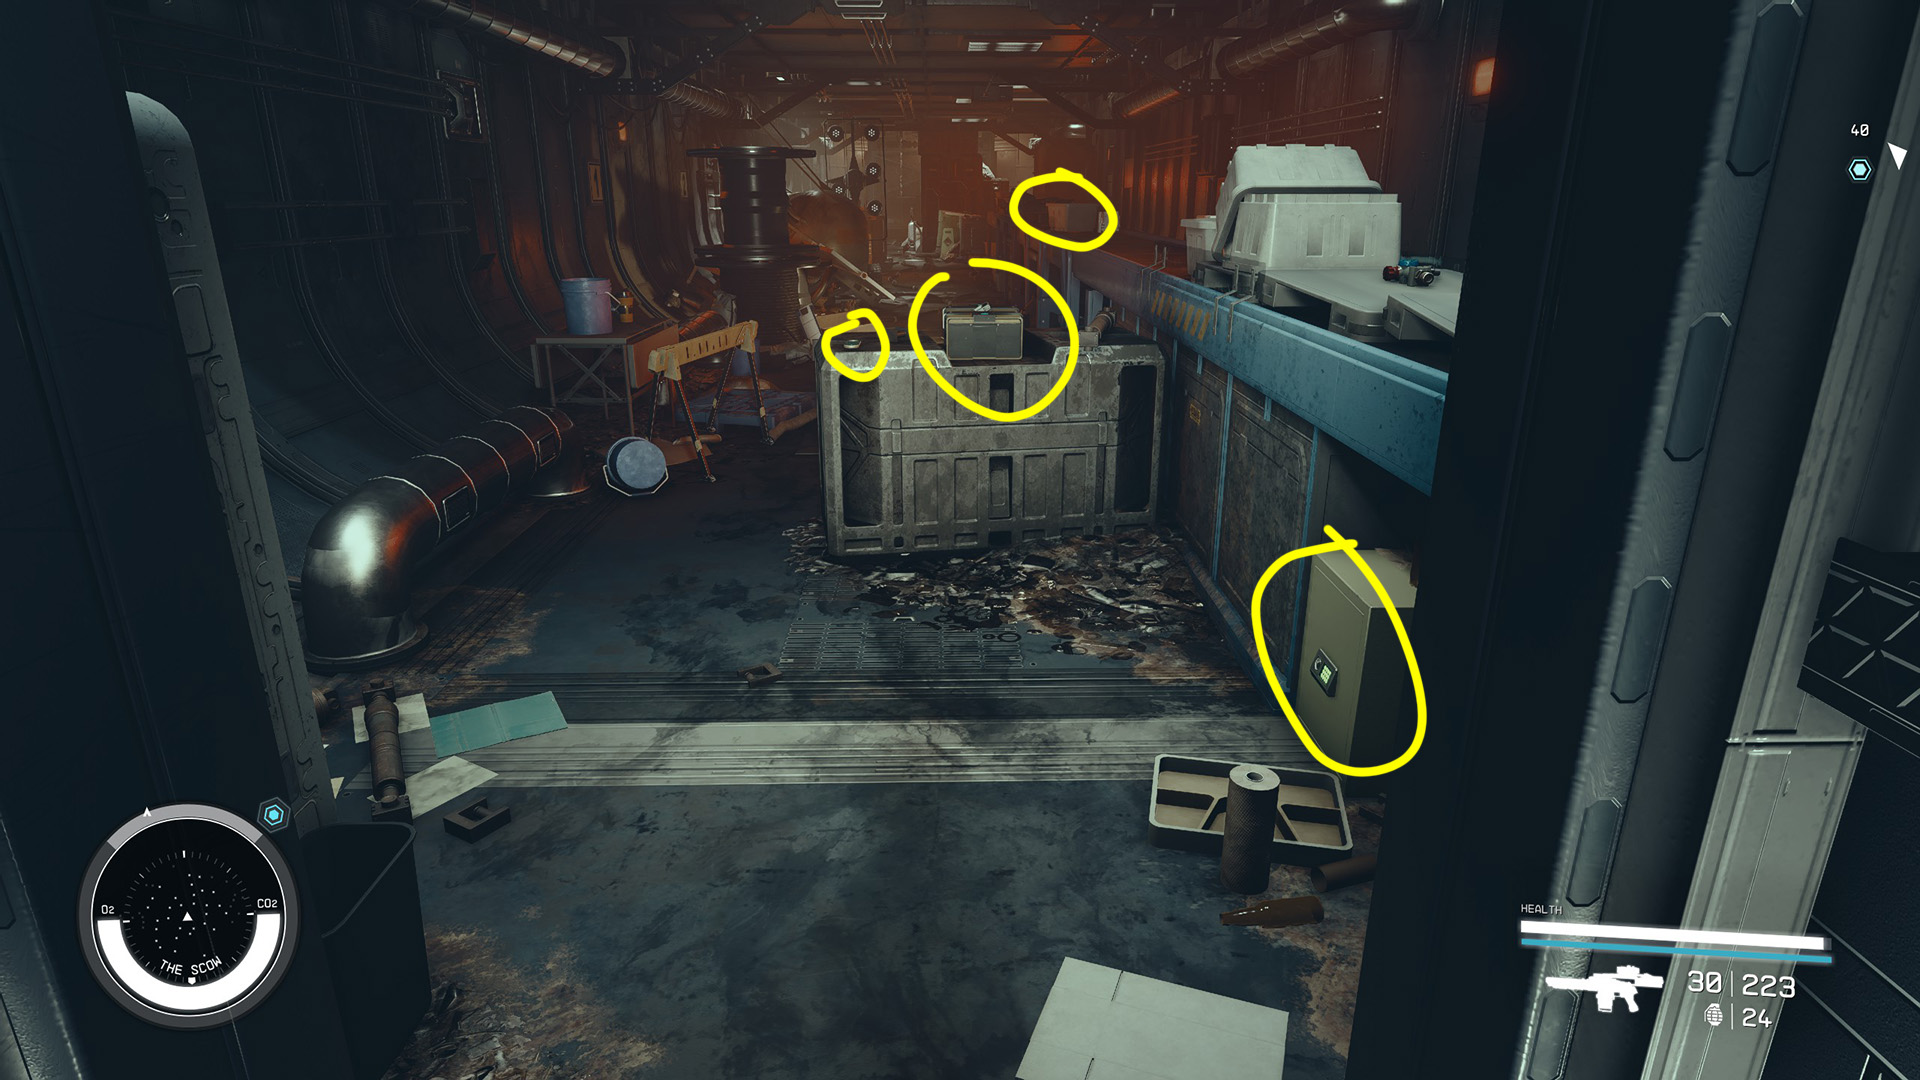
To the left of the artifact display you’ll find a shelf with some credsticks and a few item displays: a helmet, a pack, and a mannequin with a full set of gear on it. The helmet display has an expert lock on it. There are several more credsticks in the open box at the mannequin’s feet, so don’t overlook those (Image 67). On the opposite side of the room you’ll find two weapon cases (Image 68). One is open and one has a master lock on it.
Image 67Image 68
There isn’t much else of note in the vault area, but you can cut through the wall behind the desk by aiming your Cutter at each of the four pins on the corners (Image 69). This will take you to another area of the ship that you may have seen if you already cut through some of the other walls.
Go through the cuttable wall, and you’ll find a Storage Crate around the corner. Pass under the conveyor belt (Image 70) and go into the small room on the left to find another Storage Crate (Image 71).
Image 69Image 70Image 71
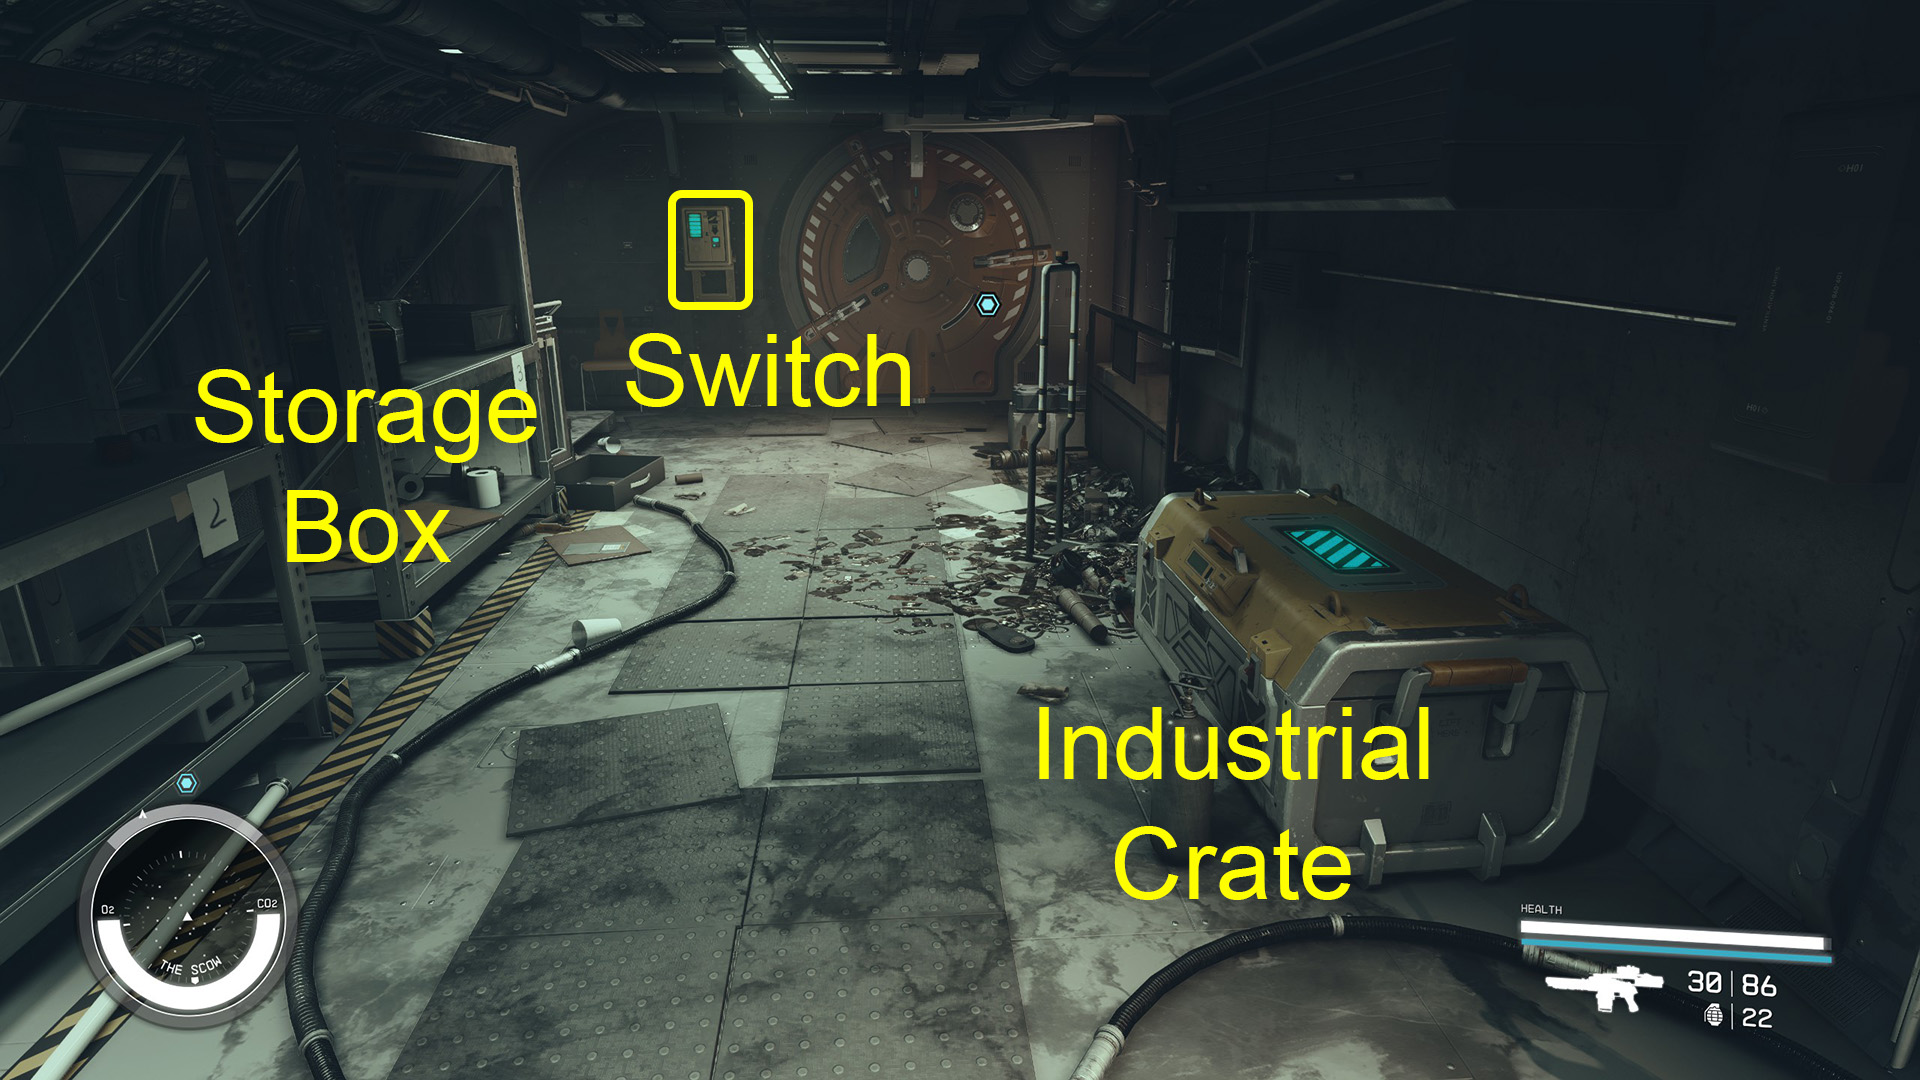
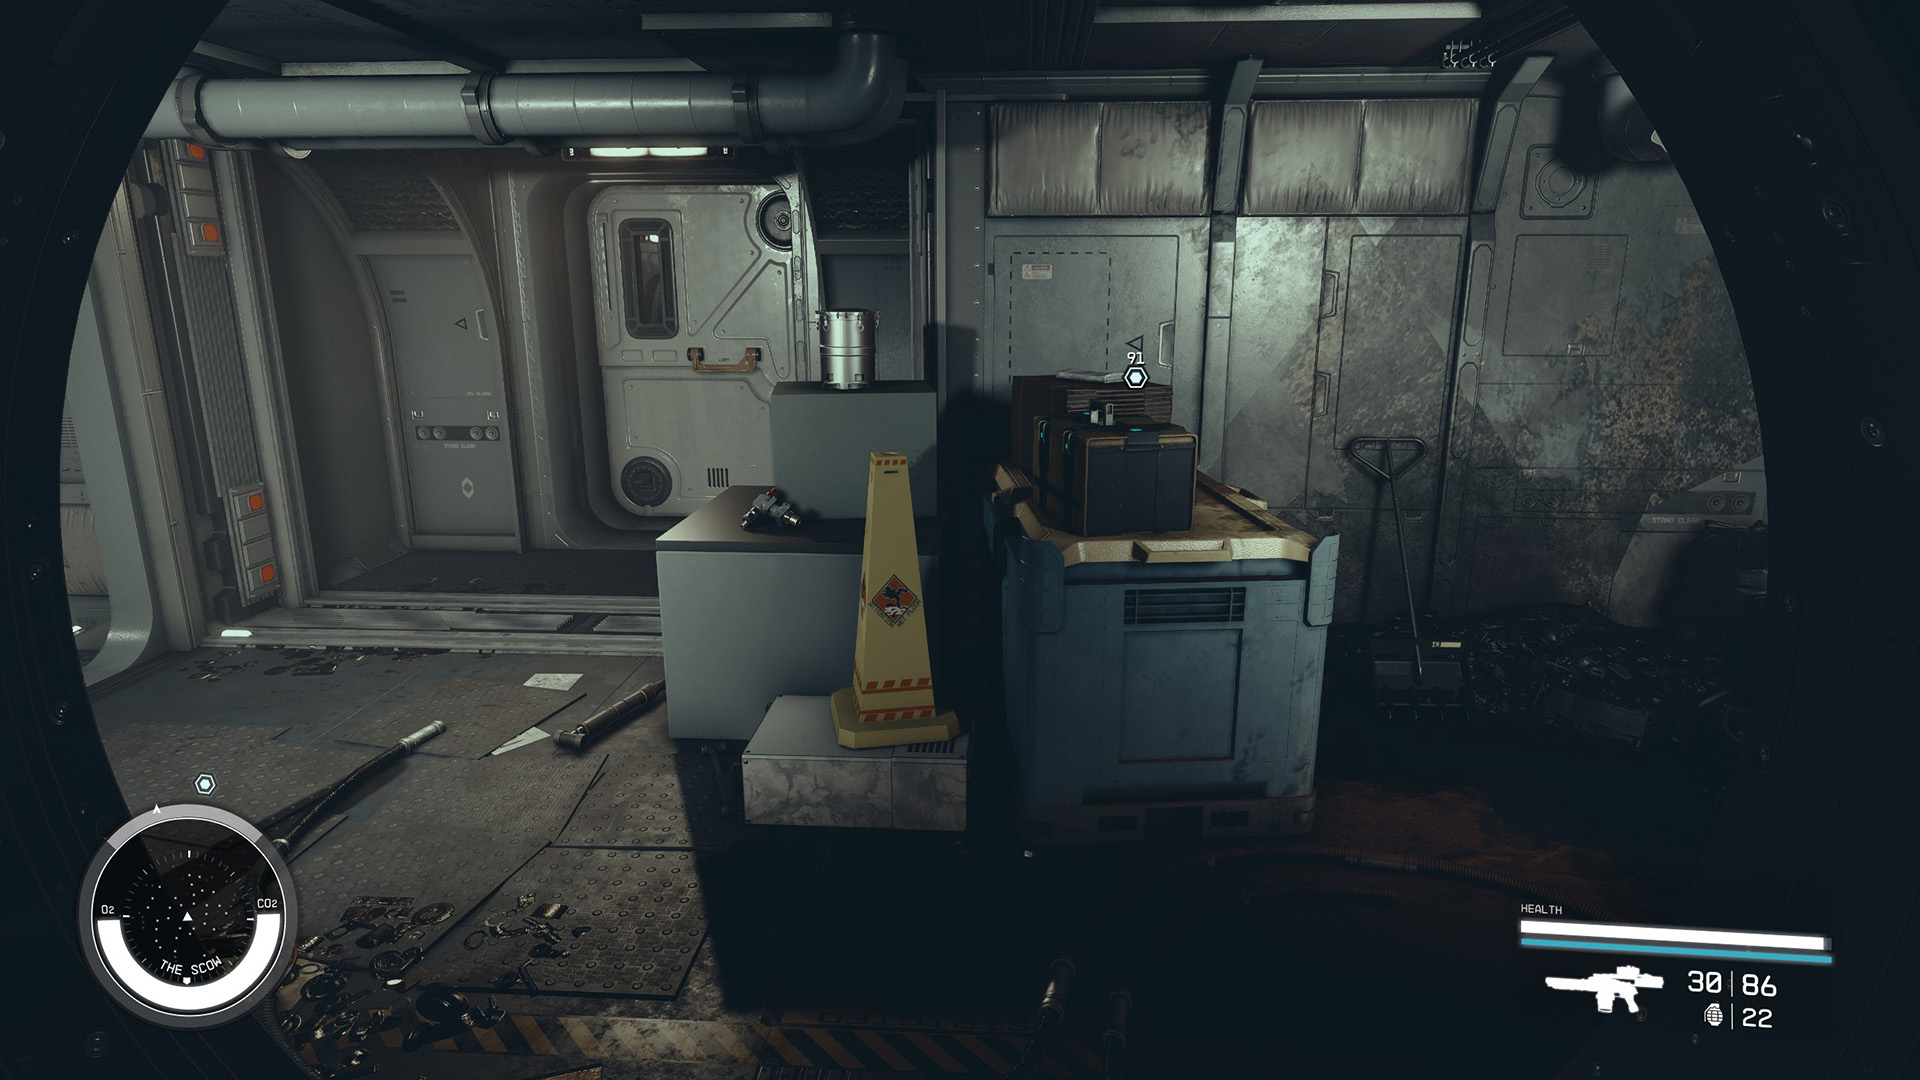
There’s nothing else notable down here, so pass back under the conveyor belt and then hop up onto it. There are a bunch of crafting components lying around if you’re interested in those. Otherwise head through the closed door to the right (Image 72). You’ll find a Storage Box on the counter in front of you. Follow the walkway around to find an Industrial Crate and some shelves with a Storage Box (Image 73). Use the Switch on the wall to open the red door, and you’ll find another Storage Box and some crafting components directly in front of you. You can pick the door behind them if you have the skill, but you won’t find much inside it.
Image 72Image 73Image 74
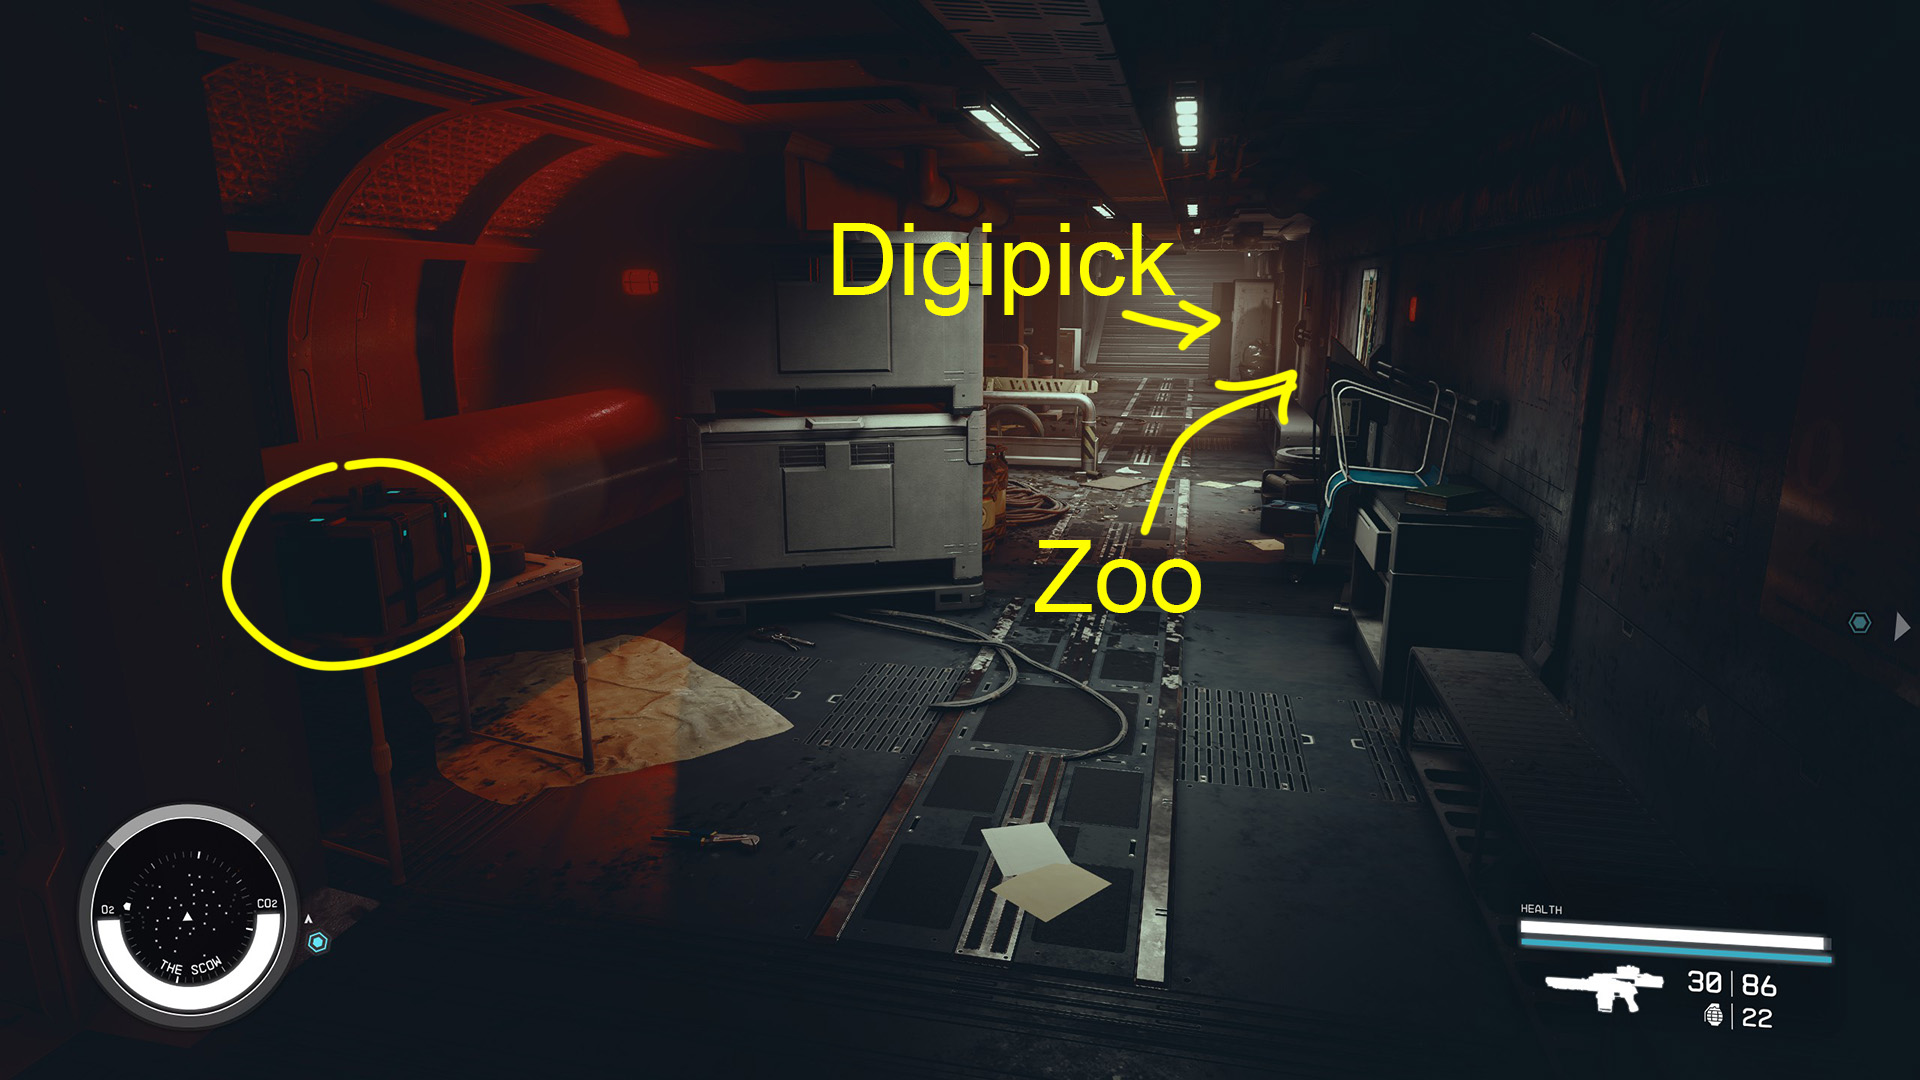
We’ll backtrack now back to the vault and go out the way we came in, back toward the zoo (Image 75). On the left side of the hallway you’ll see a Storage Box. There’s a digipick in one of the lockers near the stairs. You can go release the animals from the zoo now if you haven’t done so already and loot their cells.
Image 75
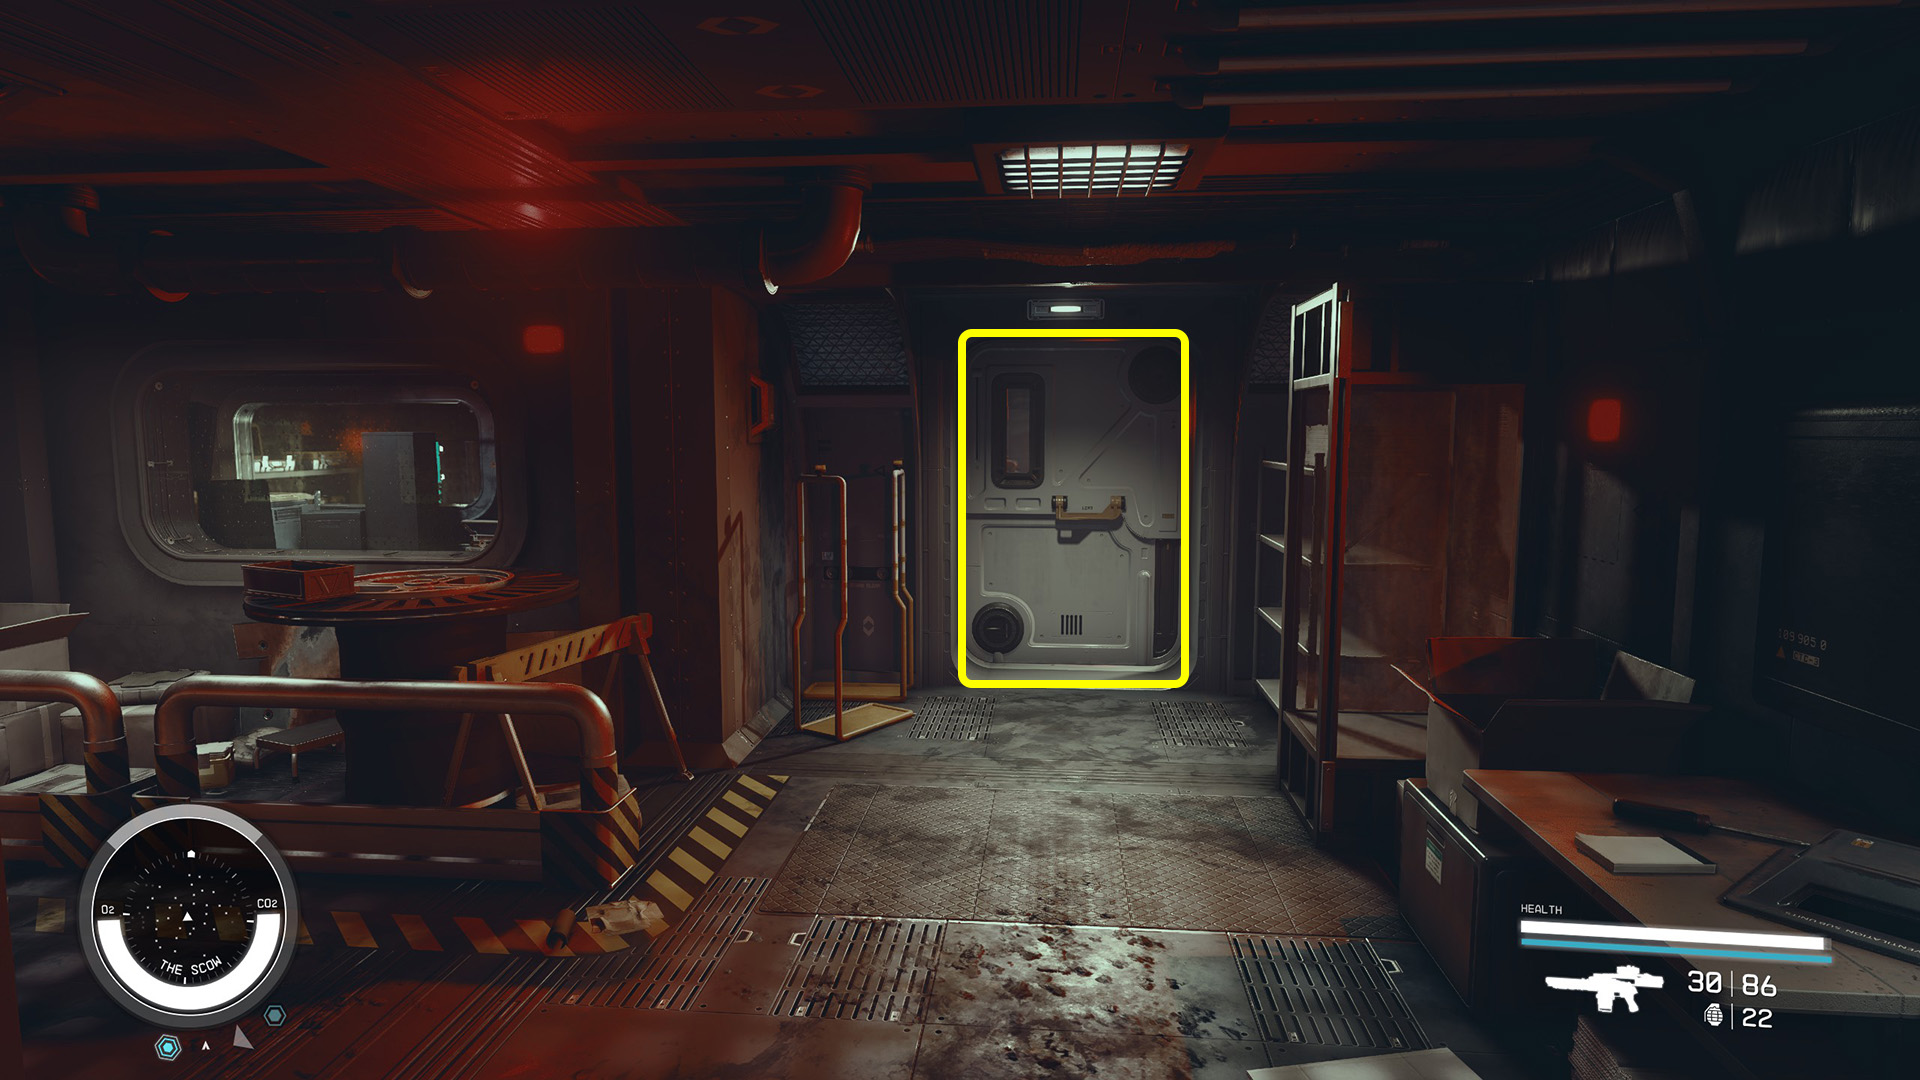
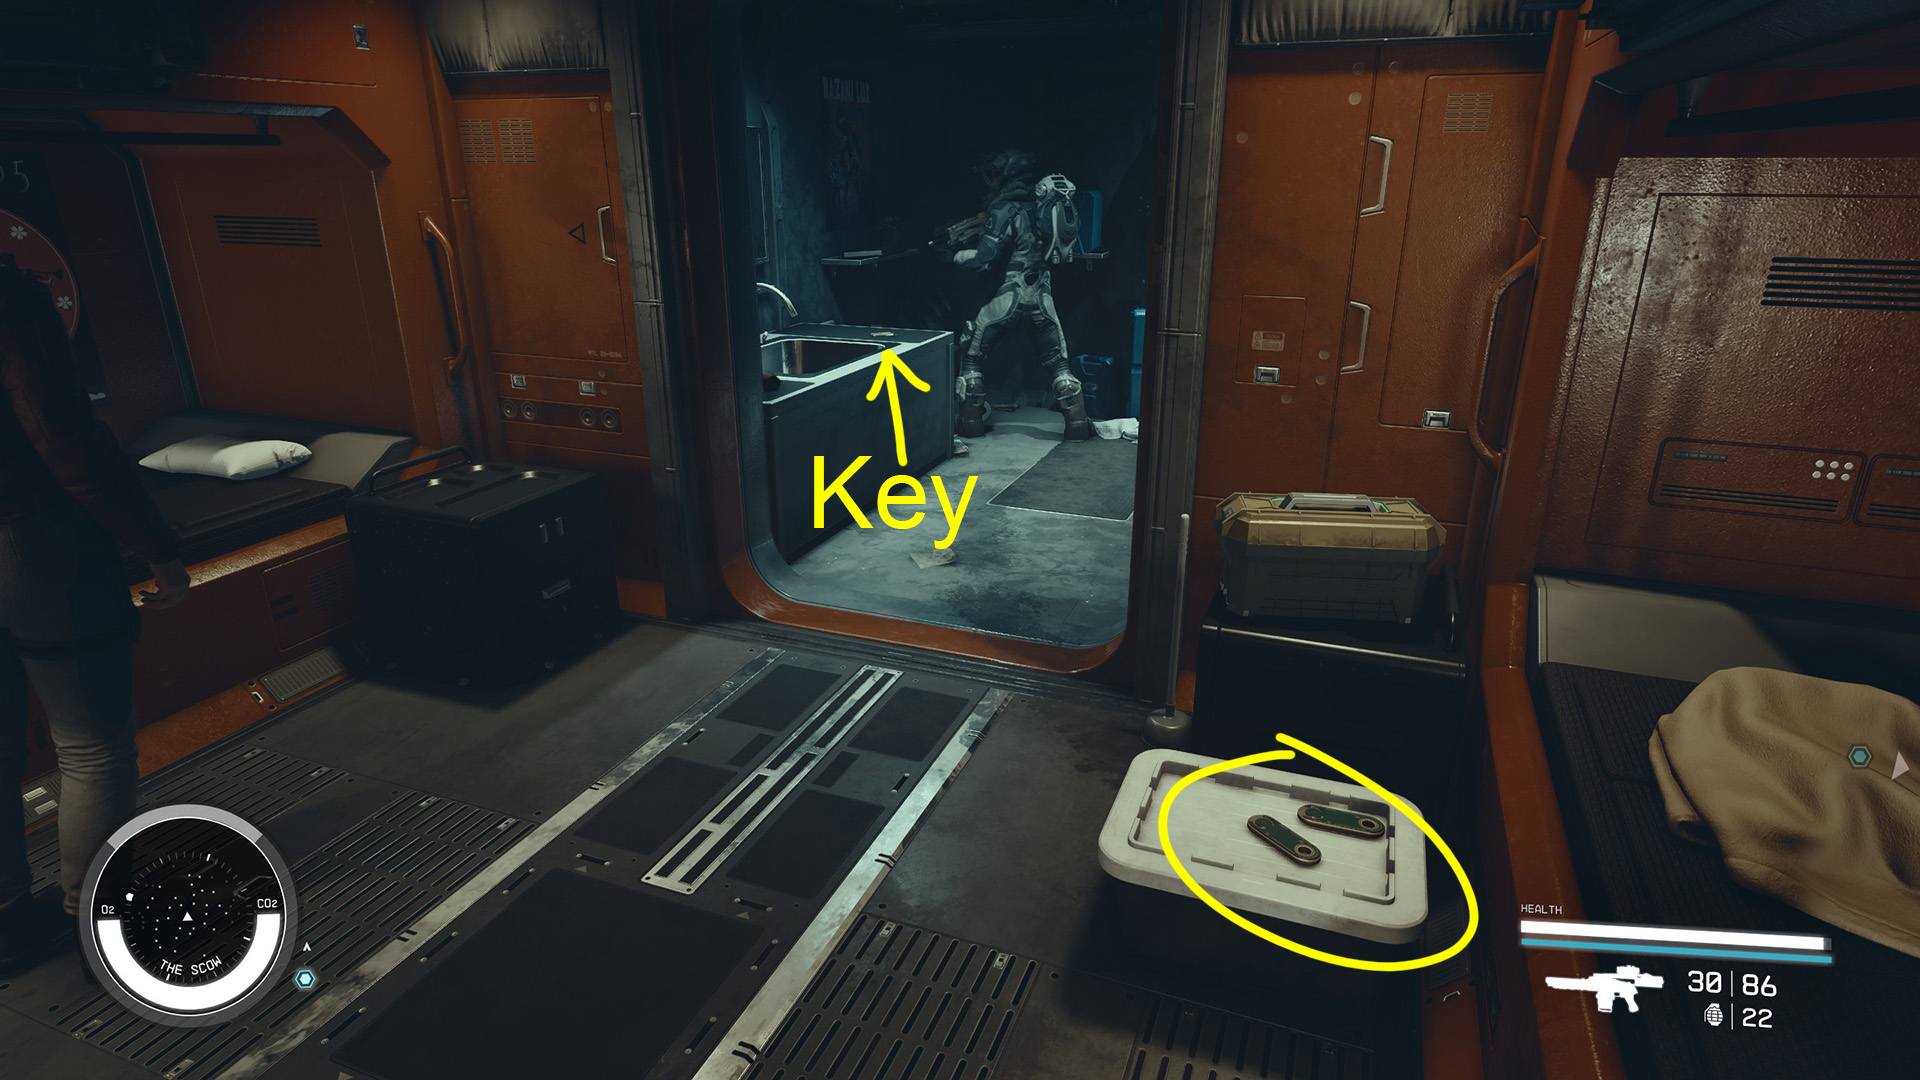
Across the hall from the zoo is a locked door that can be opened with either the Scow Security Key or by picking the lock (Image 76). You’ll find an Industrial Workbench just inside. To the right are some sleeping quarters where you can pick up a couple of credsticks and some ammo from beside one of the beds. Then pick up the Scow Aux Weapons Key from the bathroom sink (Image 77).
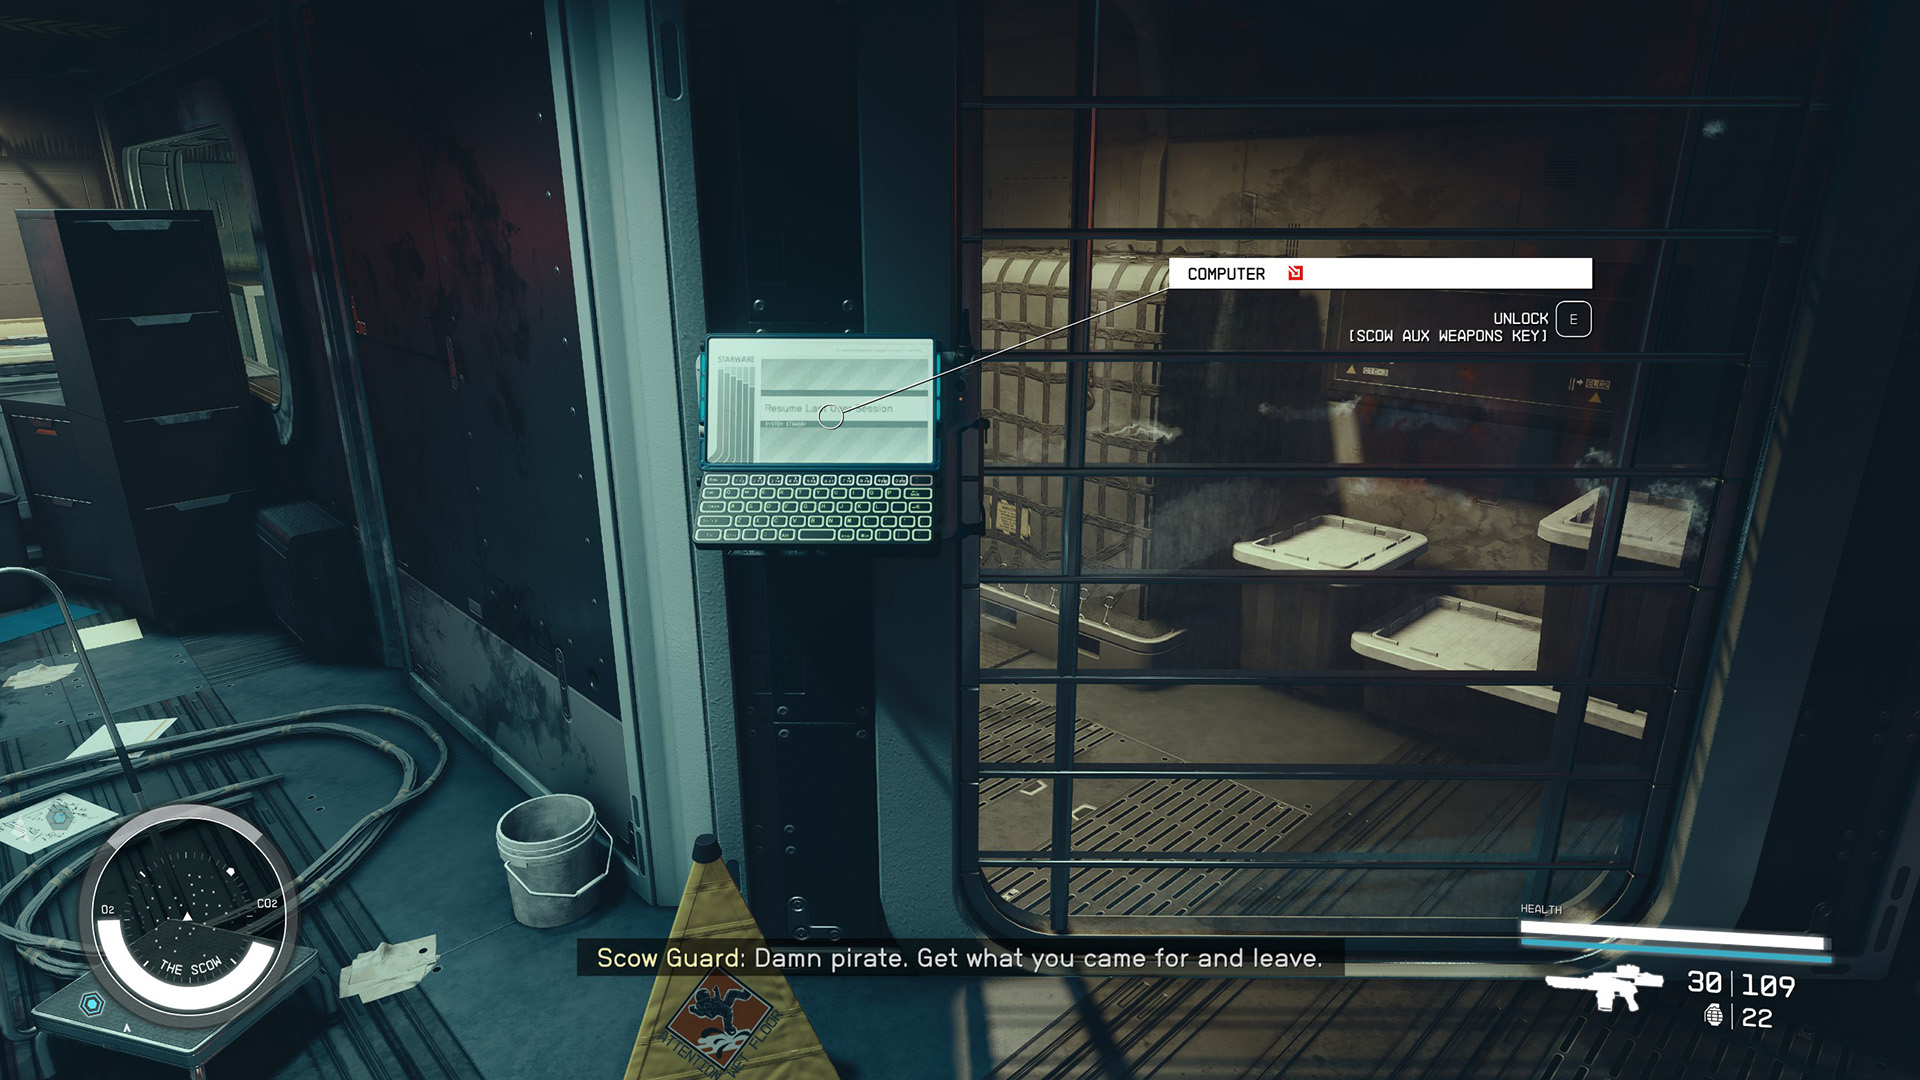
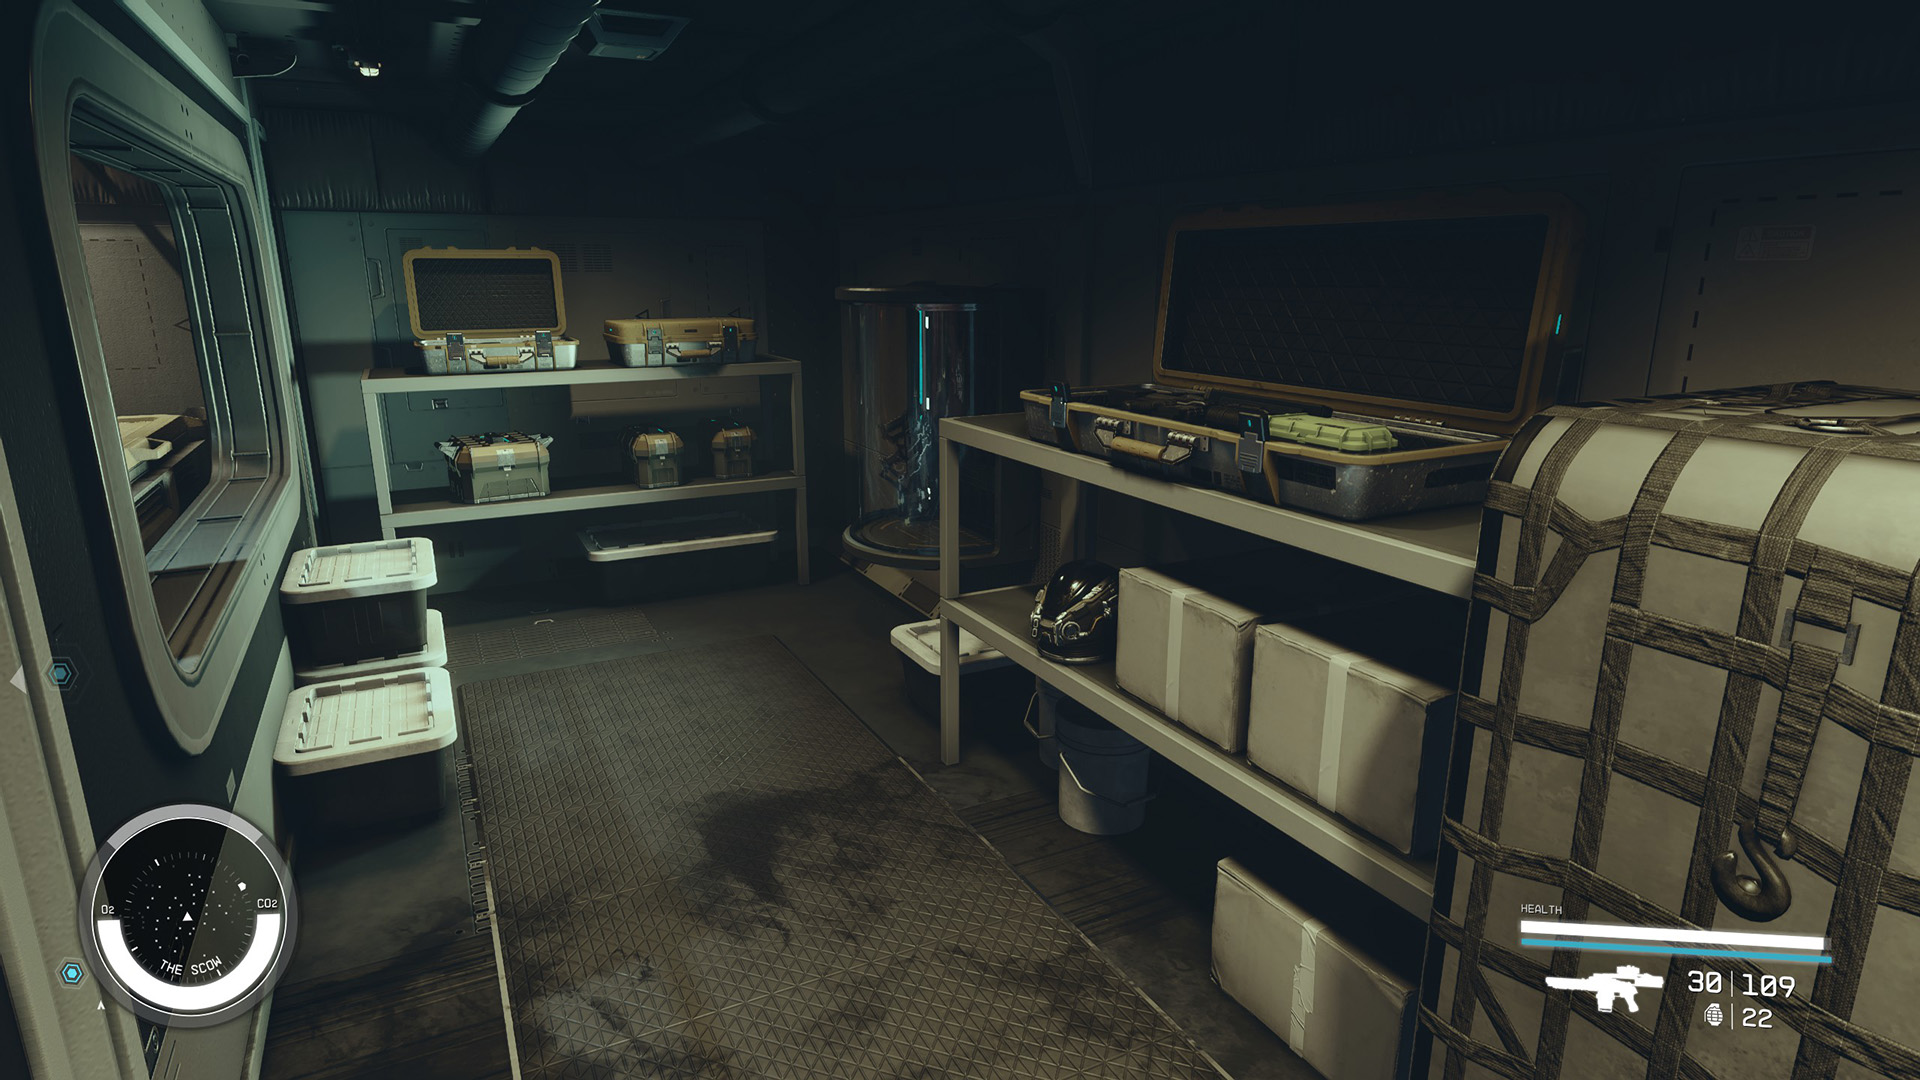
Back out next to the workbench there’s a Computer that controls the clear door (Image 78). It can be opened with the key you just picked up or with rank 2 of the Security skill. Unlocking it will let you into a small armory where you can grab some weapons, ammo, and a helmet (Image 79).
Image 76Image 77Image 78Image 79
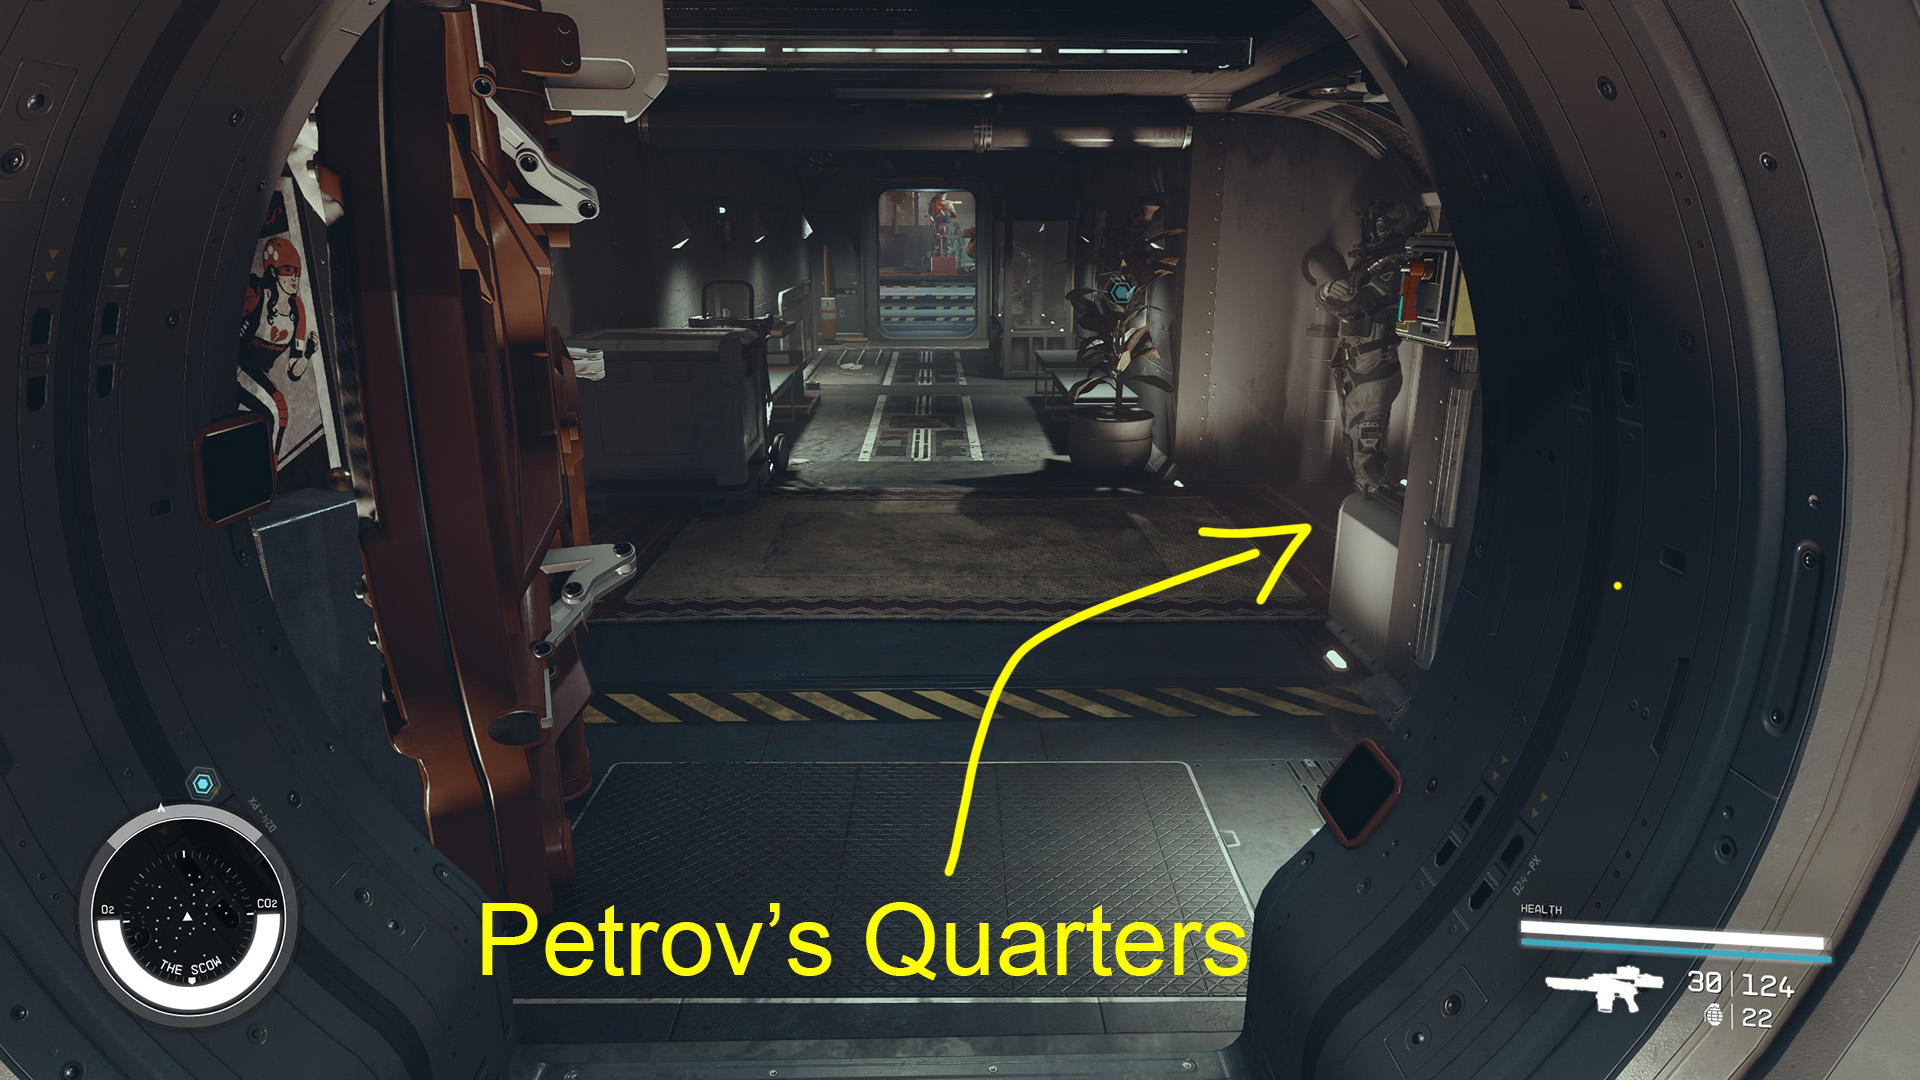
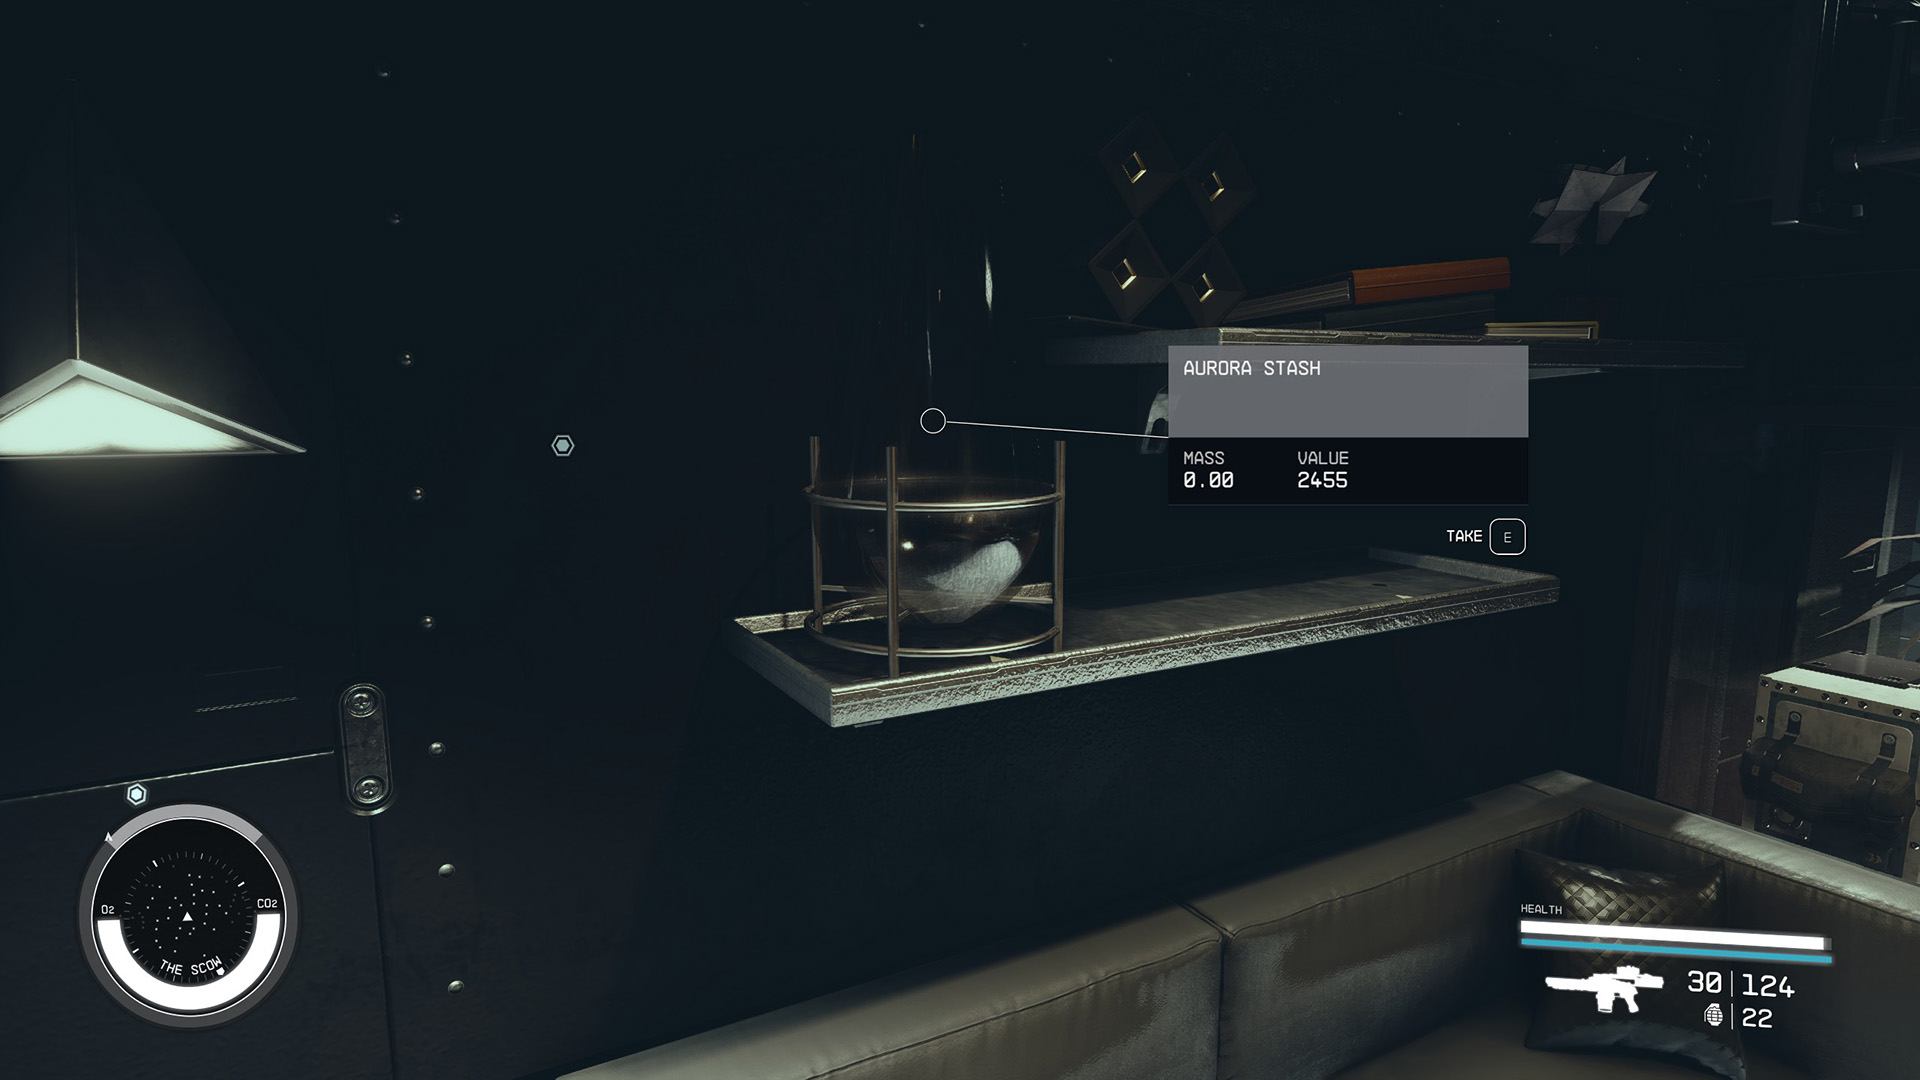
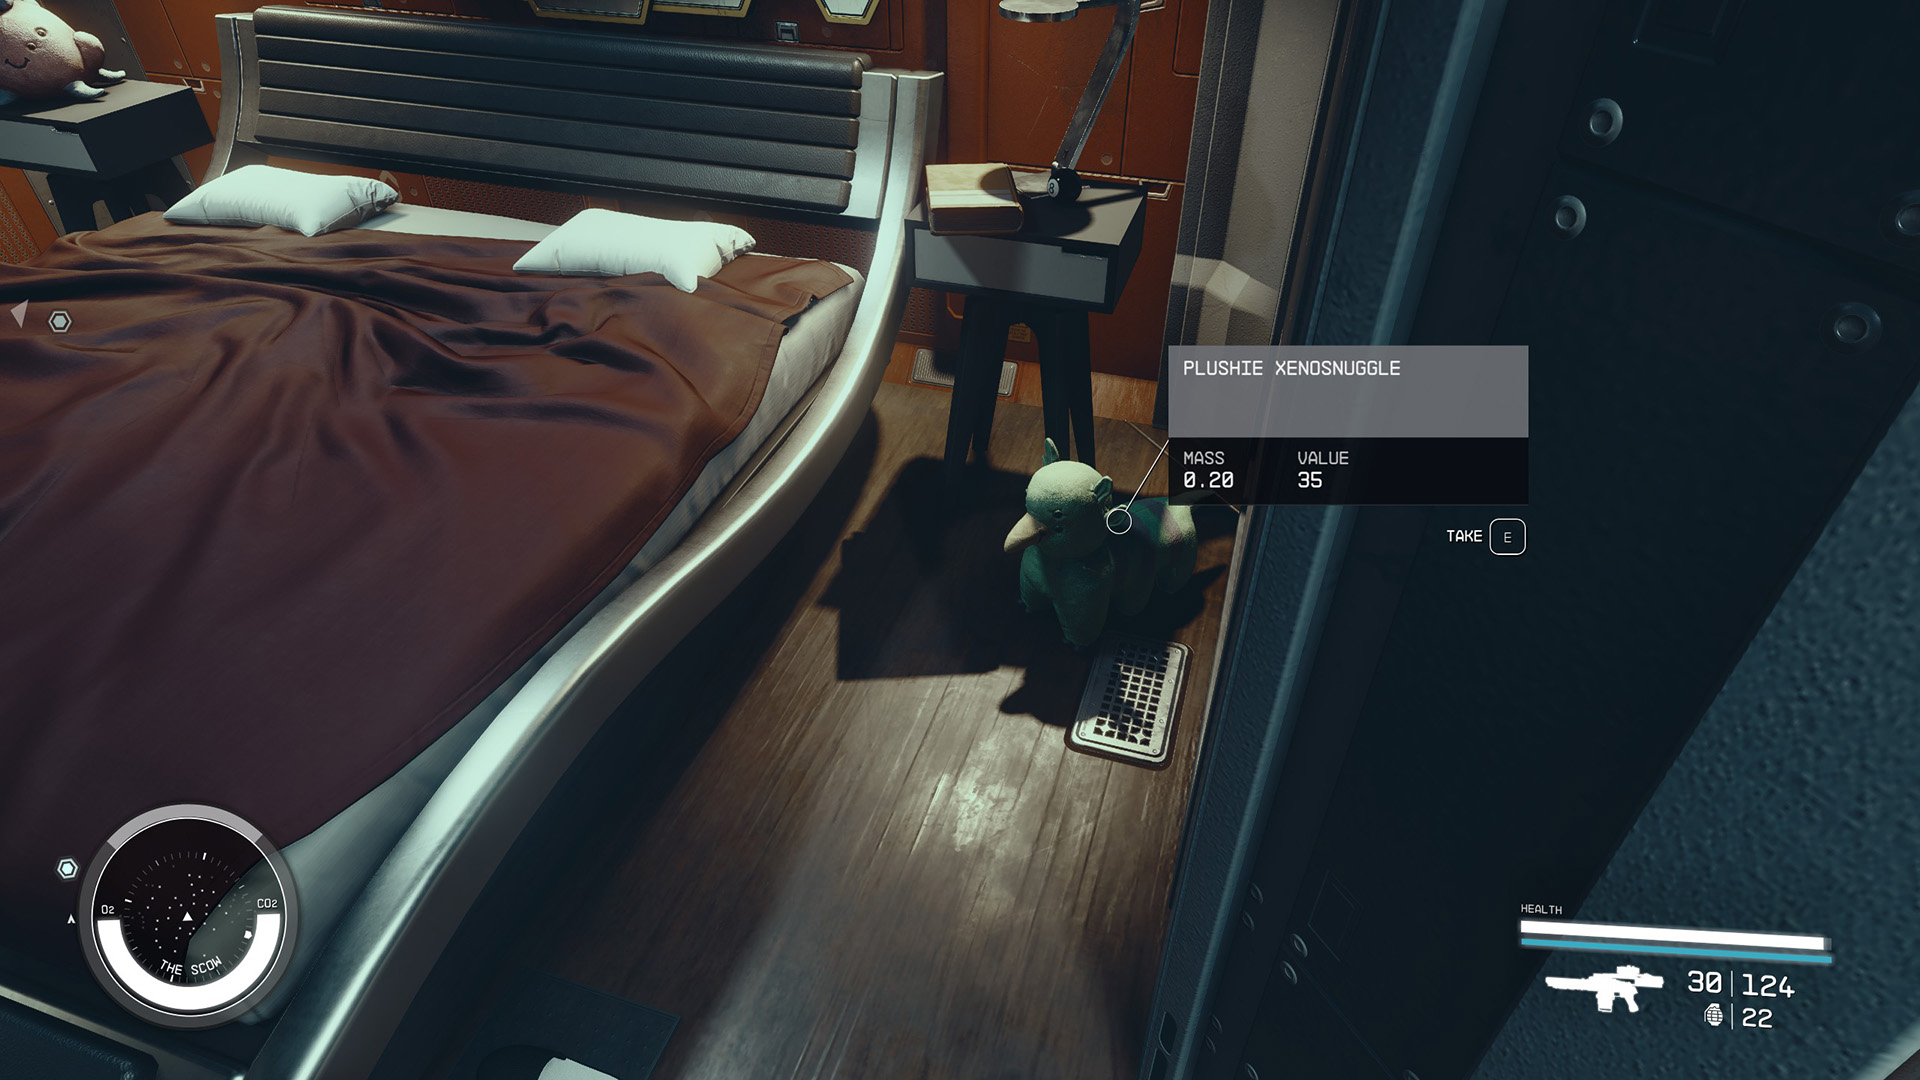
Go back out and up the stairs toward the front of the ship. Passing through the round red door, you can go into the door on the right to loot Petrov’s private quarters (Image 80). There’s an Aurora Stash on a shelf above the couch that’s worth quite a few credits (Image 81). Go through the door and you’ll find a Plushie Xenosnuggle beside the bed (Image 82).
Image 80Image 81Image 82
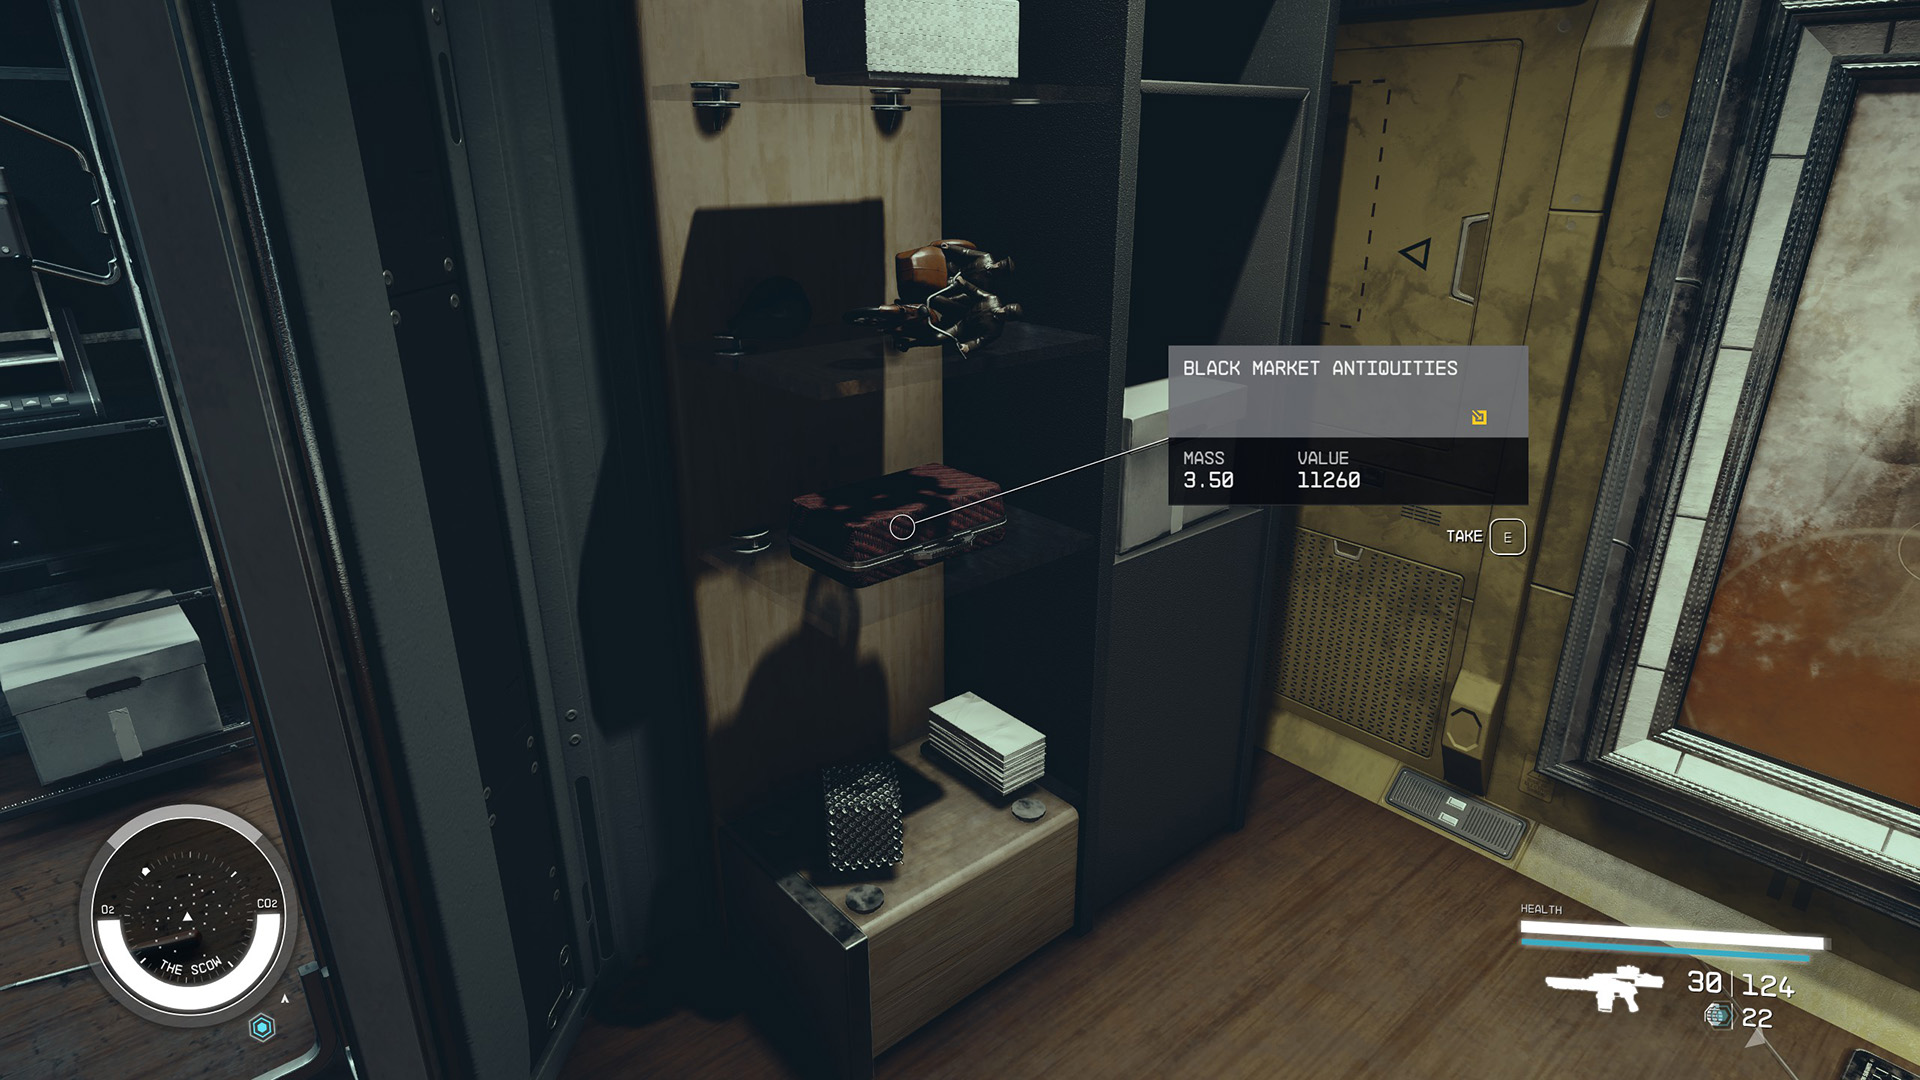
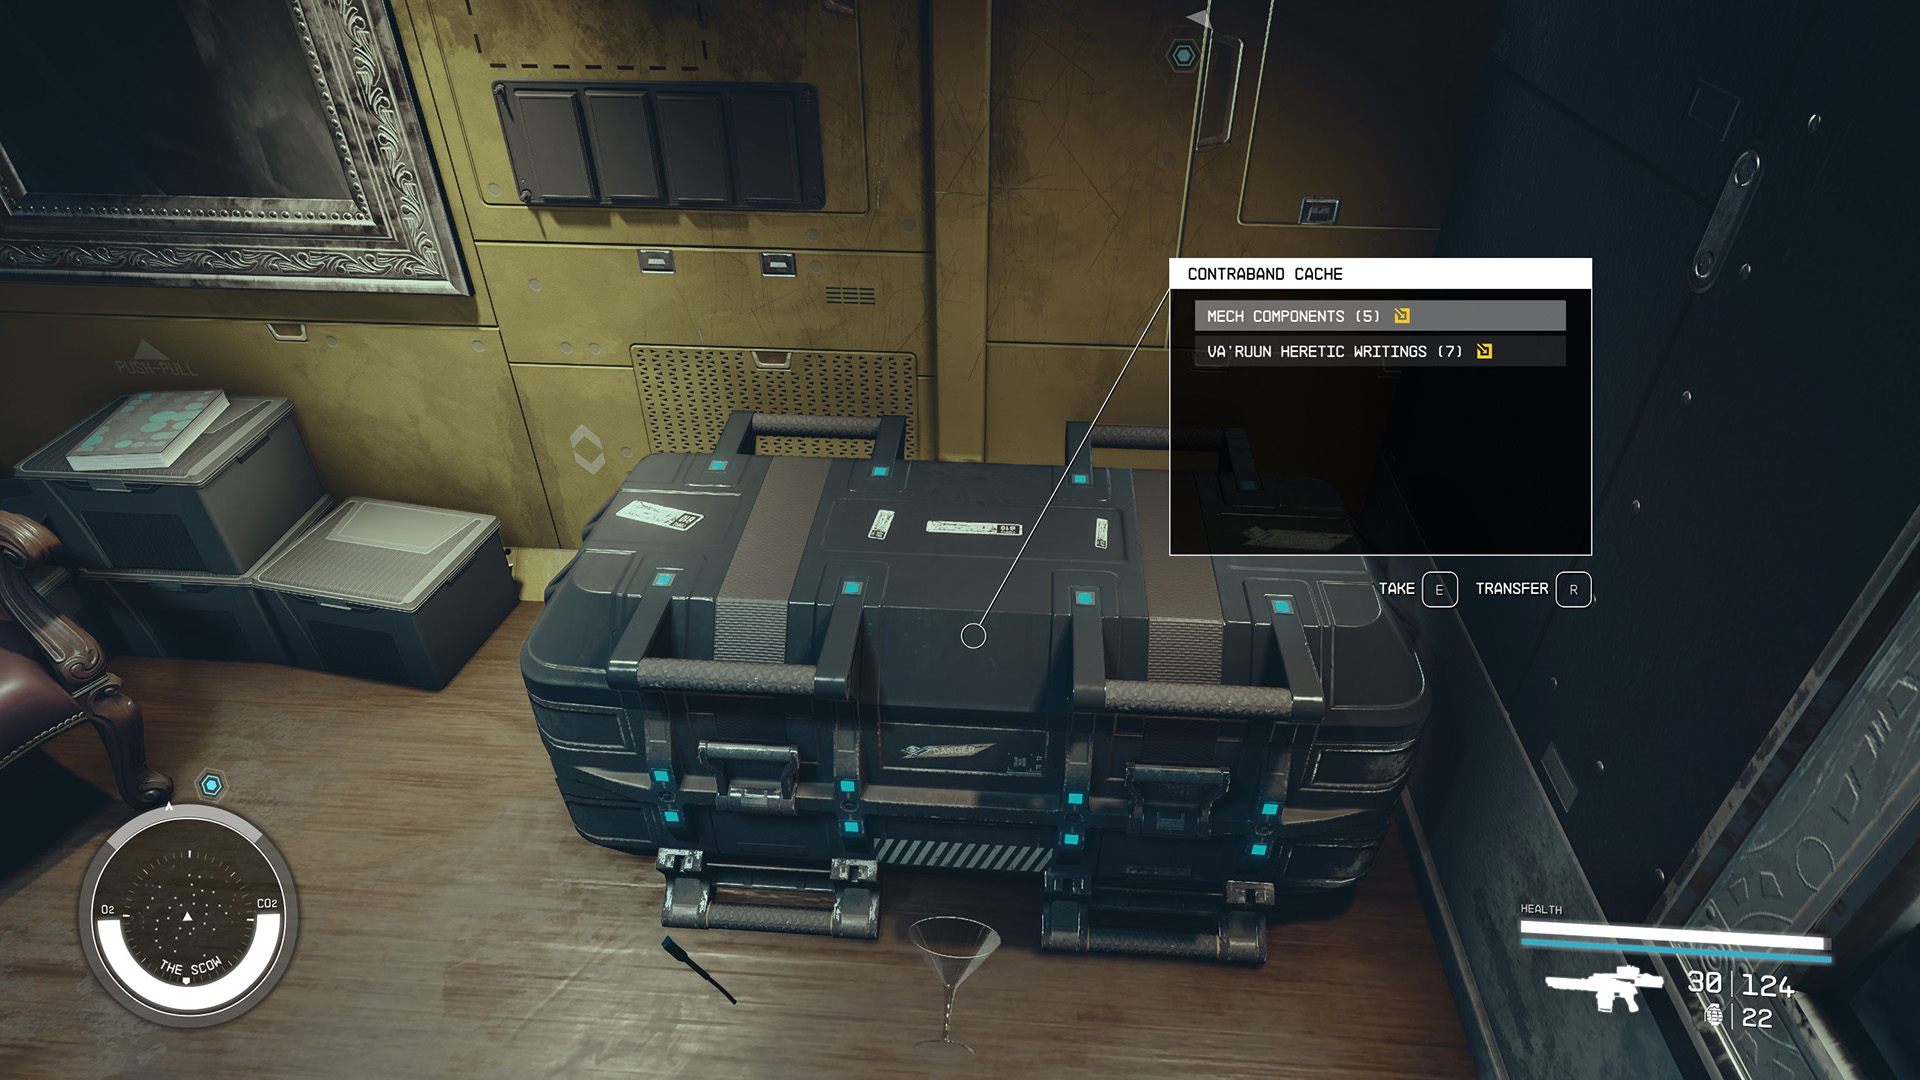
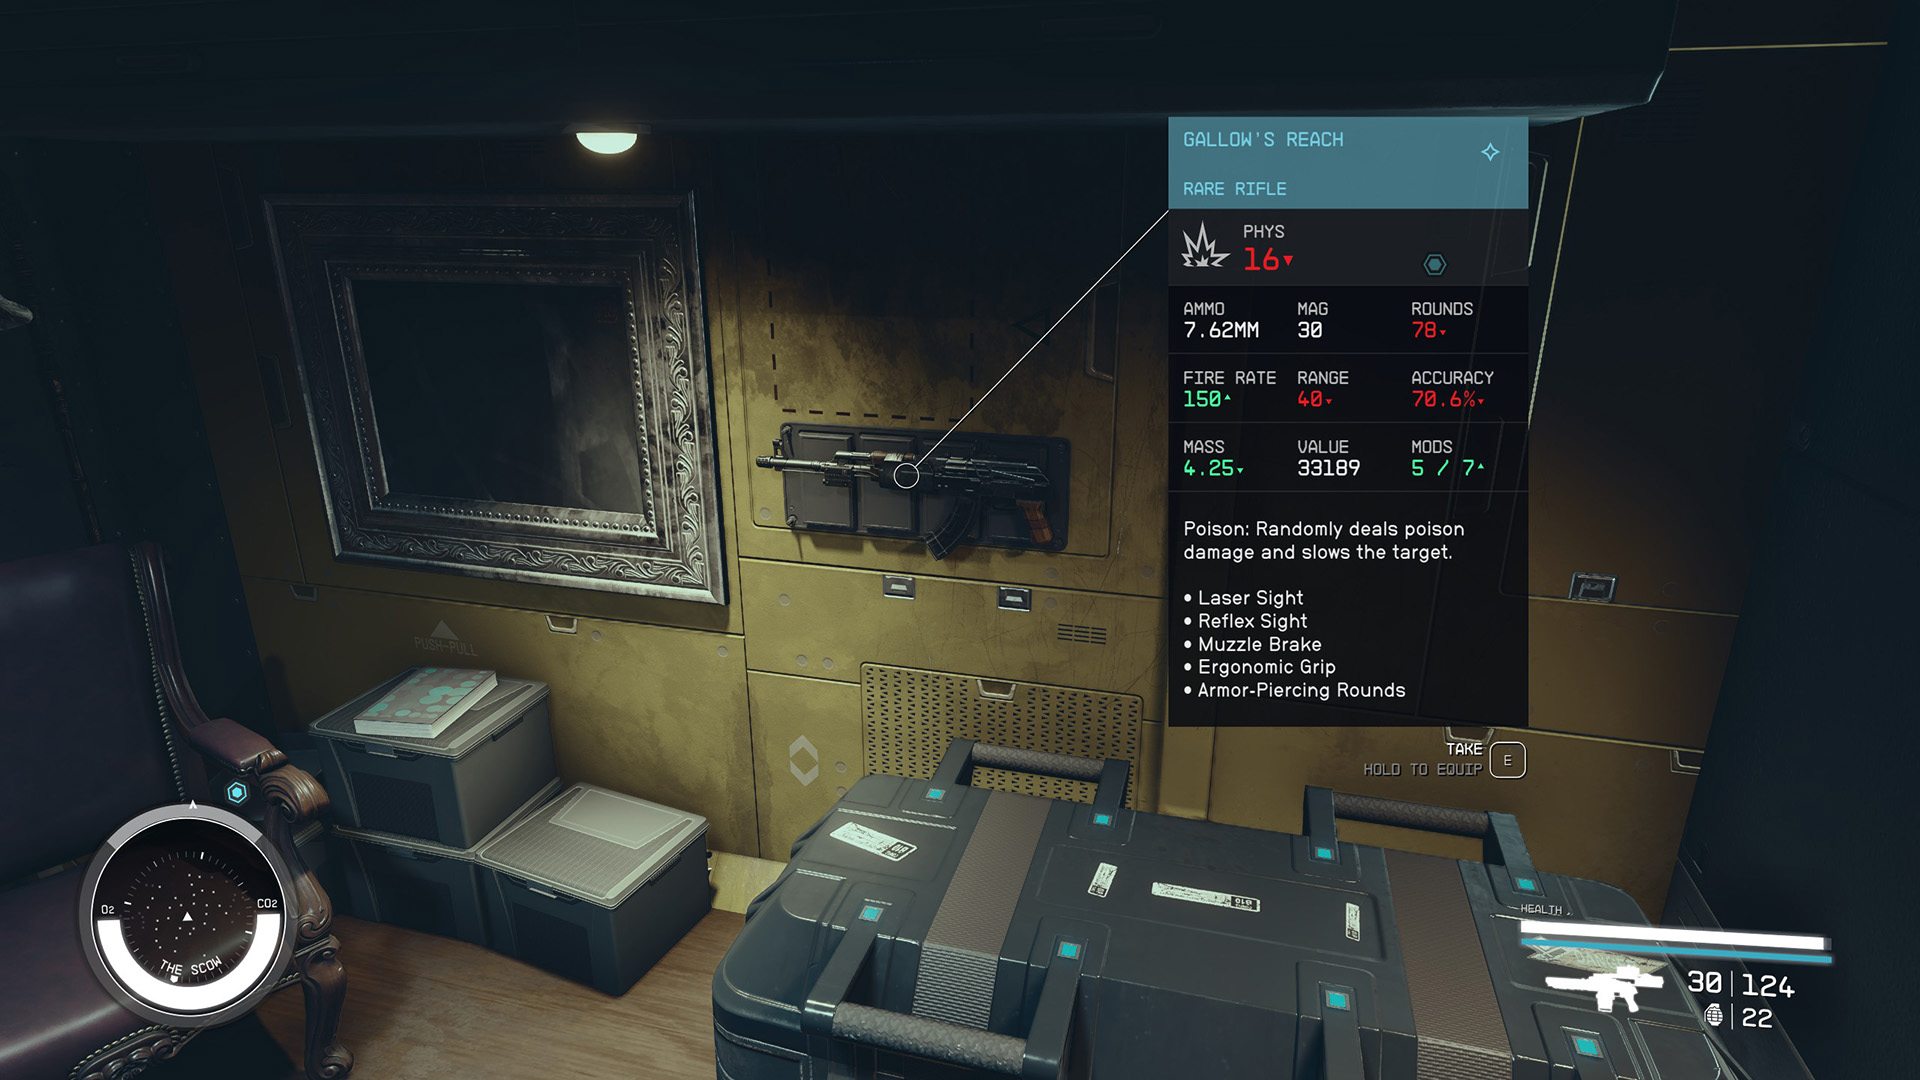
A door in the bedroom leads into a small office, where you’ll find some contraband: Black Market Antiquities on a shelf (Image 83) and a Contraband Cache behind the desk that requires rank 2 of the Security skill (Image 84). On the wall behind the desk you’ll also find the unique rifle Gallow’s Reach (Image 85).
Image 83Image 84Image 85
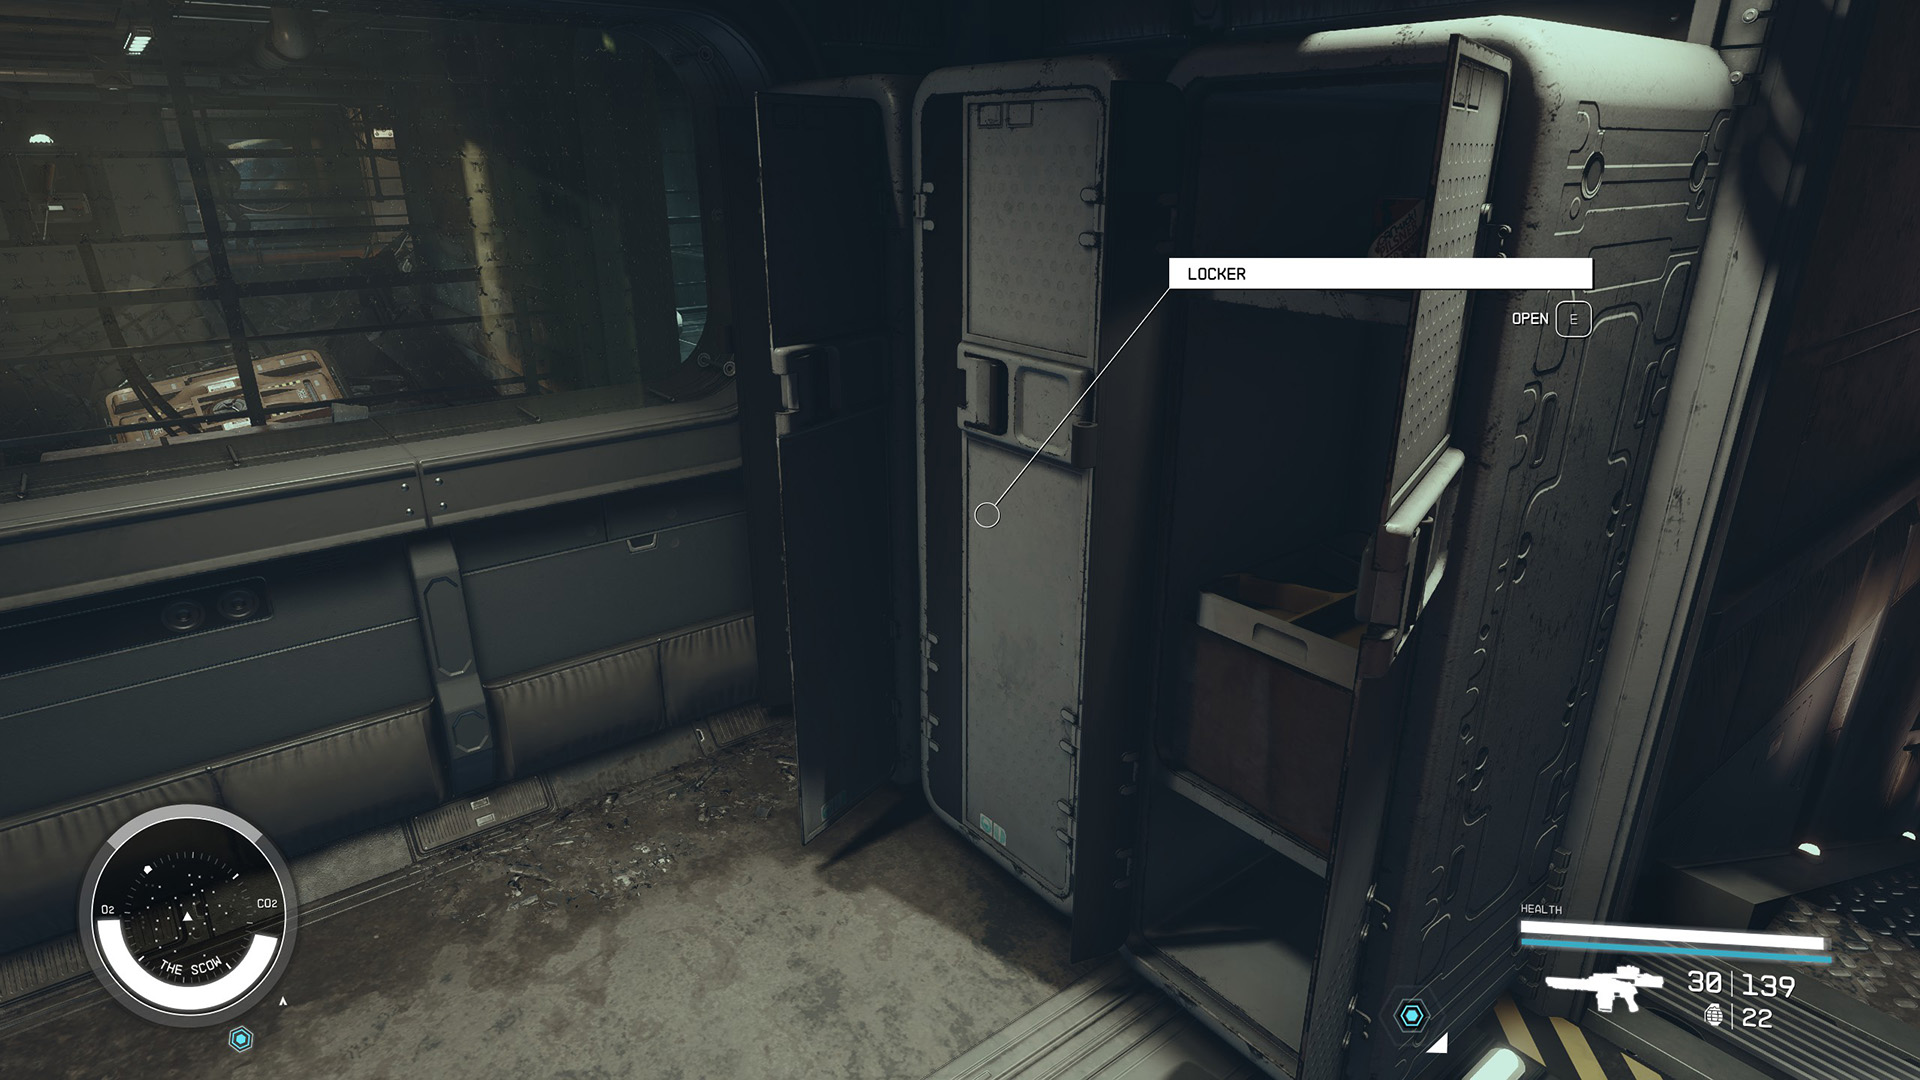
Across the hall from Petrov’s quarters is a locked door that can be opened with the Scow Service Key (which can be pickpocketed or looted from Scow Crew members) or rank 1 of the Security skill. Immediately inside the door is a locker with a couple of credsticks inside. Go around the lockers and jump down through the narrow shaft (Image 86). In this room you’ll find a Secure Cell Control computer (Image 87). If you haven’t done it yet, you can open the zoo cells from here. Near the back of the room you’ll find a Weapon Case and a Storage Box (Image 88).
Image 86Image 87Image 88
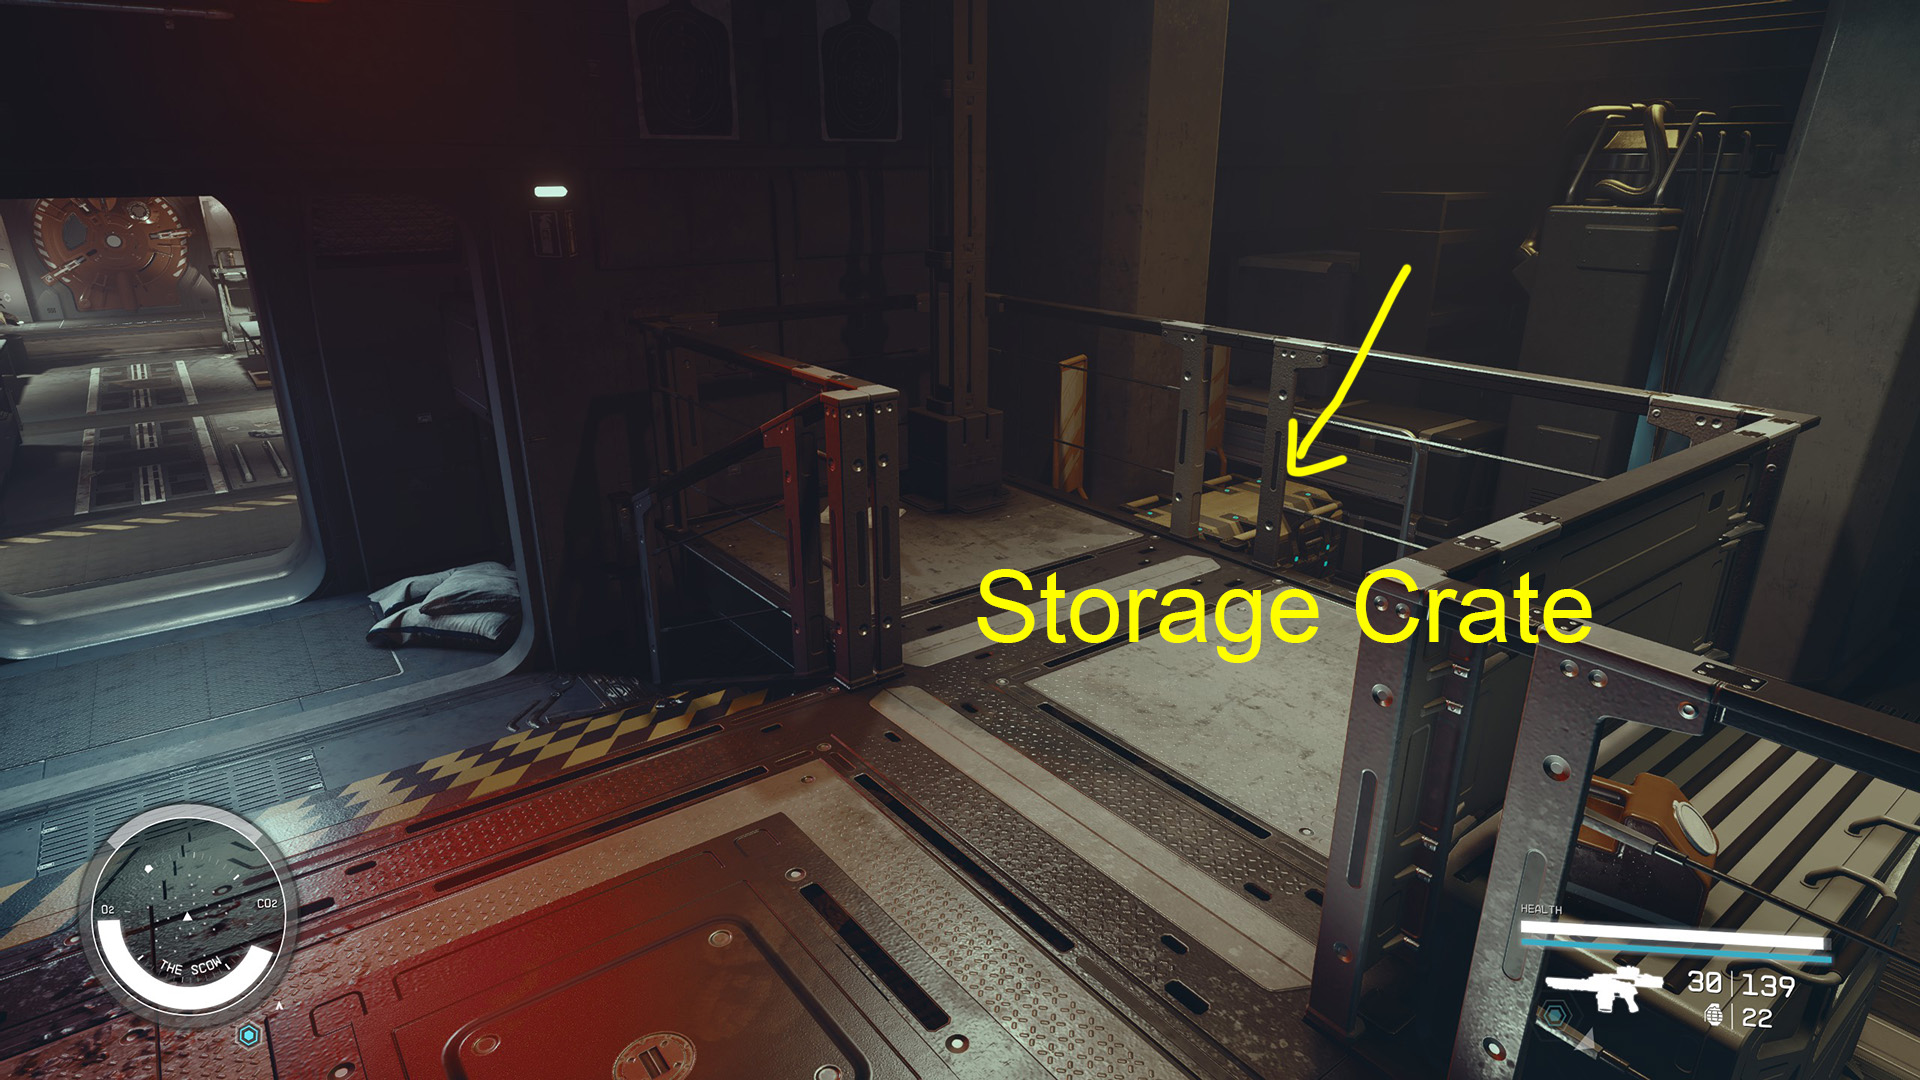
When you’re done down here, you can climb back up the shaft you jumped down using the pipes and head back to the large room with the golden statues. There’s a lot of random junk in here that you can pick up, some of which is worth a decent amount of credits, like the Space Rock Display beside the couch. If you have the Theft skill and have accepted Petrov’s surrender, both Petrov and Vadik have over 1000 credits on them that you can pickpocket in plain sight without retaliation. There’s also a Storage Crate tucked in one of the back corners of the room (Image 89).
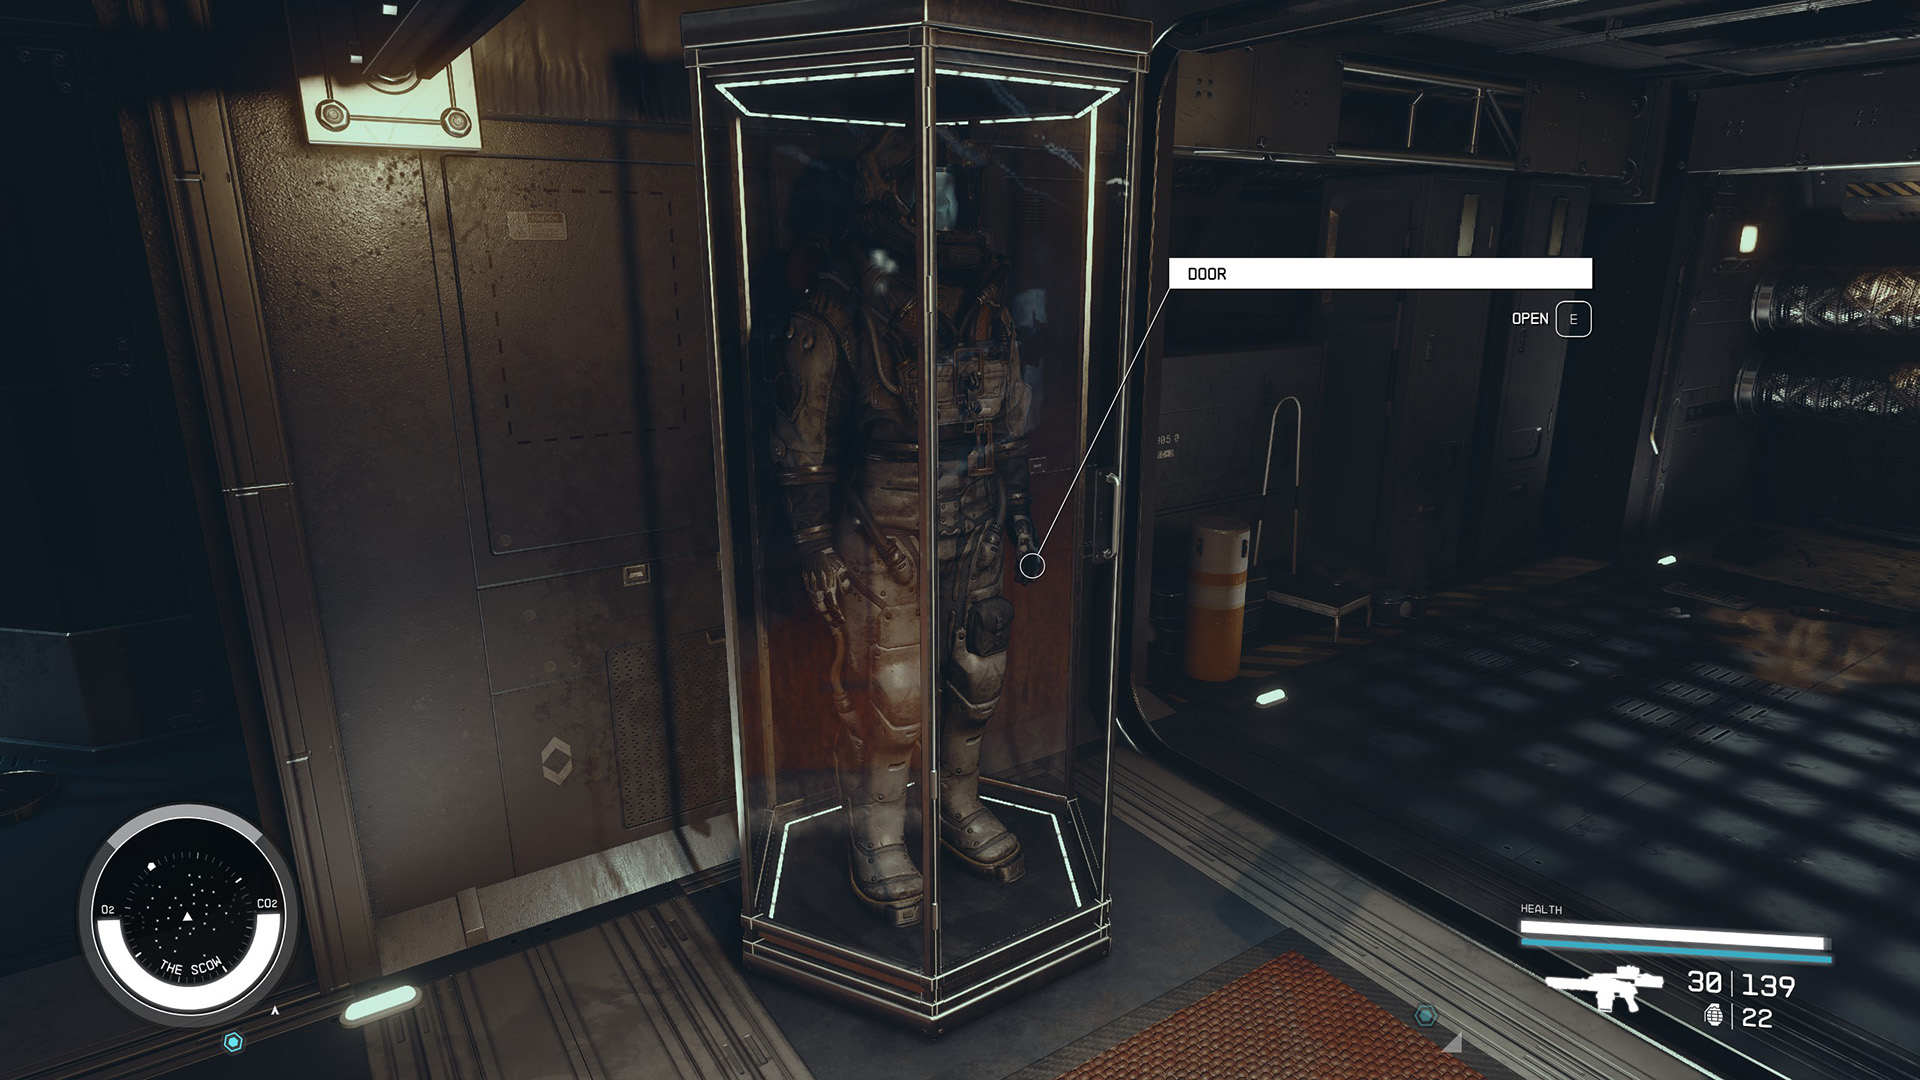
Leaving the large room, go to the left and you’ll come upon a mannequin with a full set of equipment (Image 90). You can go through the room with the computers, but there isn’t much in there. Instead, head down the central hallway with the red carpet to find two helmet displays (Image 91). Both have expert locks and require rank 1 of the Security skill to open.
Image 89Image 90Image 91
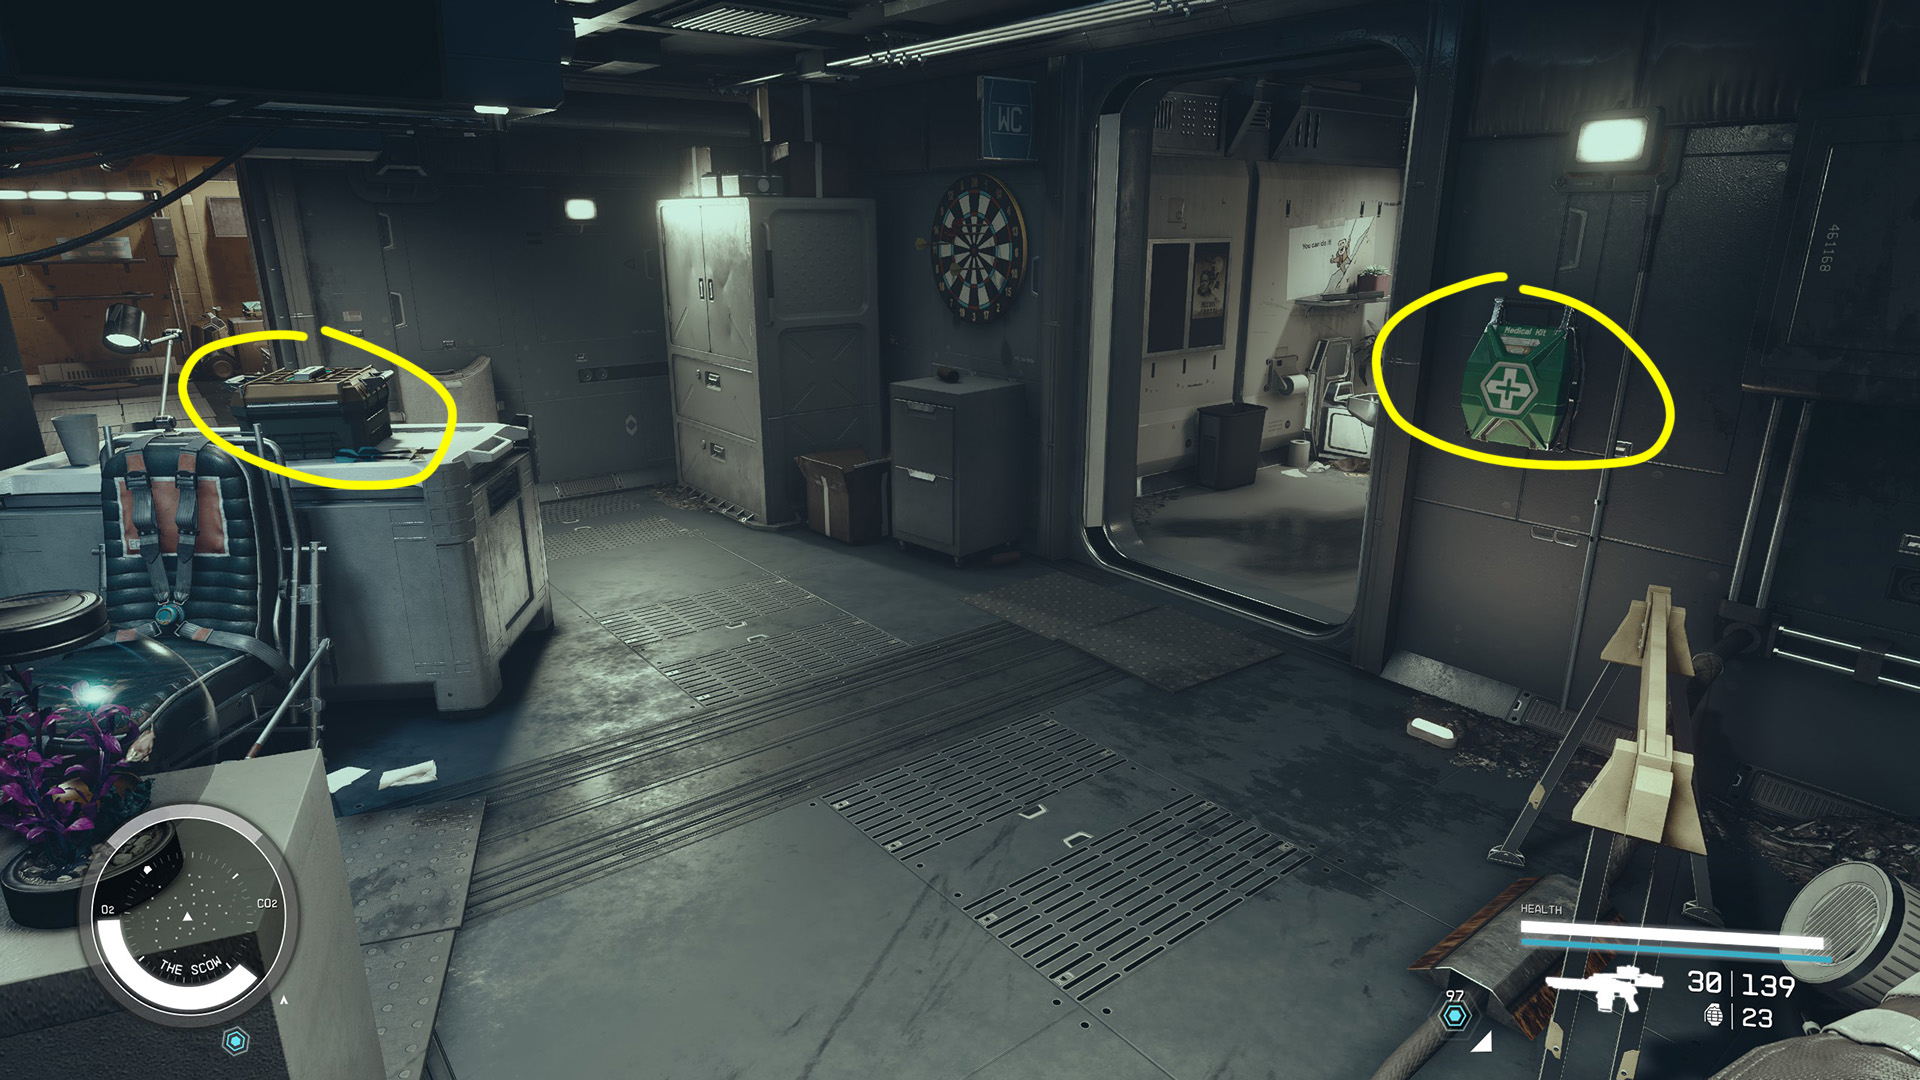
Go through the round doorway and you’ll find some lockers around the corner (Image 92). The middle one has some credsticks inside. Continue down some stairs and you’ll see a Storage Box at the bottom. There’s also a First Aid kit on a table nearby. Nothing else of note in this area, so continue down the hall and down another set of stairs.
Image 92Image 93
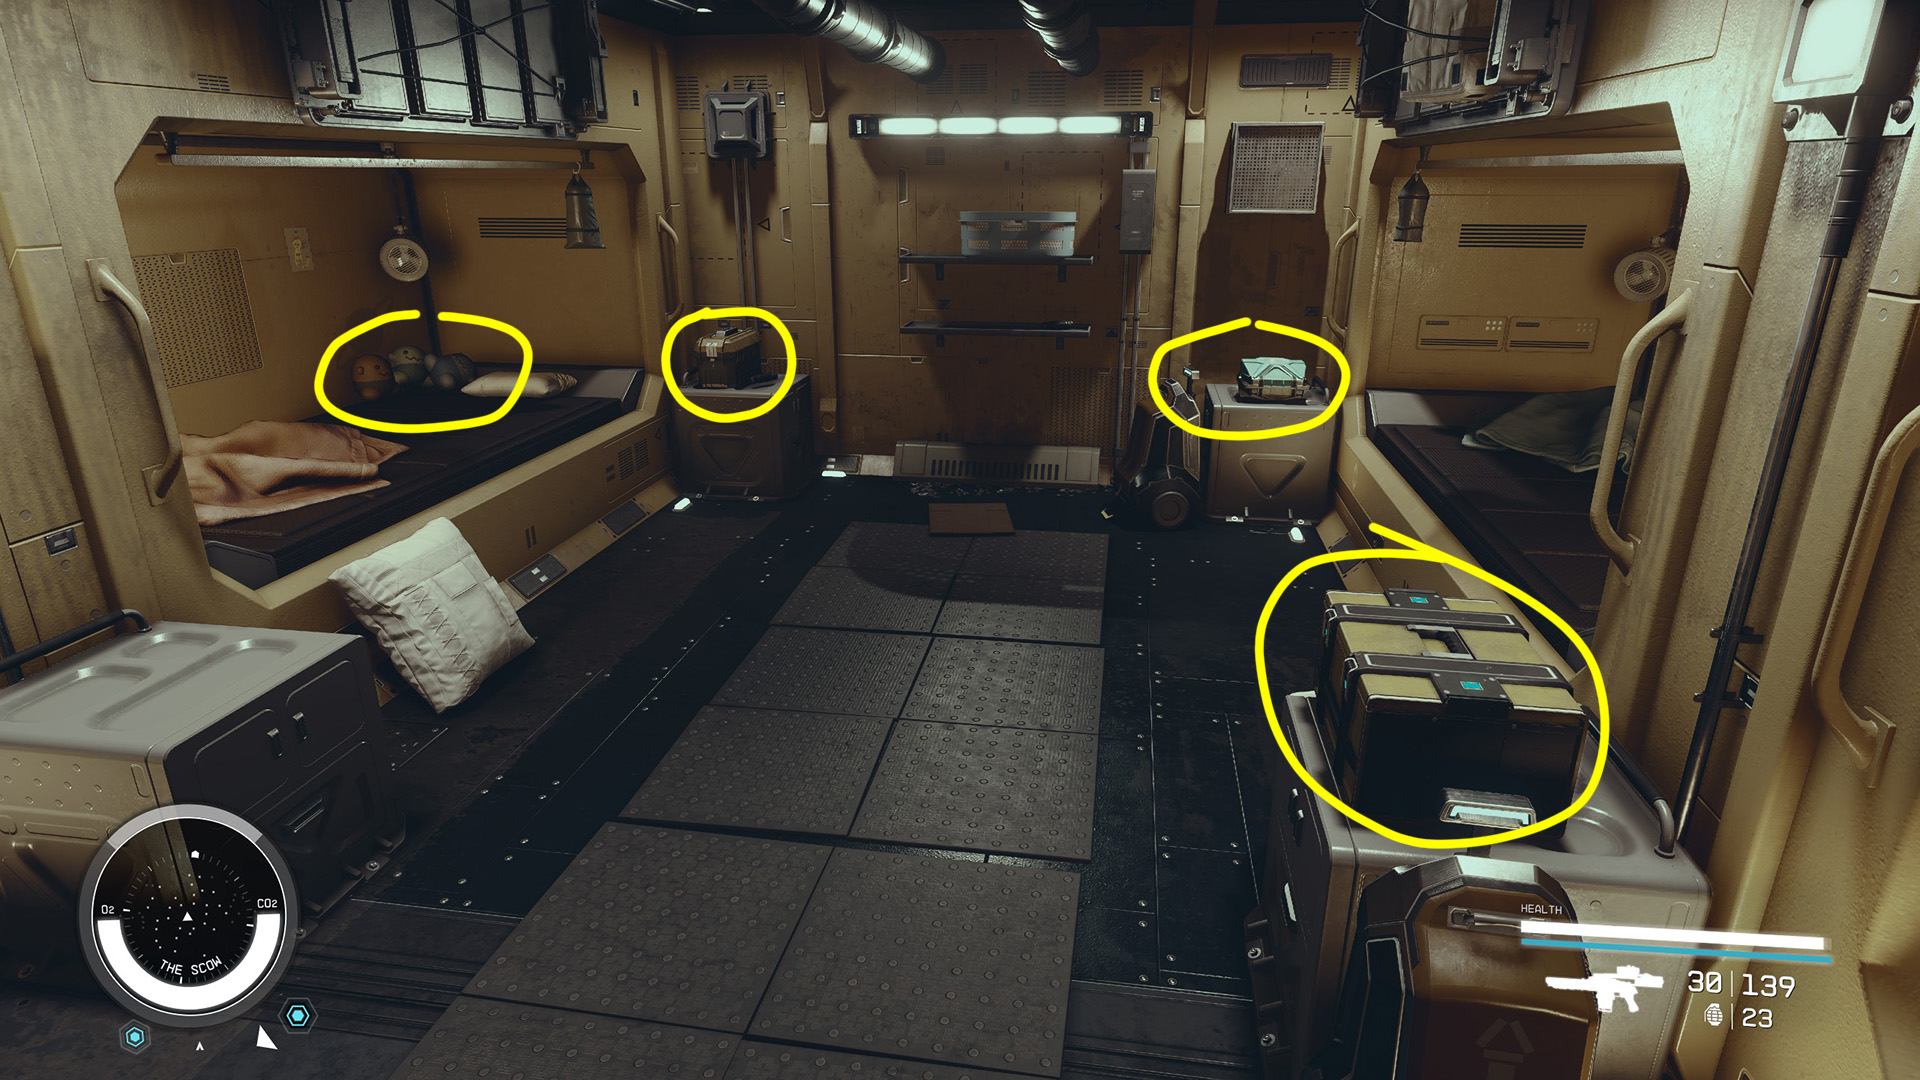
Continue until you come to the main crew living quarters on the right. Loot the Ammo Case across the hall and then go in (Image 94). You’ll find a First Aid kit to the right beside the bathroom door as well as an Ammo Case nearby (Image 95). Go past it to enter one of the sleeping quarters, where you’ll find a Storage Box and Pharmaceutical Kit on the right side and an Ammo Case and Digipick on the left (Image 96). If you’re collecting plushies, be sure to grab the three different colors of My Friend Wilby from one of the beds.
Image 94Image 95Image 96
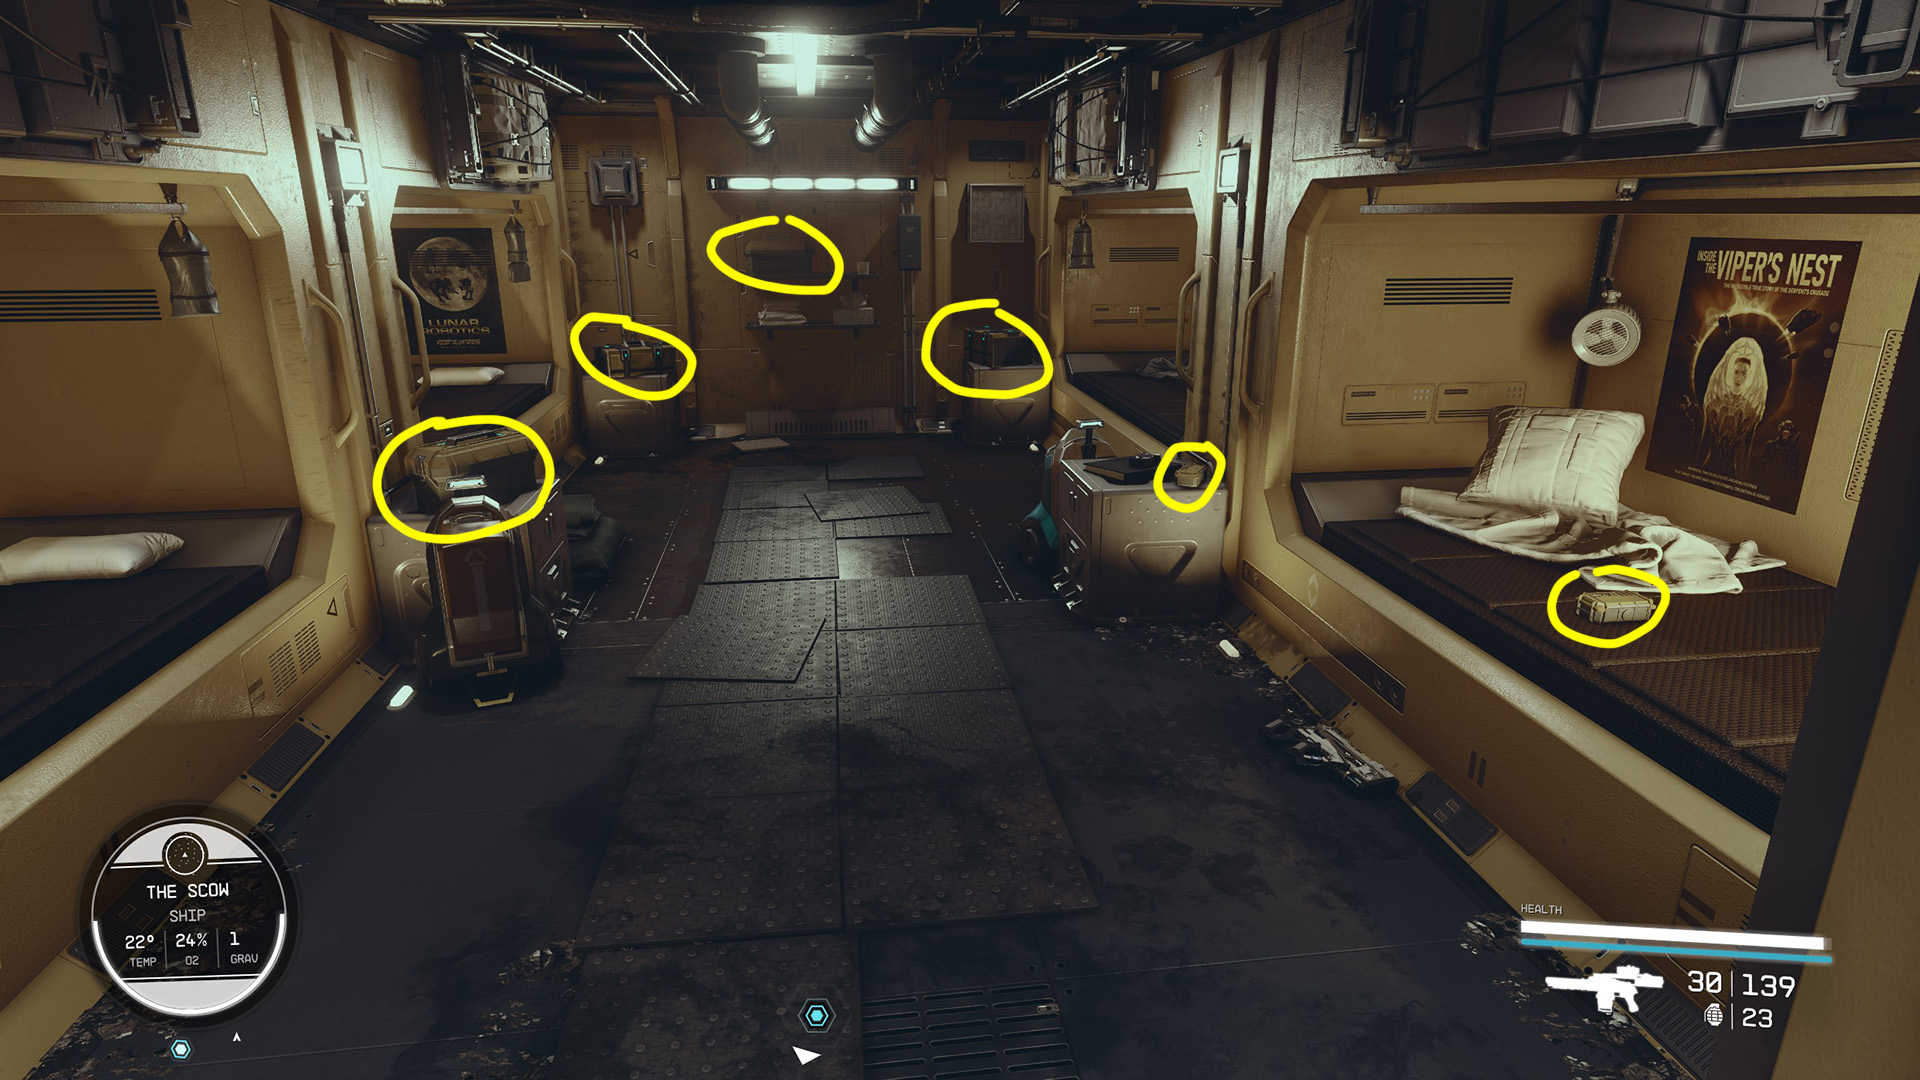
Go back out and enter the other sleeping quarters. You’ll find a couple of loose boxes of ammo as well as two Ammo Cases and two Storage Boxes (Image 97).
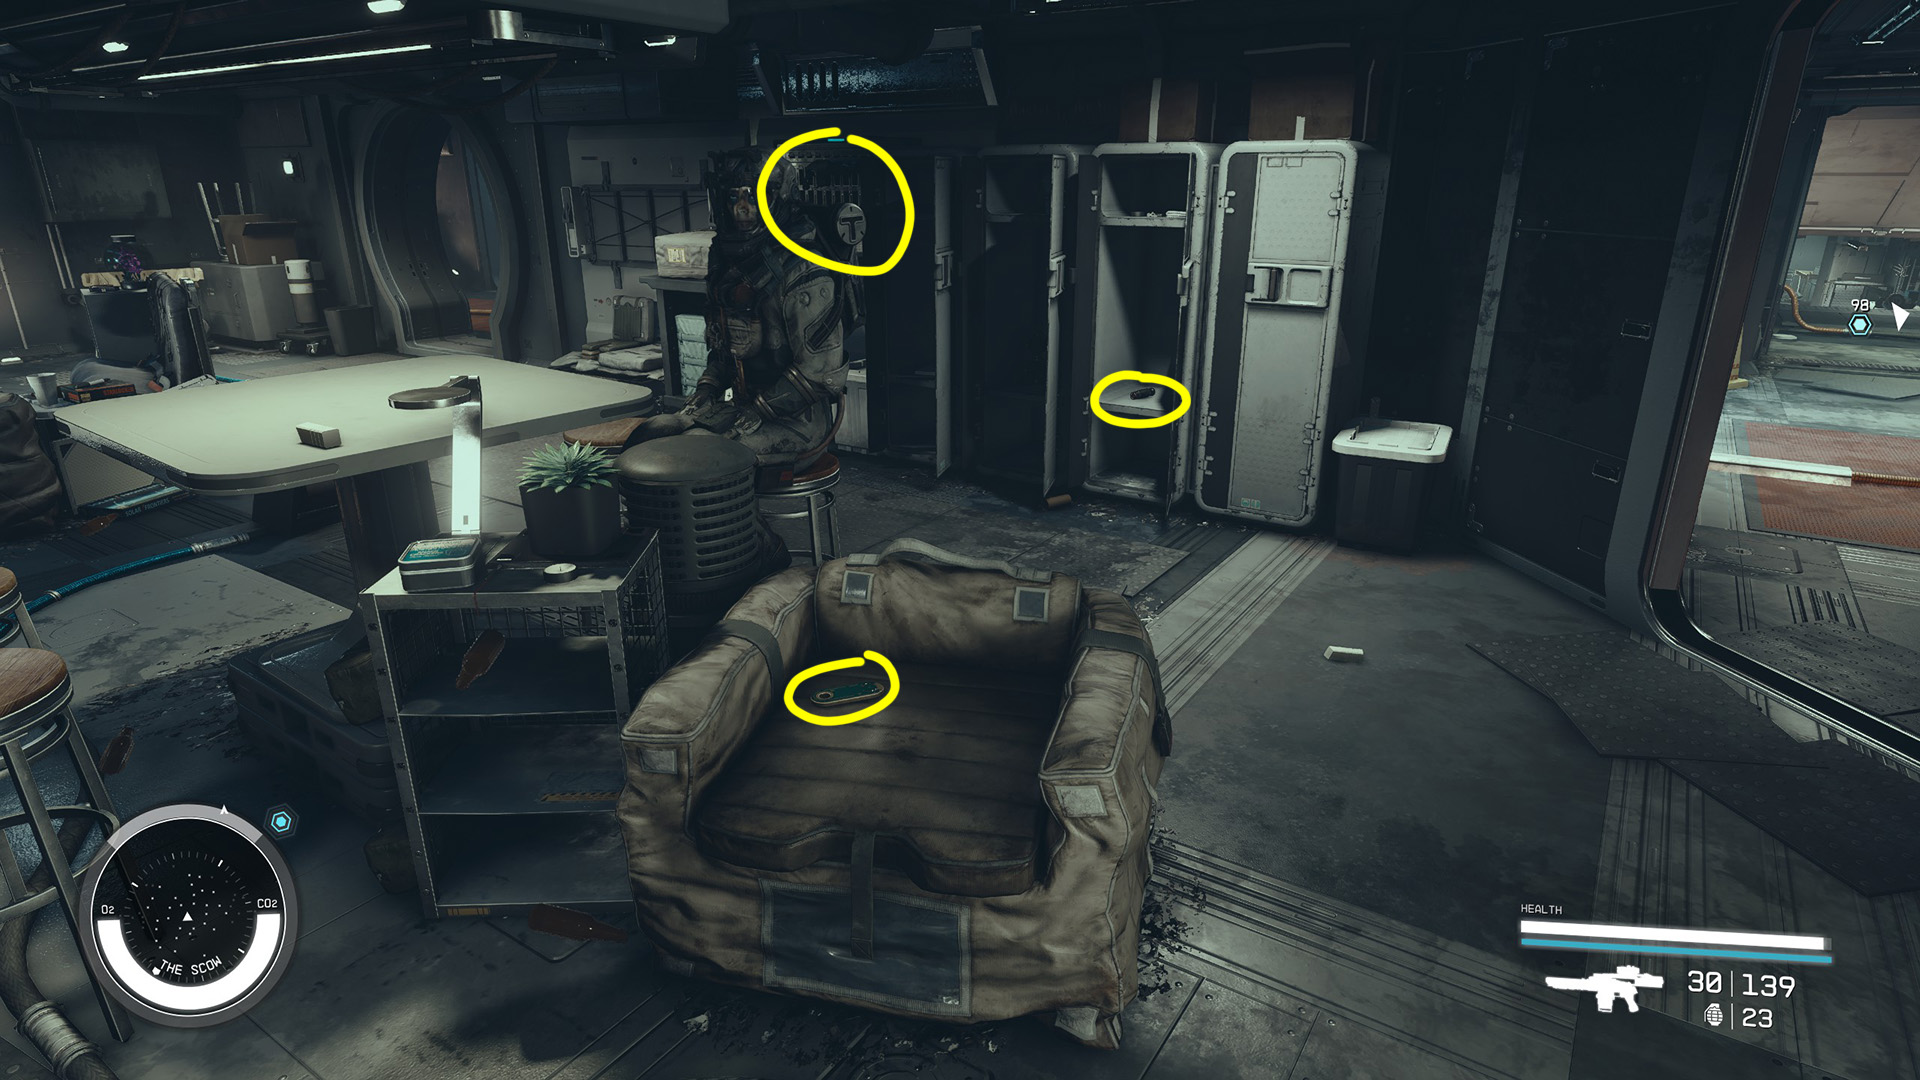
Back in the main room, you can grab a credstick from the armchair and a digipick from one of the open lockers as well as a couple of guns from a weapon rack on the wall (Image 98). There’s nothing particularly valuable in the kitchen, so you can skip it unless you want to grab a snack. Piracy is hungry work, after all.
Image 97Image 98
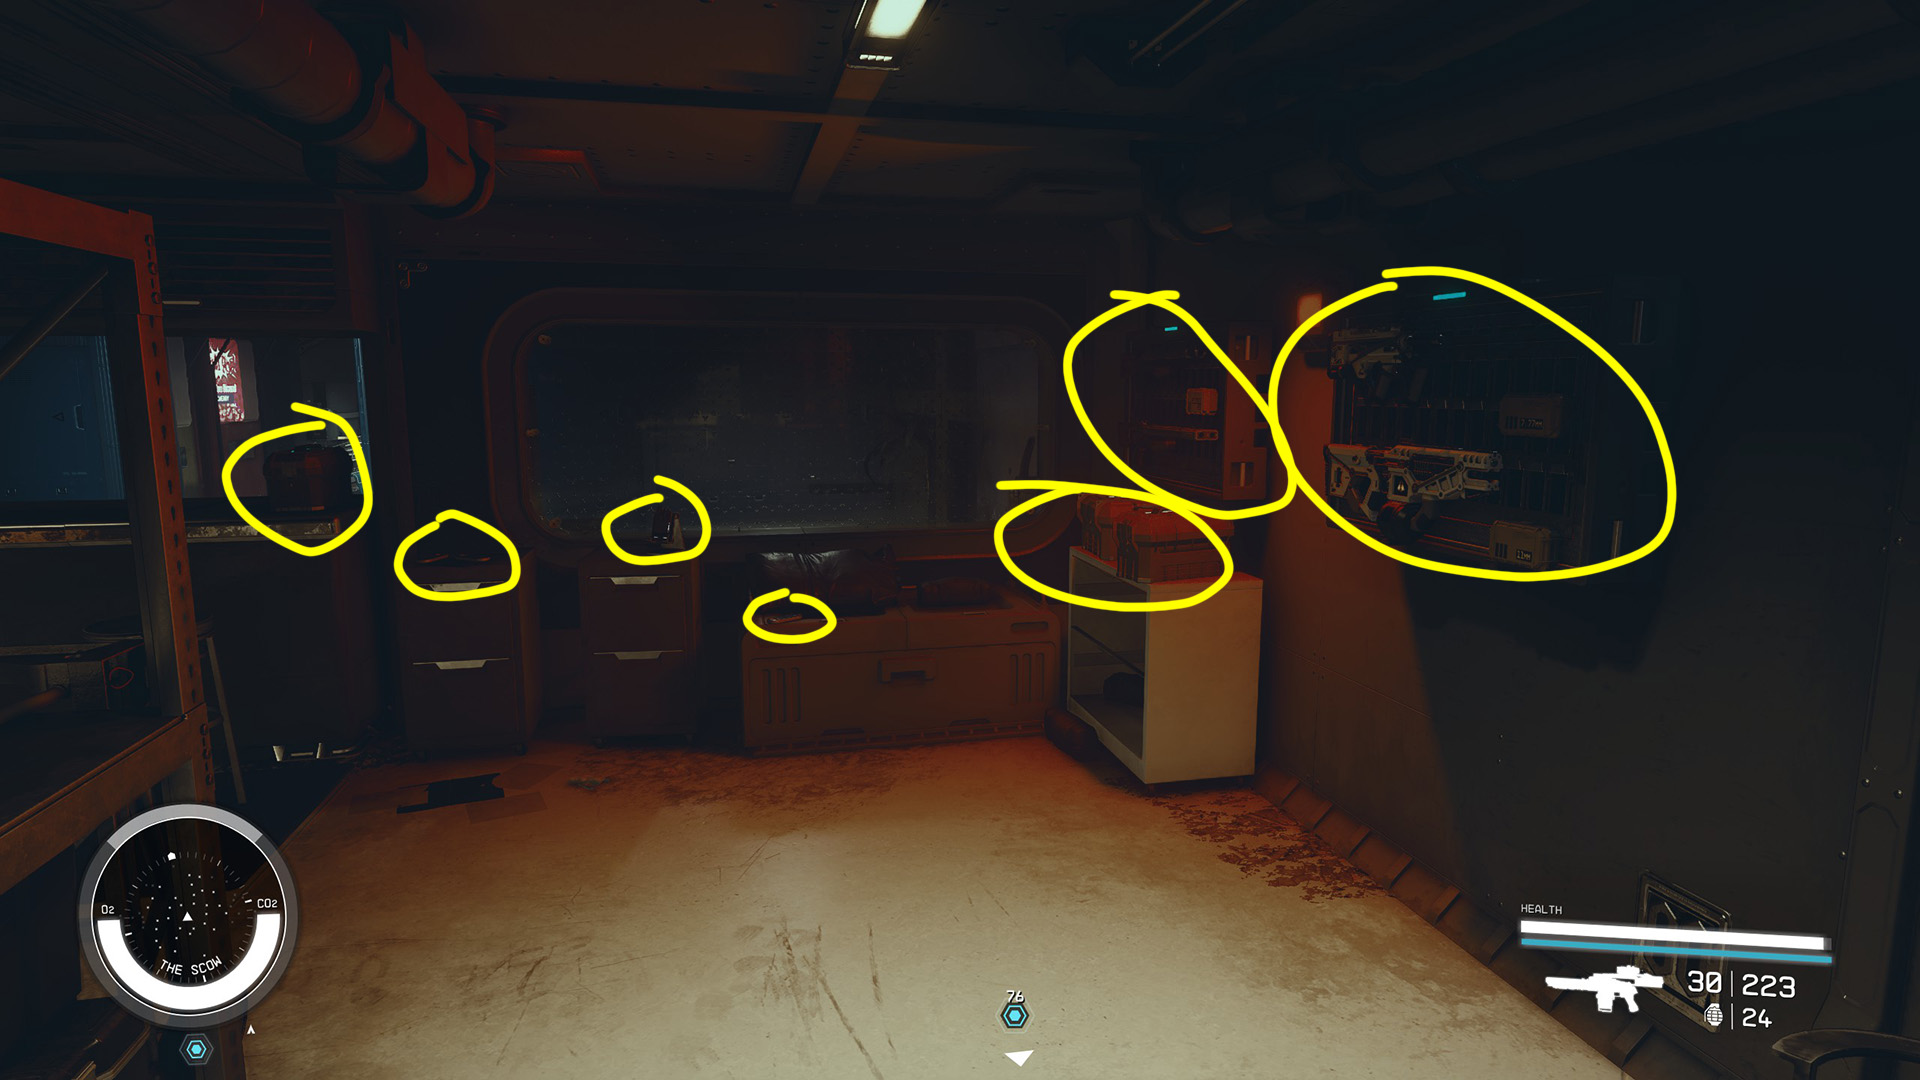
Exit the room and go down the stairs to the right (Image 99). Pass the vending machines and enter the closed door. This will lead you into the ship’s armory, which is loaded with weapons and ammo (Image 100). Walk down the aisles and loot all of the boxes on the shelves. At the far end you’ll find a Weapon Workbench. There are two weapon racks on the wall next to it and some Ammo Cases and credsticks on the counters along with a Scow Aux Weapons Key (Image 101).
Image 99Image 100Image 101
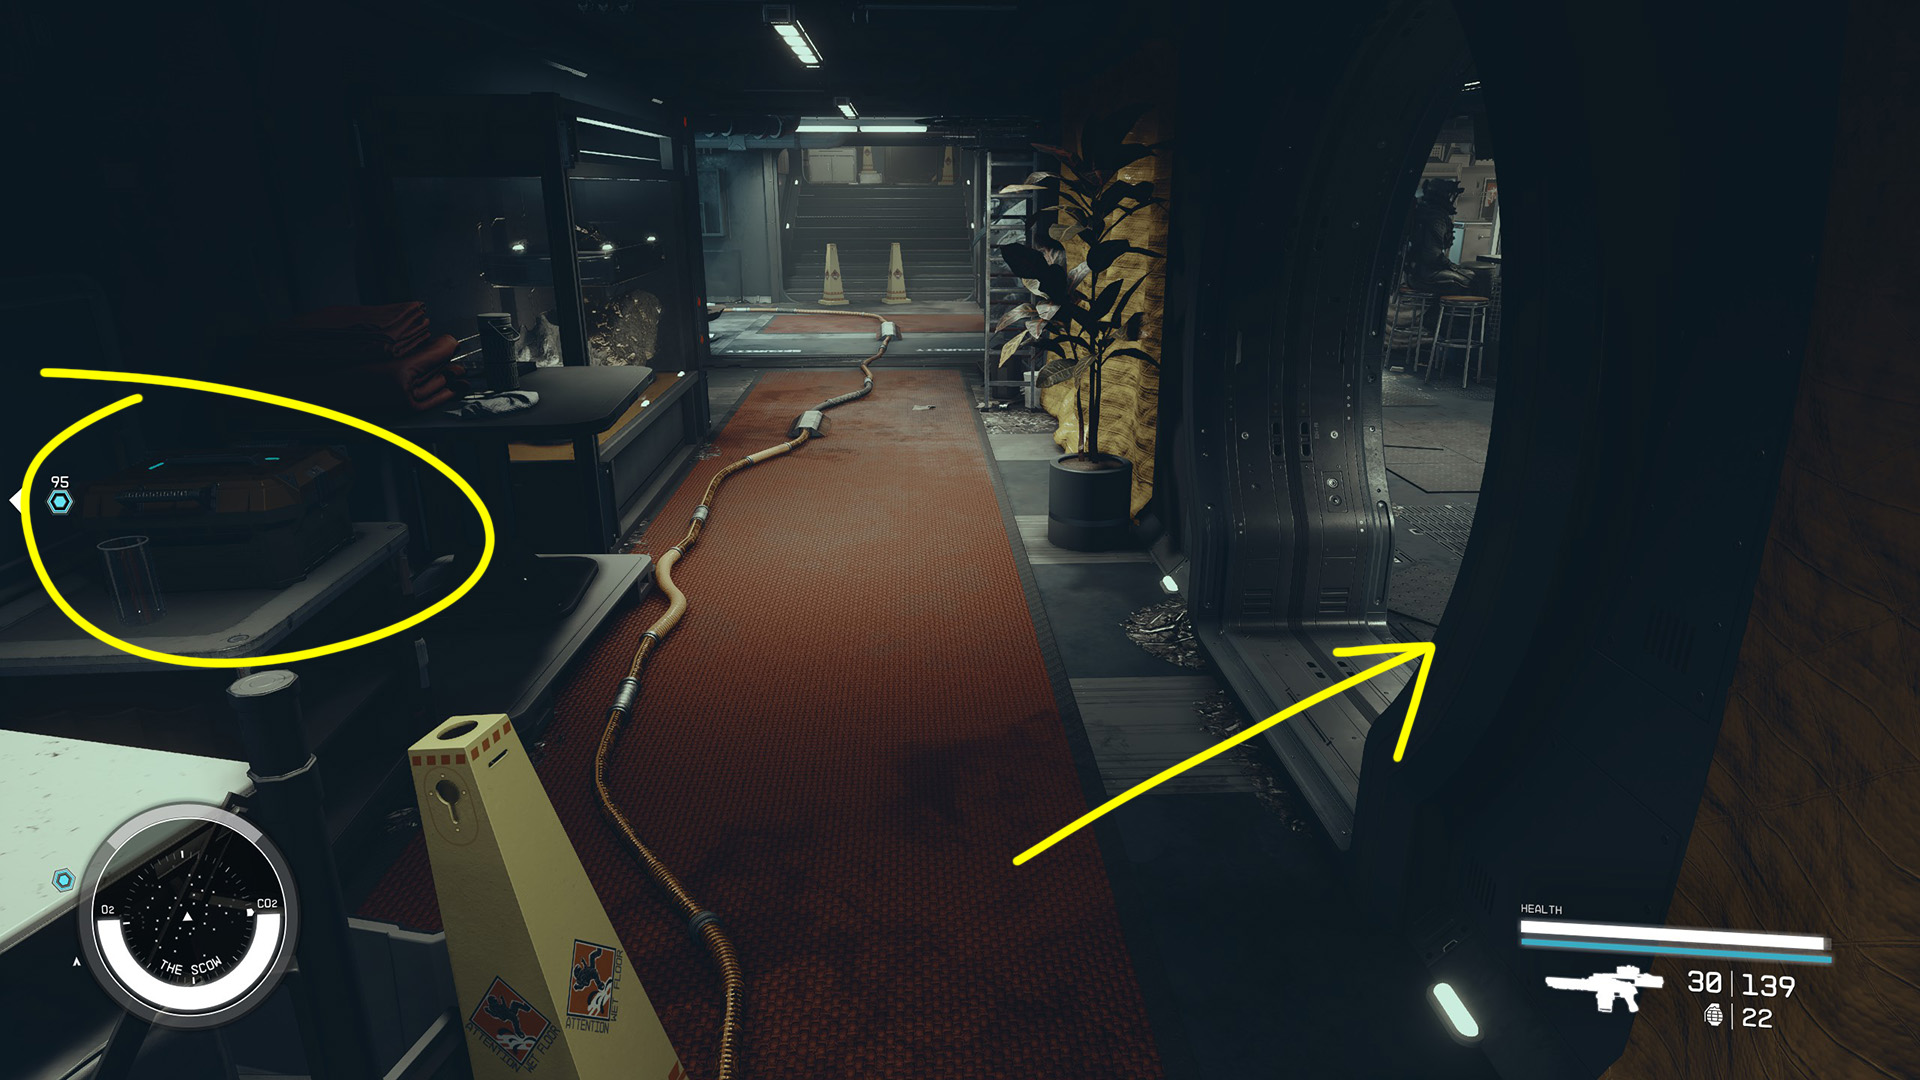
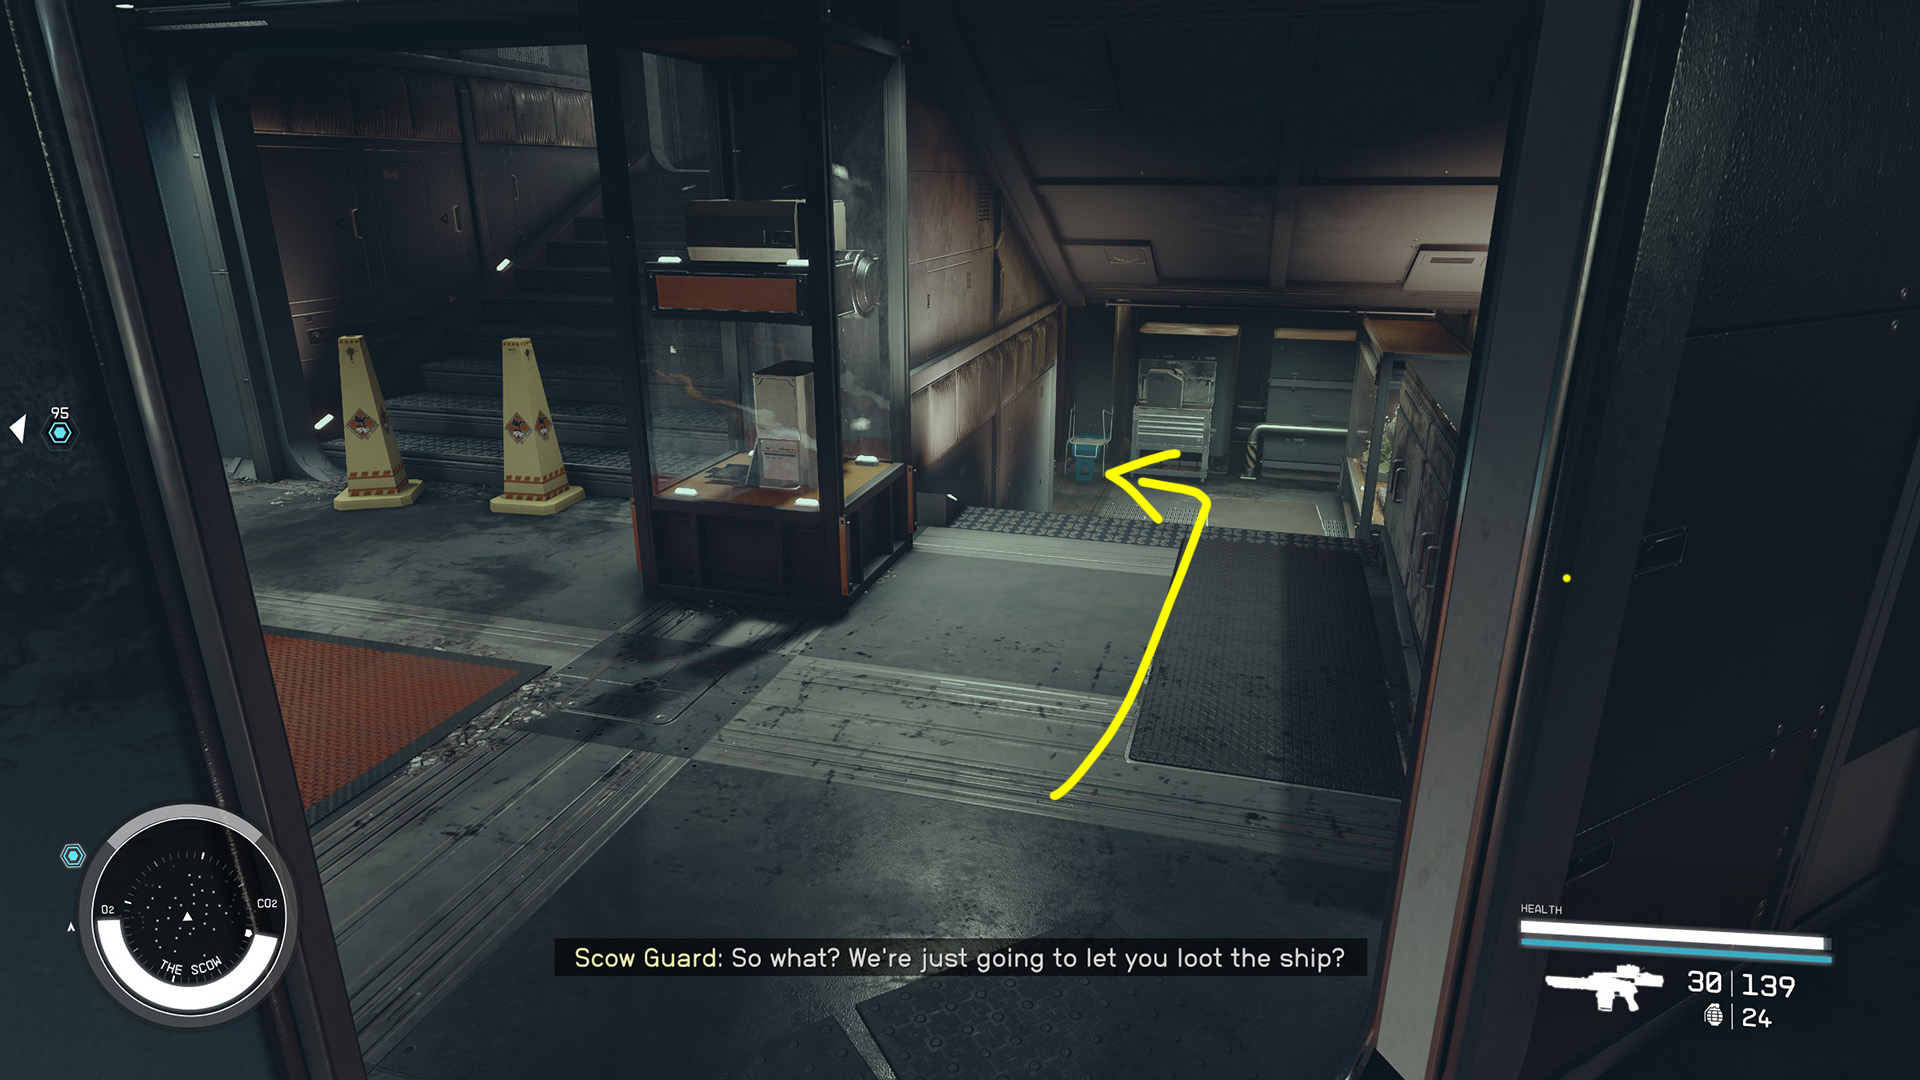
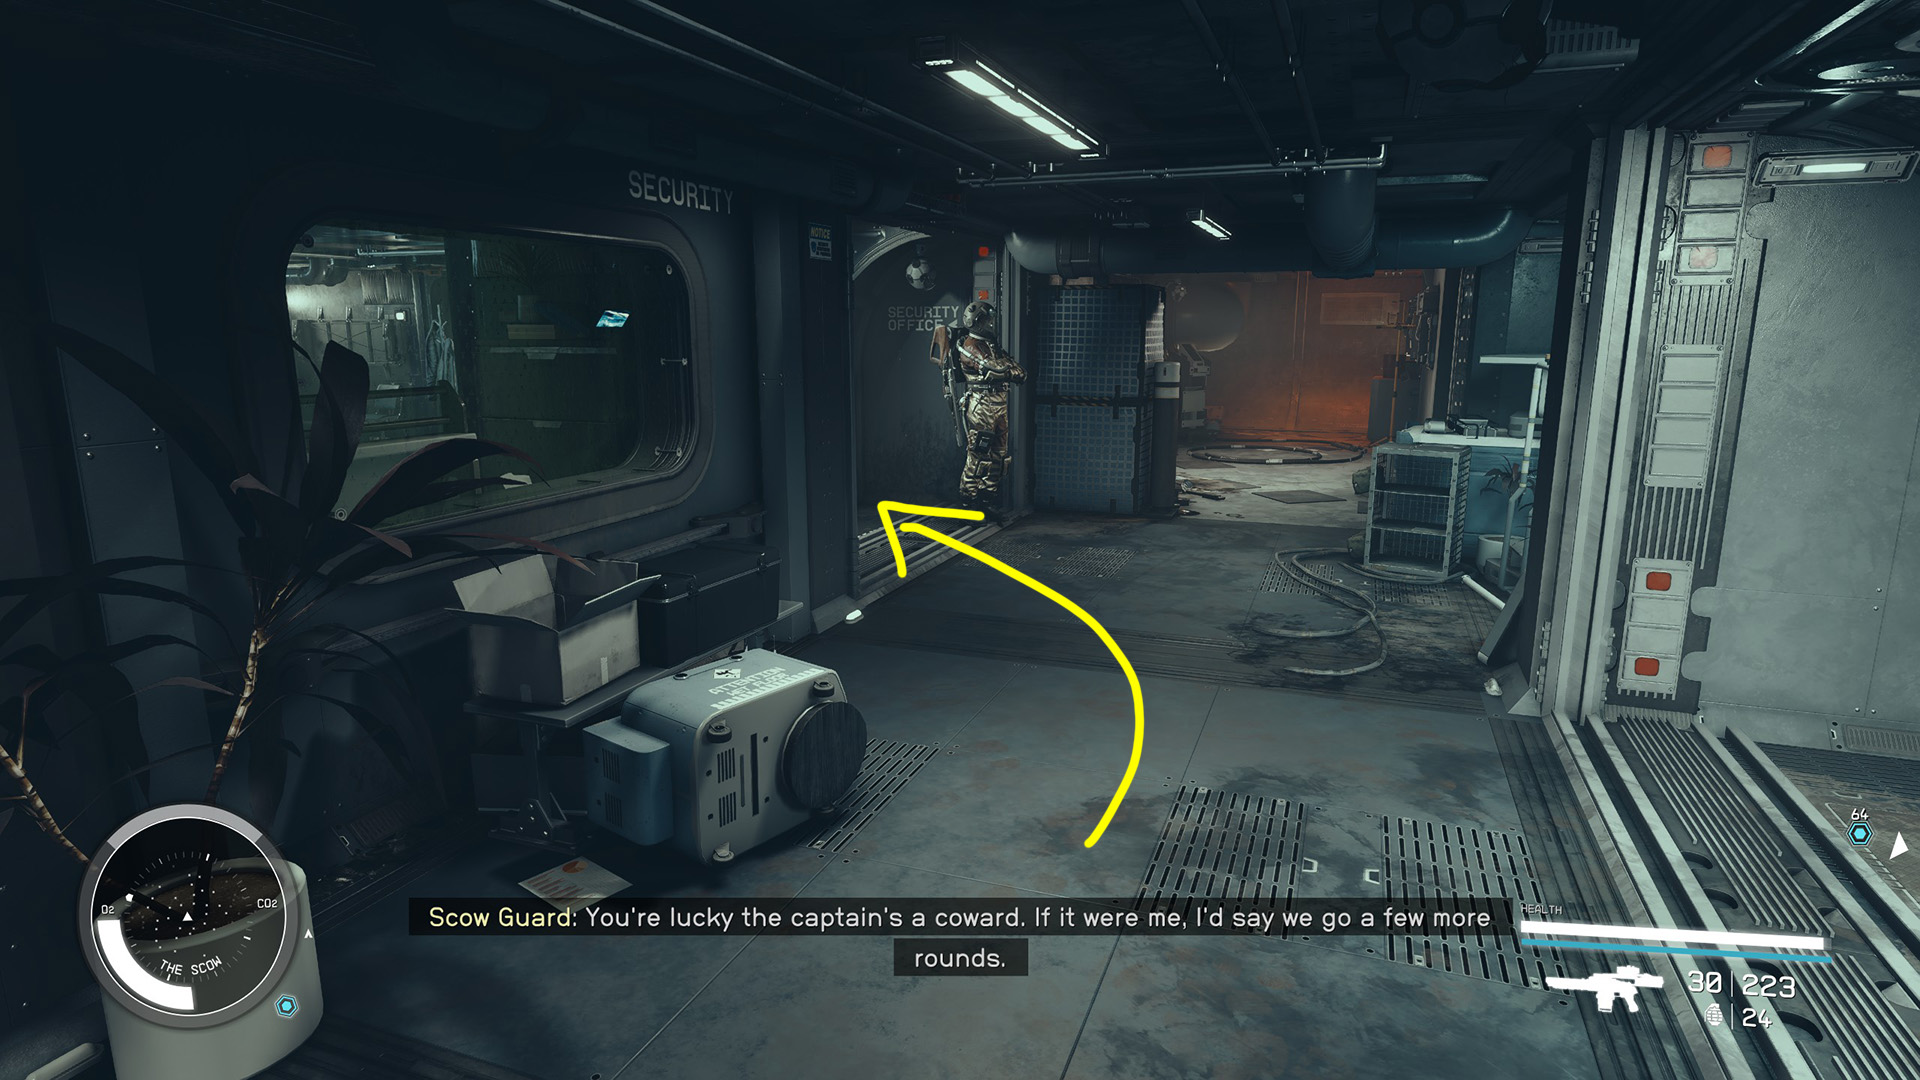
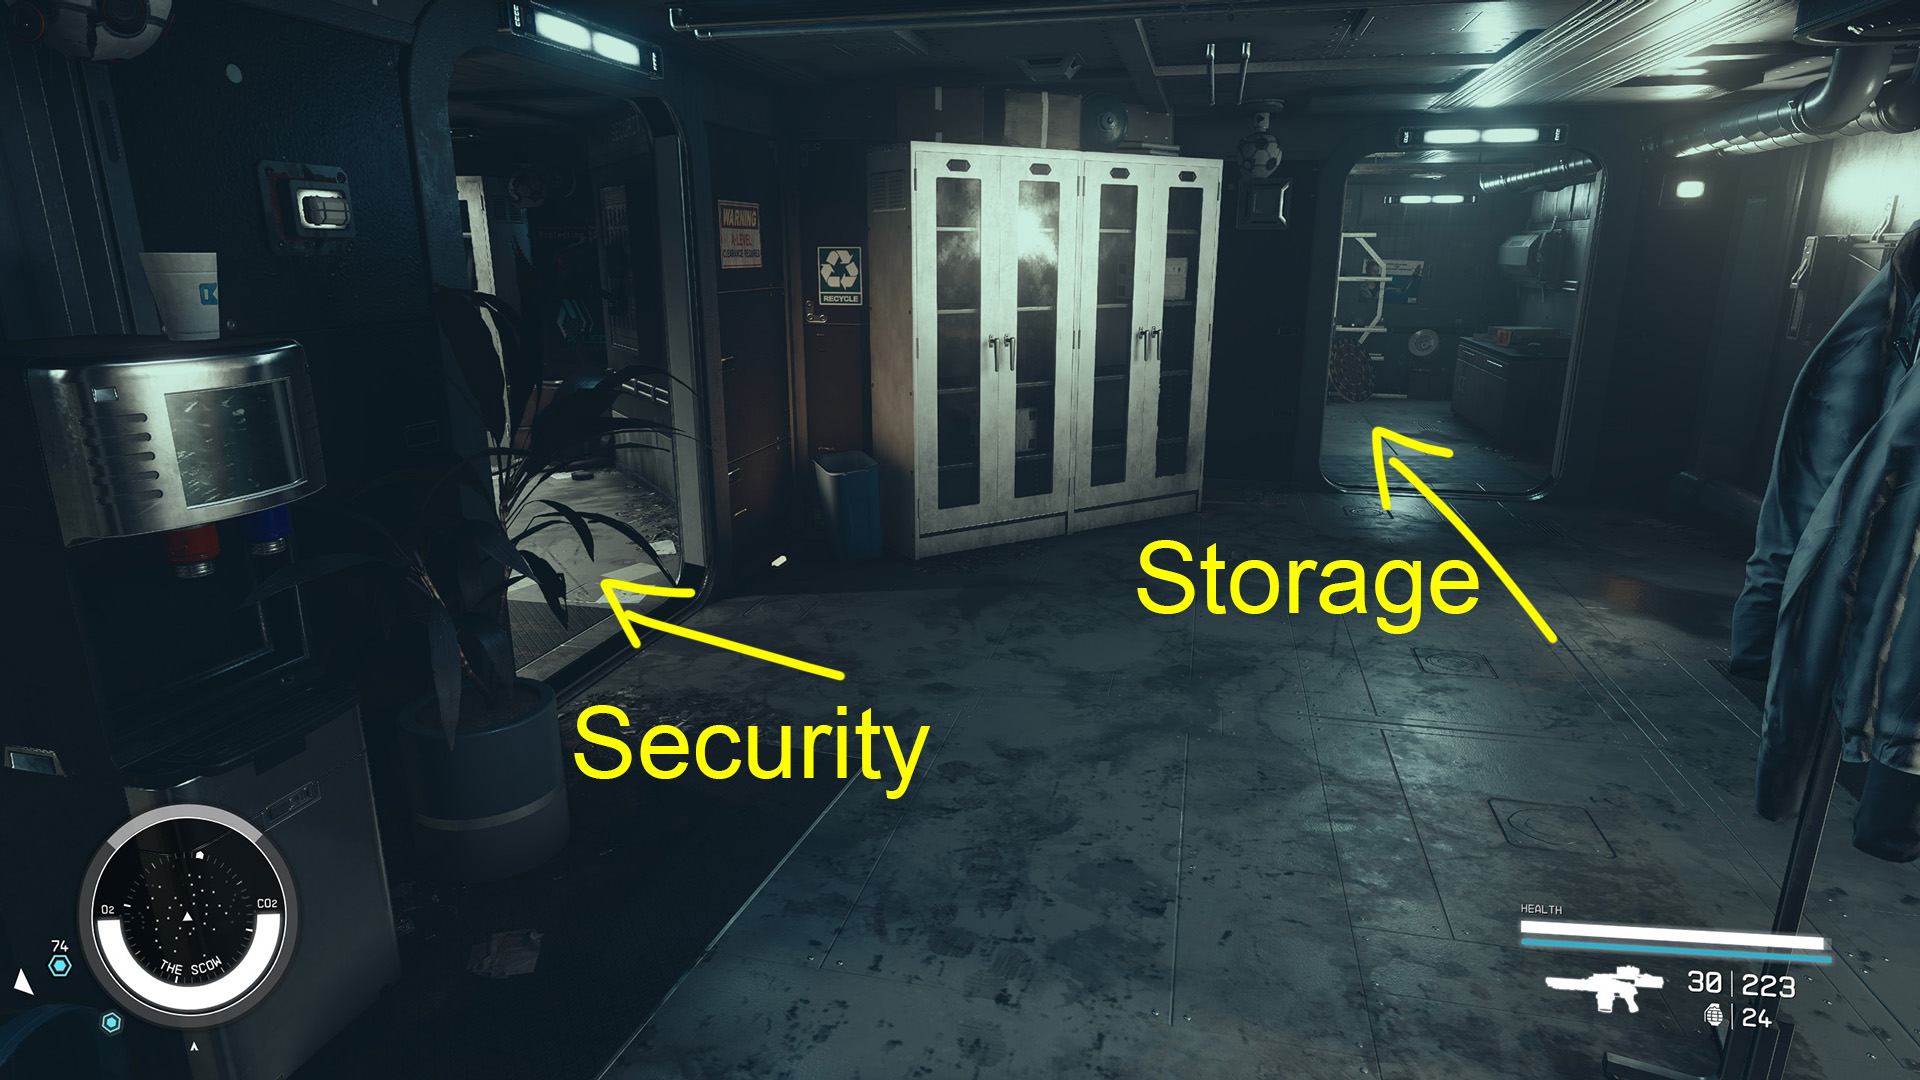
We’re almost done! Head back through the room with the vending machines and up the stairs, then down the stairs toward the front of the ship. Turn the corner and enter the Security Office (Image 102). You can ignore the area at the end of this hallway – there’s nothing worth picking up back there. There is a duct entrance, but we can just walk into the room that it leads to.
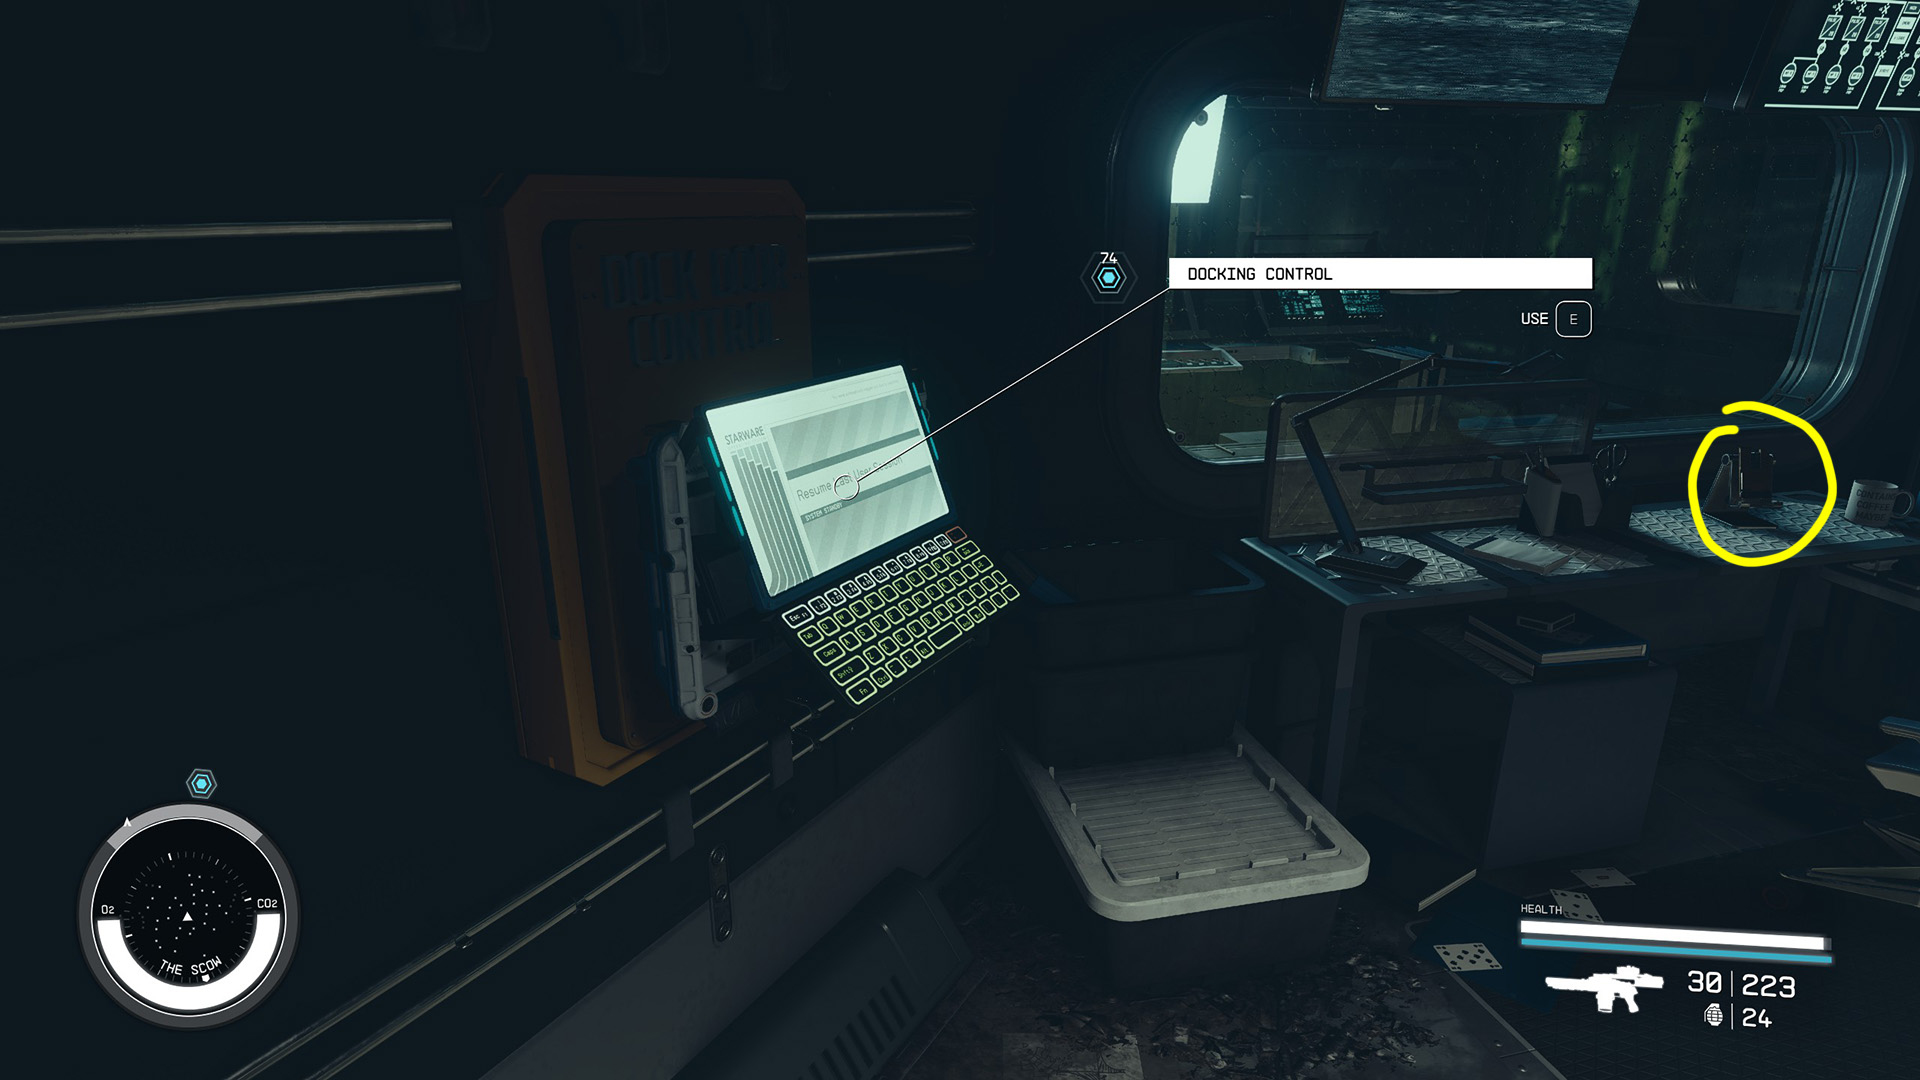
If you go into the room on the left that’s labeled “SECURITY,” you’ll find a Docking Control computer that you can use to open the docking bay doors (Image 104). This will let you access a couple of extra rooms on the way out, although there isn’t really anything worthwhile inside them. You’ll find a Scow Security Key on the desk next to it.
Image 102Image 103Image 104
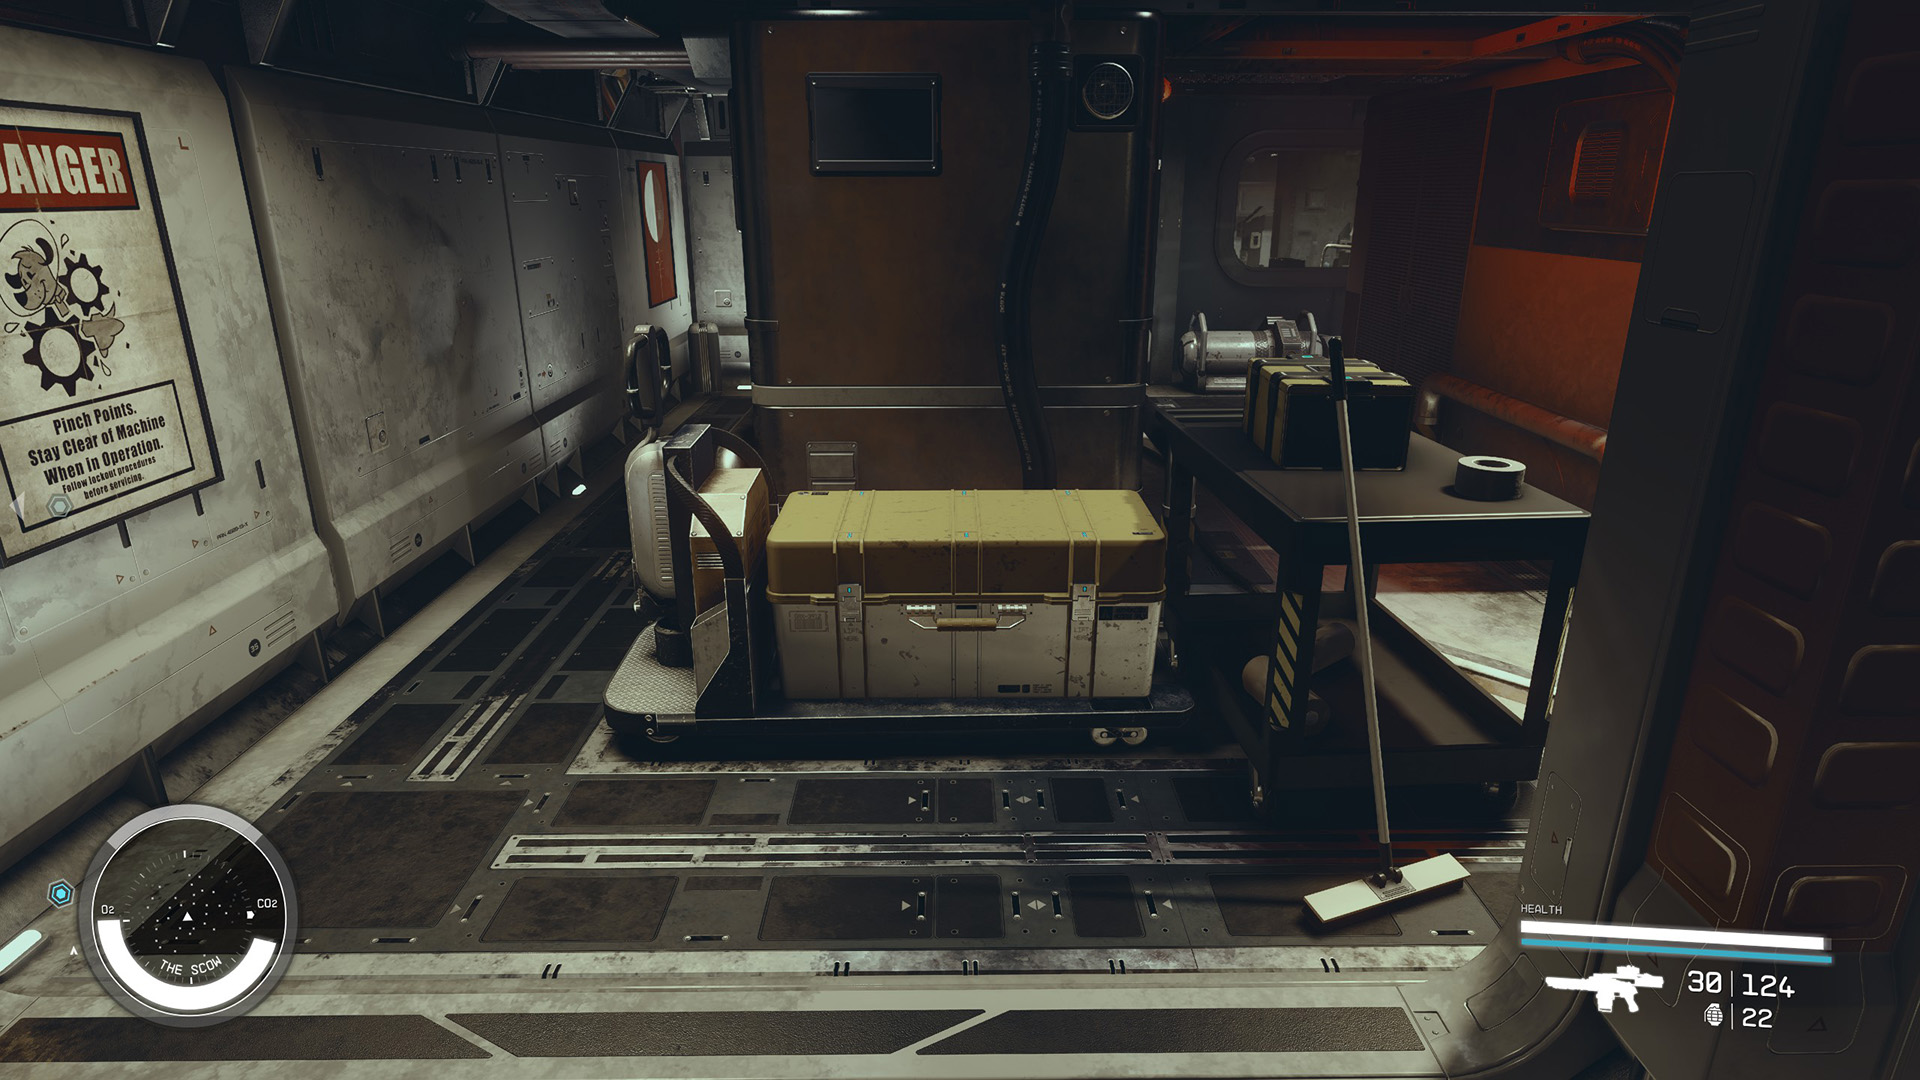
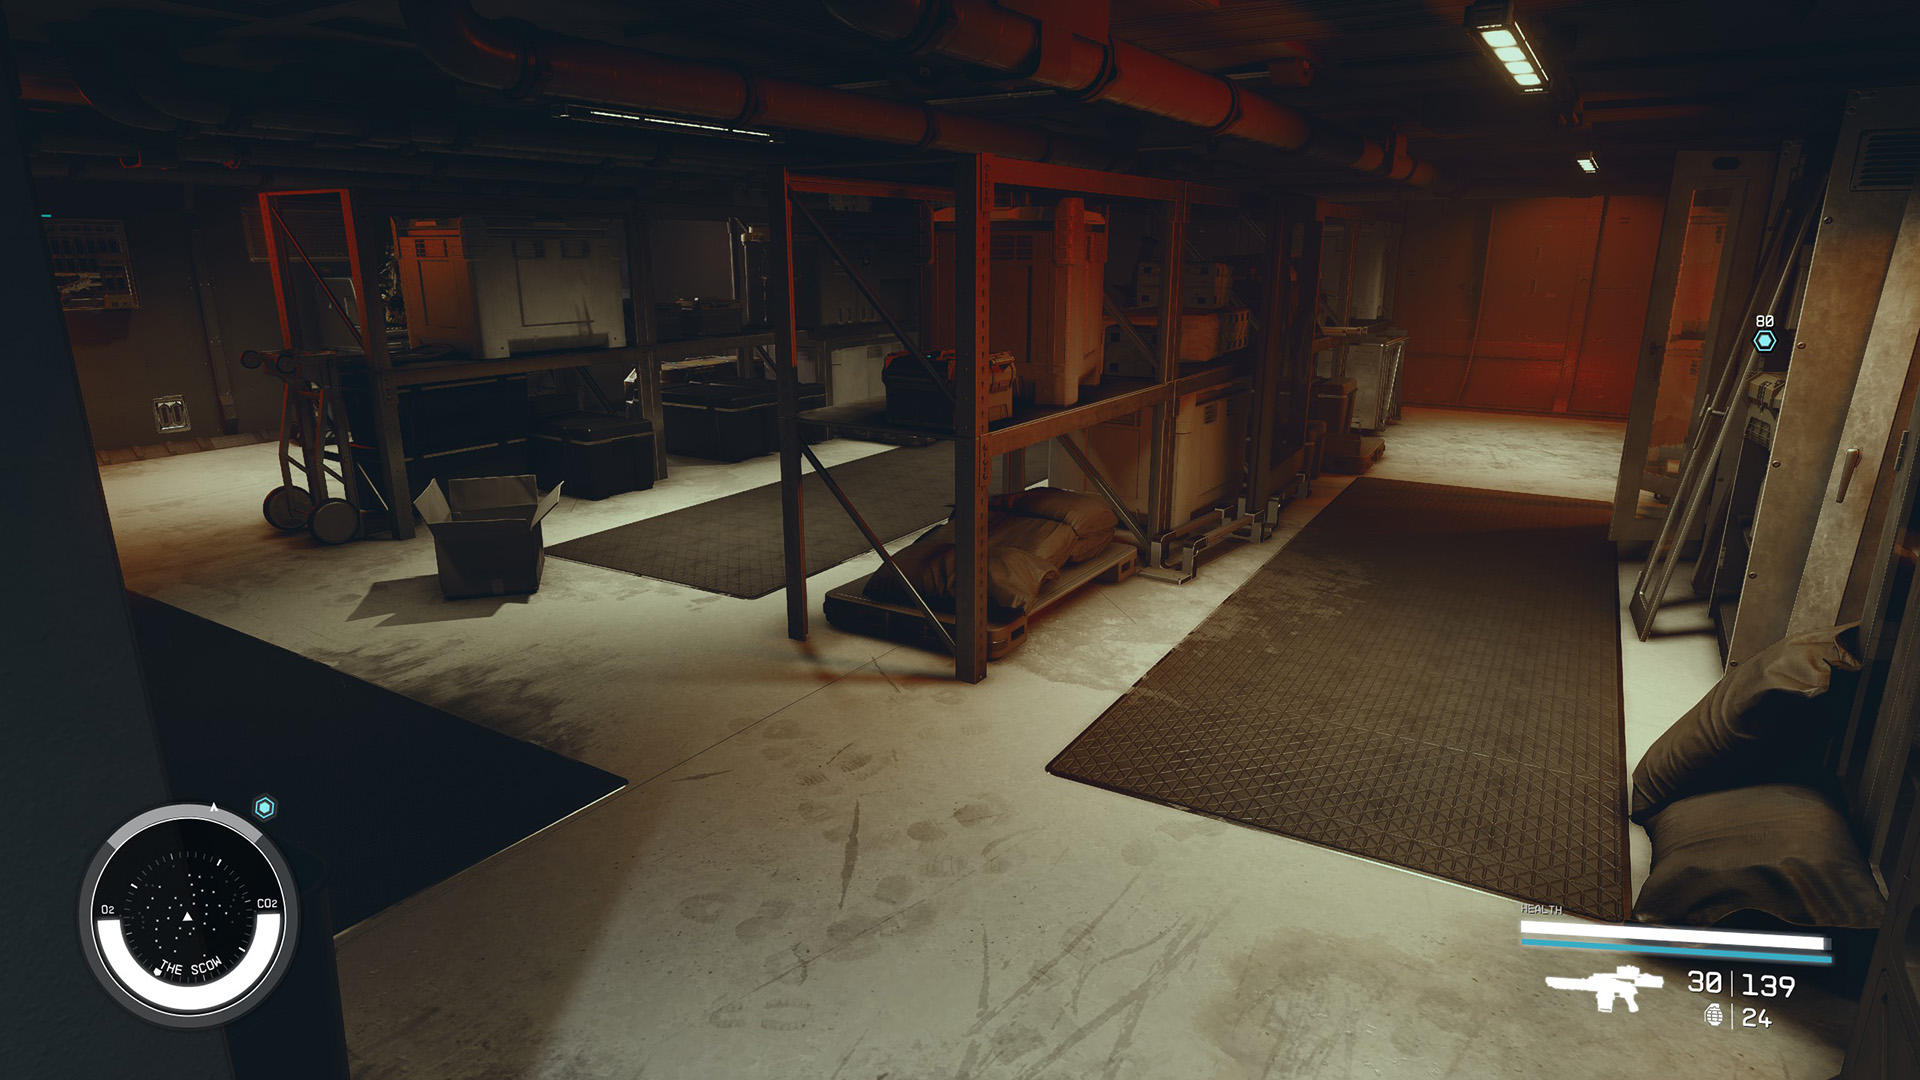
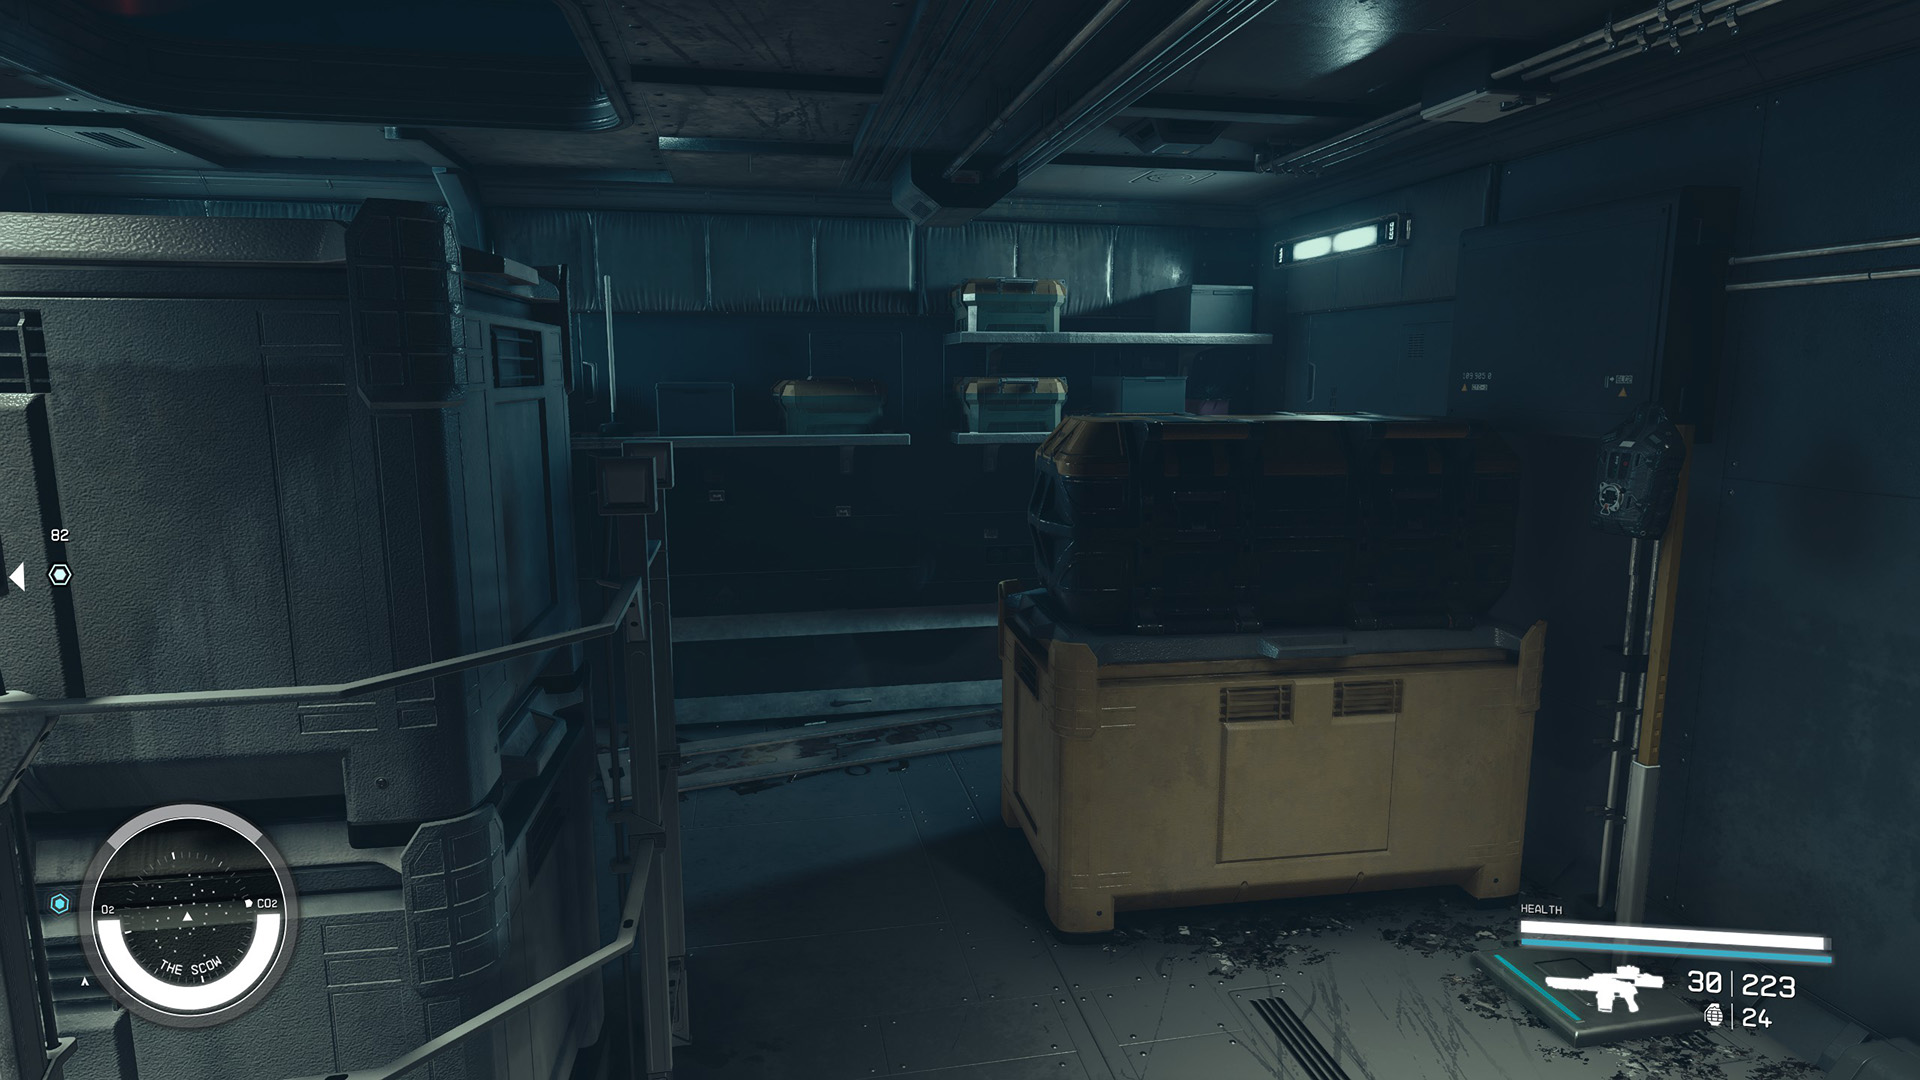
Back out of this room and enter the one in the back, and go through a door labeled “STORAGE” (Image 105). You’ll find a large Storage Crate and three Ammo Cases inside (Image 106).
Image 105Image 106
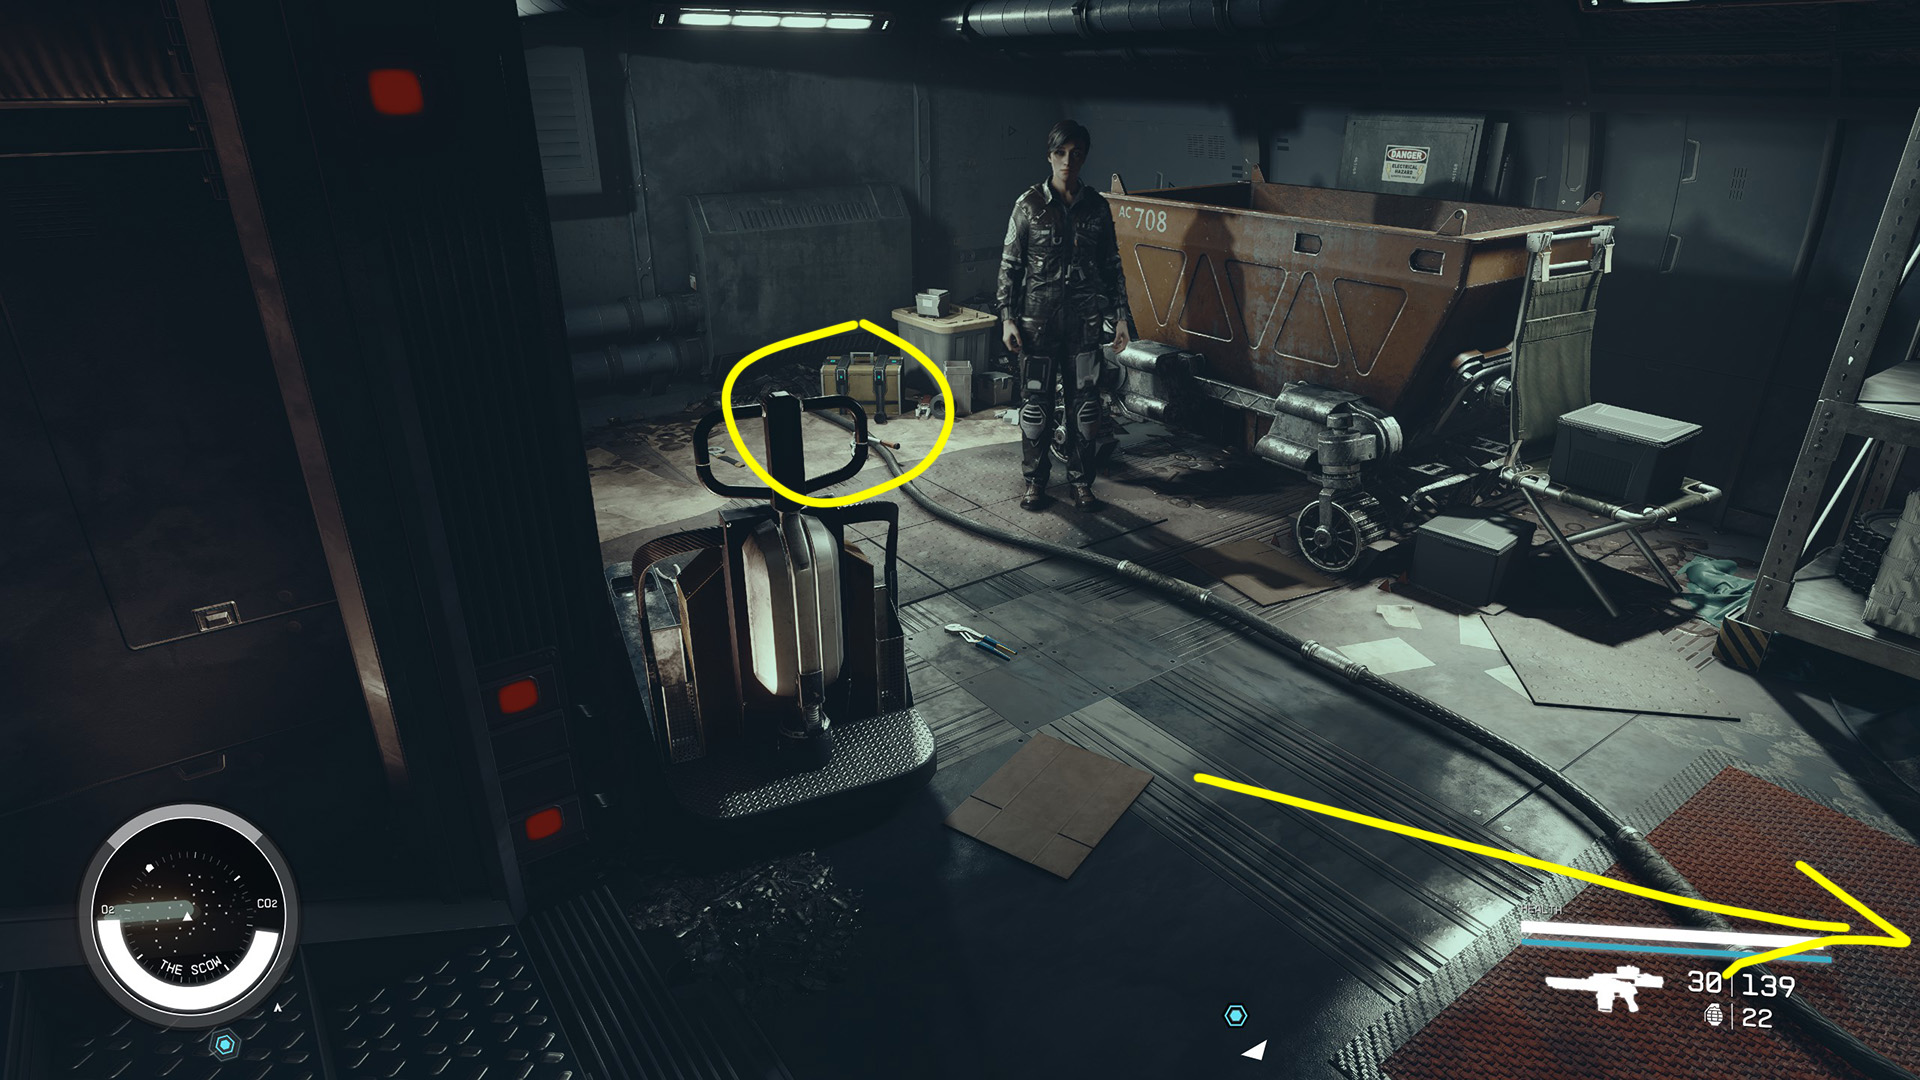
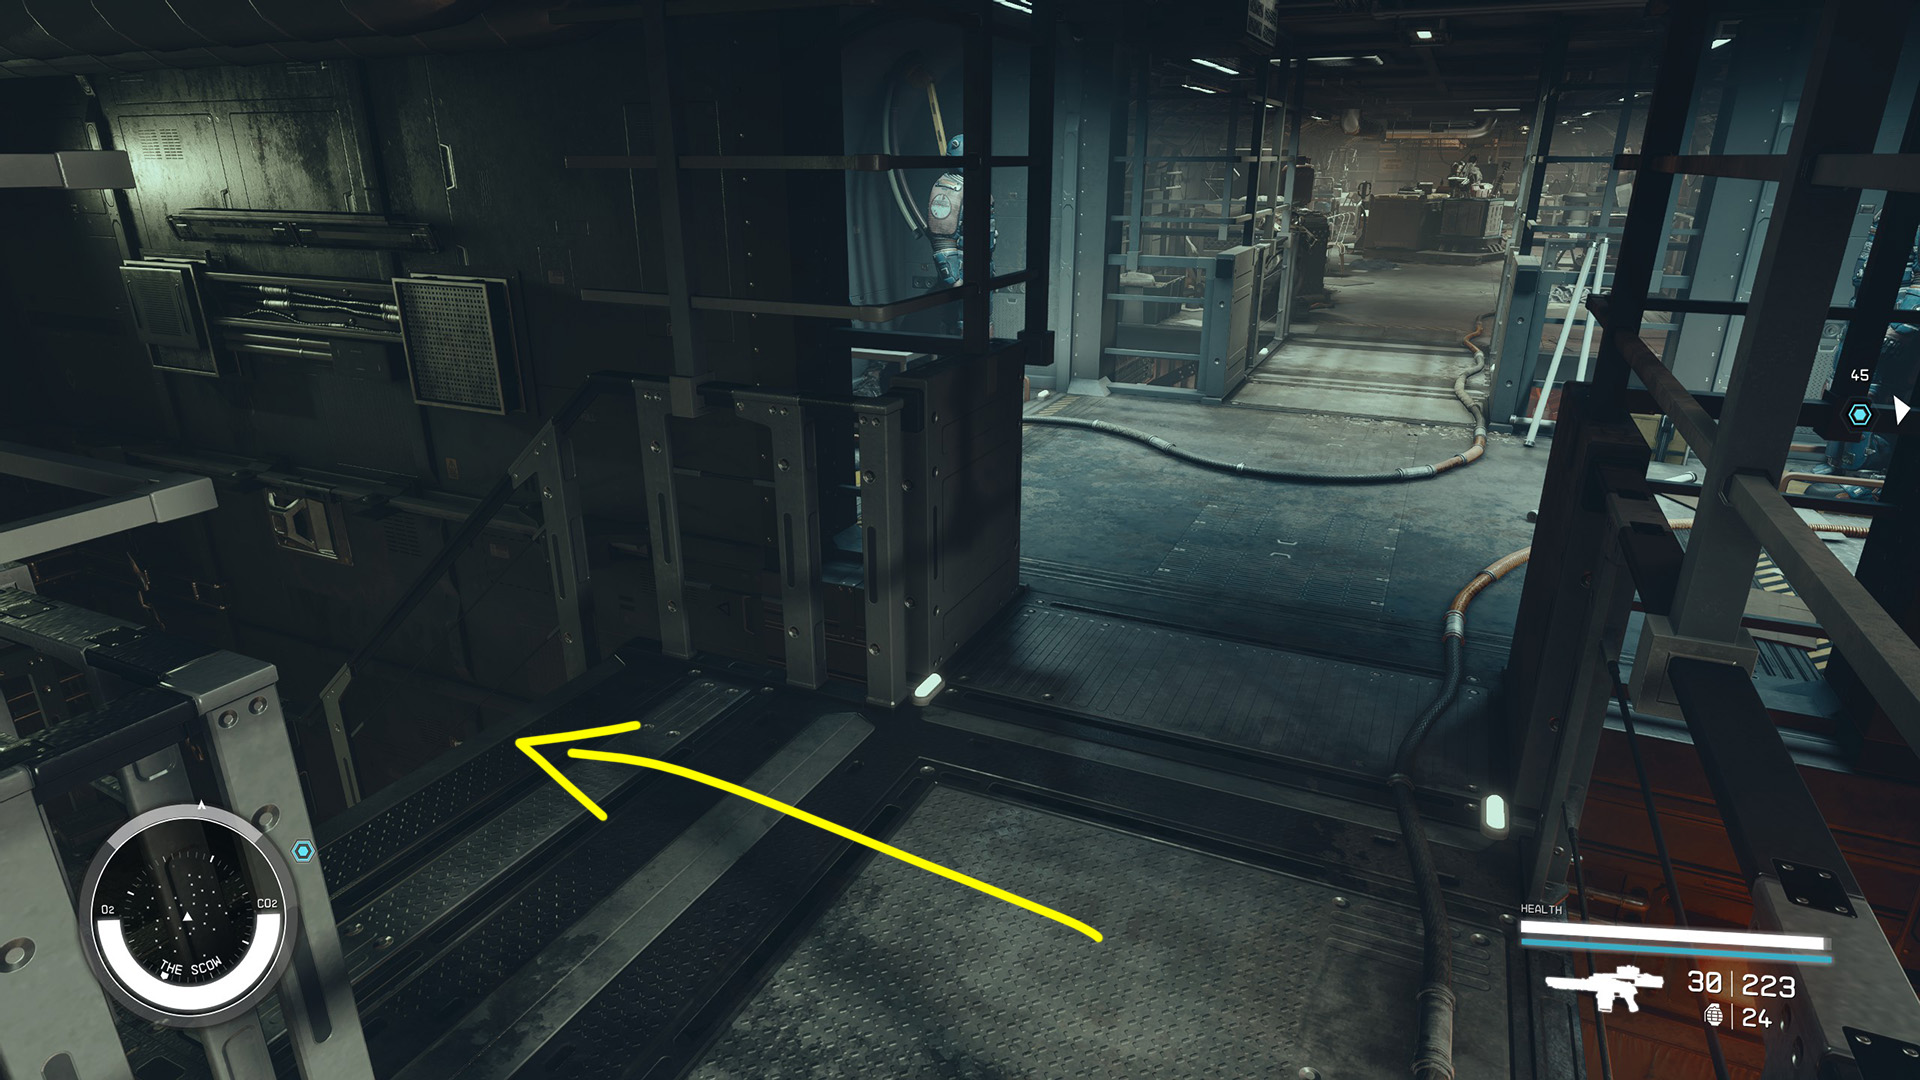
Leave the Security Office and continue back toward the front of the ship until you see some stairs going down on the left (Image 107). Take those down and you’ll come out in a room with a novice-locked Safe and a Storage Box in front of you (Image 108). You’ll also find a digipick in the locker to the left. Further down the conveyor belt is another Storage Box. The rest is junk.
Image 107Image 108
Head back up the way you came down and enter the large room where you met Tao Xun earlier. The red docking bay doors that were closed earlier are now open, but there isn’t much worth seeing here regardless. You can just head back to your ship, which is the last door on the right.
Add the Artifact to the Collection
Once you’re on your ship, you can leave. If you didn’t accept Petrov’s surrender, you’ll have to undock and defeat the ship or escape before you can grav jump. Otherwise, you can just set course for the Lodge through your mission log. Remember that you now have a bounty in the United Colonies, so if you jump into orbit somewhere, they’ll recognize you when they scan your ship for contraband. If you haven’t started the SysDef/Crimson Fleet missions yet, this will cause you to be arrested and taken aboard the UC Vigilance, and you’ll have to deal with that before you can return to the Lodge. You can avoid that happening right now by fast traveling directly to the Lodge.
Once there, approach the Artifact Collection and activate it like you’ve done before. This will immediately start the mission “High Price to Pay.” Head to that mission’s walkthrough to continue on.
I love RPGs, sandboxes, survival, and sim games. Anything that lets me build and decorate or just has a really good story. I've spent hundreds of hours in Bethesda games and even more time modding them. I also play a lot of World of Warcraft.


 /
/  /
/  to target it, then hold down the same key/button to hail them.
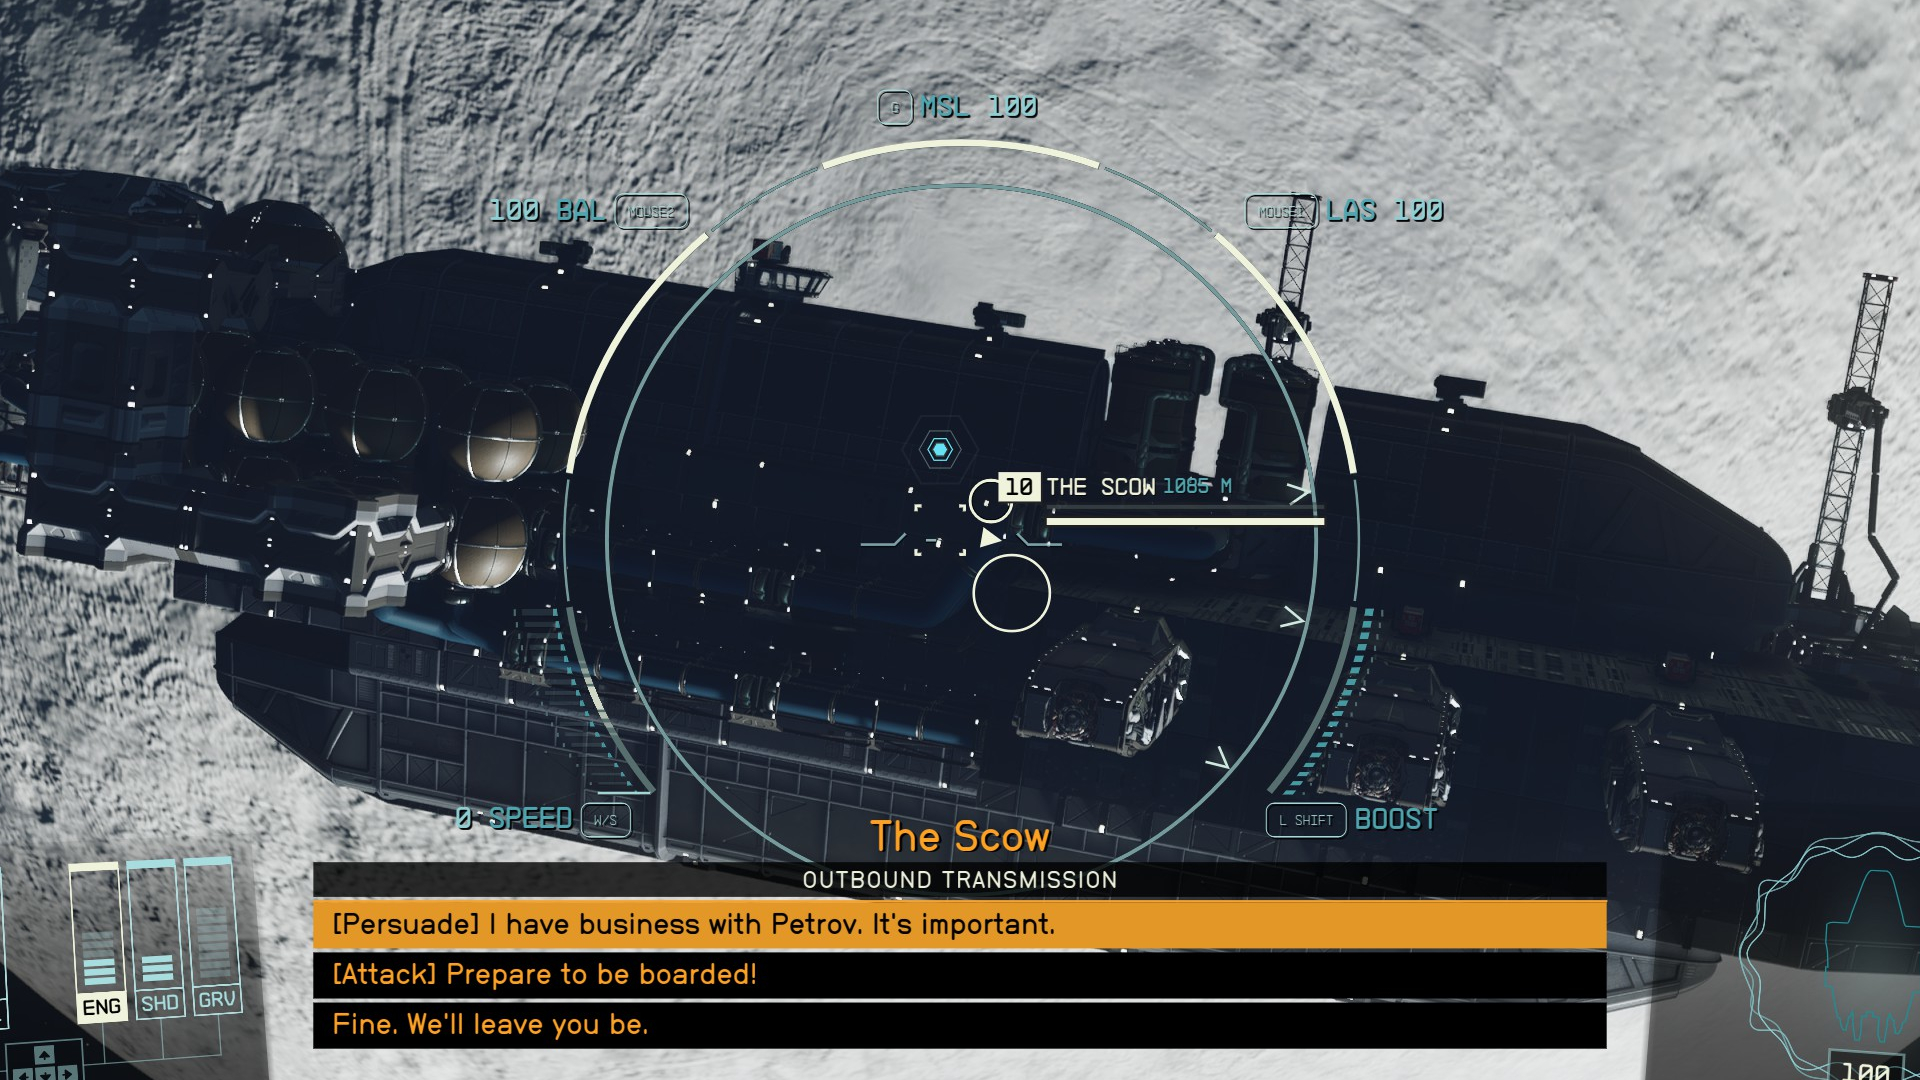
 /
/  /
/  to dock. Once on board, walk forward and use the Switch on the wall to open the door (Image 4). Don’t bother looting anything right now. You’ll be able to freely take anything on the ship later on.
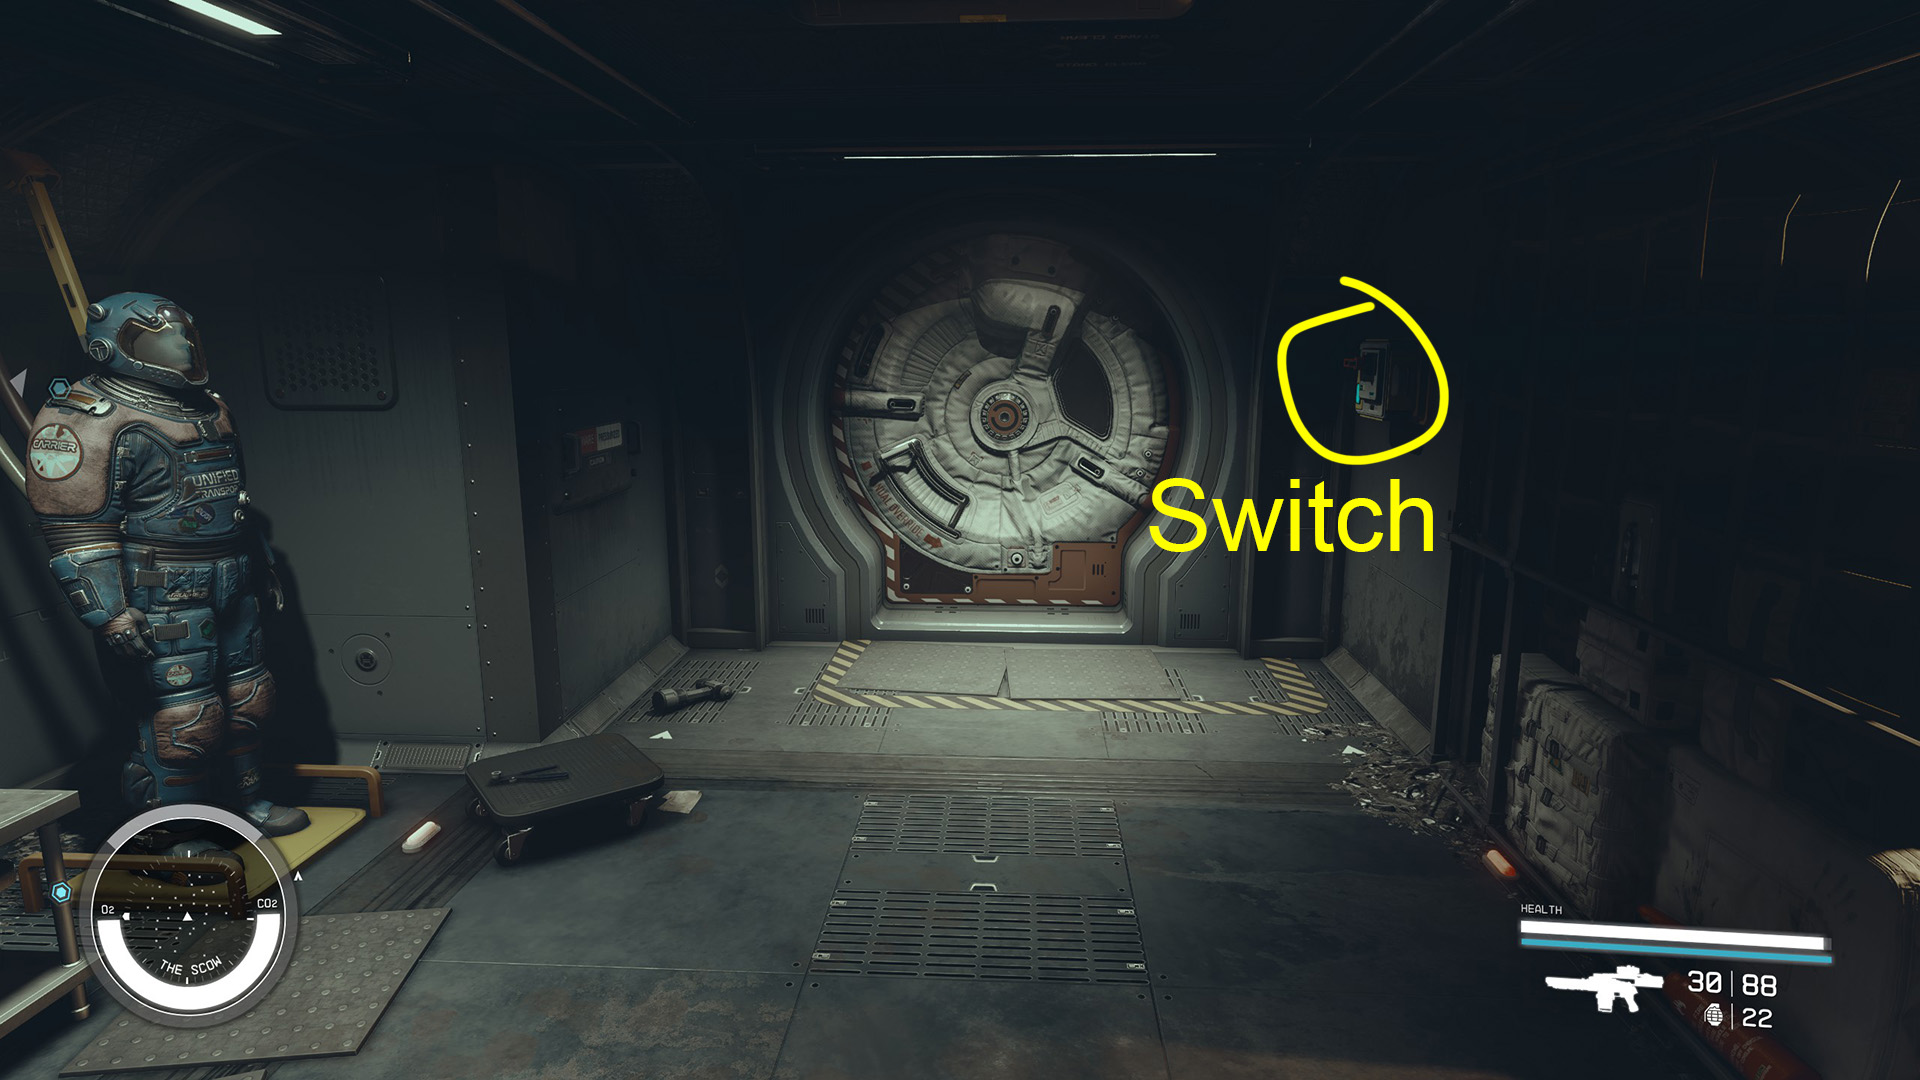


 to pull out your Cutter, and aim at the bolts that the arrows are pointing to on each corner of the panel (Image D). Cut all 4 and the door will fall open. The guards will most likely hear you, and even if they don’t, there will be a guard right on the other side of the wall, so be ready to deal with them.